Category: Piracy

  • The search for the Sydney Cove – 1797

    On the night of 2 October 1797, fourteen convicts stole a boat and made their way down the Paramatta River across Sydney harbour and out through the Heads.  When the men were discovered missing, the authorities sent boats in pursuit, but they returned a few days later, having never caught sight of the runaways.    As a storm had swept the area shortly after they had escaped, it was thought the bolters had died at sea.   However, that was no more than wishful thinking.    Their story is one of desperation, betrayal, and ultimately defeat.

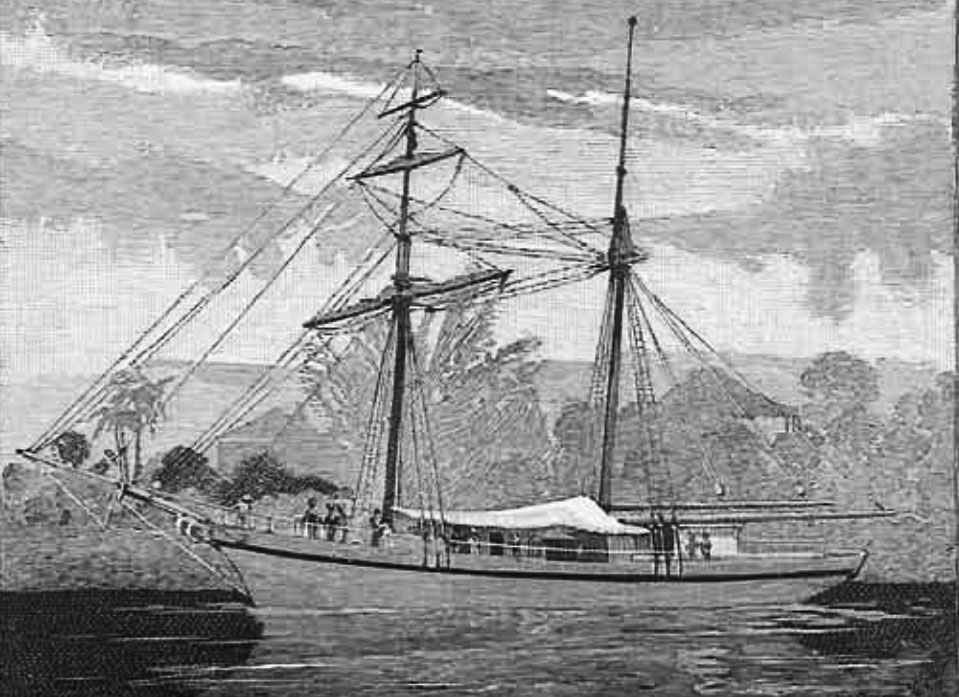
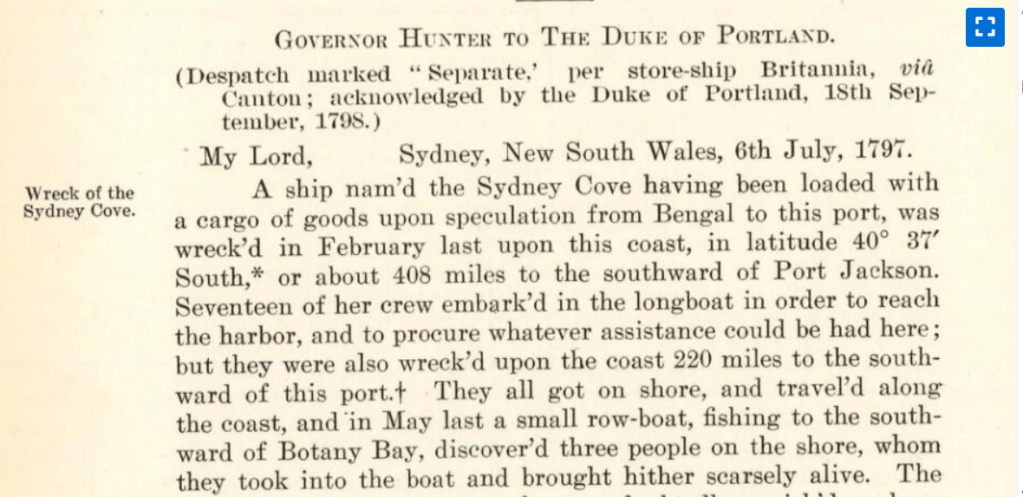
    The runaways’ leaders were John Boroughbridge and Michael Gibson.   They had been labouring away in the back blocks of Paramatta when they convinced 12 other desperate men to join them in an audacious escape.    Their plan was to find the remains of the 250-ton Sydney Cove, a ship that had recently been wrecked somewhere far to the south of Sydney.   Boroughbridge and Gibson were sure they could build a new vessel from the timbers and fittings and make for some distant port far from the clutches of British law.   That the Sydney Cove had been carrying a massive cargo of rum and other alcoholic spirits added to its allure.

    Painting of Sydney, Port Jackson. circa 1804.

    Boroughbridge was serving 14 years for some unspecified crime and had landed in New South Wales only four months earlier and was keen to leave at the first opportunity.  Gibson had already spent five long years there, but with nine more to serve, he was no less eager to put the place behind him.     It seems they had little difficulty finding 12 others willing to join them.

    With nothing more than a small pocket compass and the knowledge that the wreck lay somewhere far to the south, they headed out through Sydney Heads and turned right.    A day or so later, the weather turned nasty, but Boroughbridge and his mates ploughed on.   Twice, their boat was driven ashore, and both times, they were lucky to avoid serious damage.  

    In time, the weather eased, and they continued following the coast and unknowingly strayed into Bass Strait.   In 1797, no one knew that a body of water separated Van Diemen’s Land from the rest of Australia.    All Boroughbridge and the others would have known was that the Sydney Cove was aground on an island somewhere off the coast.   They likely had no accurate idea how far they had come or how much further they had to go.   They certainly could not have known that they needed to cross 200 km of open water to reach the beached ship.   By now, the compass would have shown that they were heading in a south-westerly rather than southerly direction as they doggedly follow the contours of the coast.

    Finally, they ran out of food and fresh water.   In desperation, they put ashore on one of the small islands in the vicinity of Wilson’s Promontory.   There, they found a ready supply of fresh water, while seabirds and seals made easy prey for the starving men.    But, the trying conditions took their toll.   By now, many of the runaways would have gladly returned to Sydney to face any punishment short of death if it meant an end to their suffering.  

    Any sense of common purpose they may have once possessed had since evaporated.   They could not agree on what they should do next.   Should they stick to their original plan and continue searching for the elusive Sydney Cove?   Or should they abandon the search and head back north?   Then, one night, in a callous act of betrayal, Boroughbridge, Gibson and five others quietly set off in the boat, abandoning the rest of the men as they slept. 

    After leaving their comrades to their fate and giving up the search for the Sydney Cove, they returned north again.   Bypassing the entrance to Sydney Harbour, they continued on to the mouth of the Hawkesbury River, where it emptied into Broken Bay.   It cannot have been lost on the weary men that after three or four months on the run, they were now barely a day’s sailing from where they had started.   

    After months at sea, their boat was in such a derelict state that they did not trust it to carry them any further.    The men agreed they would continue sailing north, but to do so, they would have to find another boat.     They did not have long to wait.

    Boroughbridge and his men seized a passing vessel and set a course north. Their plan now was to make for Timor in the Dutch East Indies as William Bryant, his wife Mary and others had done some six years earlier.   News that Mary and some of the other runaways had reached England and been pardoned had only recently reached Sydney offering hope for anyone contemplating following in their wake.   

    Nothing more was heard of them for another couple of months.  Then, in late March 1798, they returned to Broken Bay and hailed down a passing boat.  Boroughbridge handed a letter to the boatswain asking him to deliver it to the NSW Governor.   The letter, signed by Boroughbridge, Gibson and three remaining runaways, claimed they wished to give themselves up and begged for clemency.   They wrote that they had sailed about 400 nautical miles (750 km) north, which would have put them on either Stradbroke or Moreton Island.   Then, they claimed, disaster struck.    When they tried to run ashore, their boat was caught in the surf and driven hard onto the beach, where it broke apart with the pounding of successive waves.   They were stranded on an inhospitable stretch of coast.   But all was not lost.   They were able to salvage enough timber from the wreckage to build a smaller craft and put back out to sea.   However, by now, they had all had enough of life on the run.  They decided that rather than continue sailing north, they would return to Sydney and beg for mercy. 

    Their plea for mercy fell on deaf ears, for the Governor had learned that Boroughbridge and the rest of the men seeking clemency had callously abandoned half their mates to die on the island in Bass Strait.   In an unlikely turn of events, they had been found by George Bass while he was endeavouring to prove the existence of the body of water which now bears his name.   Unable to carry all seven back to Sydney on his small boat, he ferried five across to the mainland, gave them a compass, a musket and as much food as he could spare and told them to follow the coast north to Sydney.   They were never heard of again.   Two men, too weak to walk, remained with Bass.   He returned to Sydney on 25 February and handed the pair to the authorities and they reported what had befallen them.     

    In April, Boroughbridge and the four remaining runaways were returned to Sydney, where they were tried for piracy and found guilty.   Jonathon Boroughbridge and Michael Gibson were hanged, while their three companions were only given clemency at the last minute as they stood before the gallows contemplating their final moments of life.

    © Copyright C.J. Ison / Tales from the Quarterdeck, 2024.

    Please enter your email address below to be notified of future blogs.

  • Capture of the Harrington, 1808

    Brig – similar to the Harrington.

    Robert Stewart was not your typical convict born into England’s poverty-stricken underclass and sentenced to transportation for committing some petty crime. Rather, he came from a comfortable though modest middle-class family. Born in 1771, the first ten years of his life would have likely been idyllic, but then his father died, and a year later, his widowed mother enrolled him into the Royal Mathematical Institution. There, he joined the ranks of boys learning maths and celestial navigation, preparing them for apprenticeships in the merchant marine or Royal Navy. Had he graduated, Stewart would have had a respectable and rewarding career that would one day see him master of his own ship. However, Stewart harboured ambitions of one day enjoying the sort of wealth and privileges that “higher-born” gentlemen took for granted.   

    In June 1785, Robert Stewart’s rebellious nature and frequent absences led to his expulsion from the institute.  He then joined the Royal Navy as an ordinary seaman and over the next 12 years rose to the rank of Petty Officer. But in 1798, aged 27, he deserted, likely embittered that he would never be promoted into the officer ranks.  Three years later, he stood trial on fraud and forgery charges. Stewart had purchased goods while posing as a Lieutenant in the Royal Navy and paid for them with a forged cheque. Caught, charged and found guilty, he was sentenced to transportation for life and sent to Van Diemen’s Land.

    Sydney Cove c1809. Courtesy State Library of NSW.

       Stewart arrived in Hobart on the Calcutta in 1803 and did not attract any undue attention for a year or so. However, twice, he attempted to escape by seizing small colonial vessels and setting sail. Both times ended in dismal failure, and he was returned to Hobart to face punishment. After his second attempt, he was sentenced to death. Stewart was only spared that punishment due to a blanket pardon given to all prisoners under capital sentence by the recently appointed Governor of NSW, William Bligh. However, in 1808, he was sent to Sydney to serve a period of time at hard labour.

       But Stewart never gave up hope of regaining his freedom. This time, he had his eye on the 180-ton brig Harrington anchored in Sydney Cove. She had recently returned to Port Jackson from China with her hold filled with tea after delivering a cargo of Fijian sandalwood. So lucrative was the trade that the Harrington’s captain was set to do it again.   The ship was stocked with enough supplies to last the crew several months and was to sail any day.   

    At 10 o’clock on the night of 15 May 1808, Stewart led as many as 30 fellow convicts out to the waiting ship in two boats they had just stolen. They came alongside as quietly as they could so as not to alert any sentries. But when Stewart climbed over the side, he found he had the deck to himself. The rest of the men swarmed over the gunwales. Some went forward to secure the crew. Others went aft to take care of the officers. The Harrington’s Chief Officer, Arnold Fisk, woke to the sight of Stewart holding a pistol to his head. The brig’s captain and owner could not be found, for he had gone ashore earlier that day. As Stewart and his men took control of the ship, the captain was blissfully asleep in his home overlooking Sydney Harbour.

    Sydney Gazette 22 May 1808, p. 2.

        With the ship’s company under guard, the convicts cut away the anchors and used the two stolen boats to tow the Harrington the length of Sydney Harbour. Once they reached the Heads, the sails were unfurled and the wind took them out to sea. By 7 a.m., they were about 20 nautical miles (40 kilometres) off the coast.

       Stewart ordered the Harrington’s crew into the two boats so they could make their way back to Sydney. They pulled into Sydney Cove later that afternoon to learn the alarm had already been raised. Earlier that morning, Captain Campbell had looked out across the Harbour to find his ship was not there.

       It took authorities three days to organise a ship, the Pegasus, to go in pursuit. By then, Stewart and the Harrington were long gone. The Pegasus cruised the Fijian Islands and then sailed on to Tonga before returning to Sydney via New Caledonia. She was gone nine weeks and arrived back empty-handed. For a time, it looked as if Robert Stewart and his band of bolters had made good their escape. Stewart had sailed the brig nearly 8000 kilometres north and was approaching Manila in the Philippines when their luck ran out. HMS Dedaigneuse spotted the unfamiliar vessel, and her captain sent a boarding party across to investigate. By then, the Harrington was flying American colours, and Stewart presented the officer with papers purporting that the ship was of American origin. The forged documents did not fool the officer in charge of the boarding party who seized the ship. Stewart, now calling himself Robert Bruce Keith Stuart, was taken back to the Dedaigneuse while the rest of the convicts were locked in the Harrington’s hold, now under the command of a British naval officer and a prize crew.

       Shortly thereafter, the Harrington ran aground off the island of Luzon. Most of the convicts were reported to have got ashore where they fled on foot. However, there is some evidence to suggest that their “escape” might have been fabricated, and they were actually press-ganged into Royal Navy service.

       Stewart, on the other hand, had a much easier time of it. He spoke and carried himself in a gentleman-like manner, professed to have enjoyed a liberal education and that he had connections to some of Britain’s most prestigious families. Stewart claimed to have once been a lieutenant in the Royal Navy before he fell victim to the penal system. As a result, he was accorded considerable leniency by the Dedaigneuse’s captain.    Captain Dawson allowed Stewart “every reasonable indulgence and forbade to place him under personal restraint.” That was until Stewart tried to escape and came very close to succeeding. After that, he was placed under close confinement. Stewart was eventually delivered to British officials in India, where he continued masquerading as a gentleman in need of help rather than the escaped convict that he was.

    Calcutta circa 1809.

       He knew he could not hide the fact that he had committed an offence serious enough to warrant transportation to New South Wales. So, instead, he fabricated a preposterous story about his conviction. Stewart claimed he had eloped with a young lady from a very respectable family, though chivalry required him to leave her unnamed. But, after they were secretly wed, a junior Baronet who also had desires for the lady broke into their apartment. Stewart said he had shot and injured the young aristocrat in what he described as an affair of honour. Stewart said he had been unfairly found guilty of attempted murder and sent to New South Wales. That sounded more in keeping with a gentleman than being caught for the more tawdry crime of passing a forged cheque. His tale garnered much sympathy from the colonial administrators in Calcutta. The Chief Magistrate even went as far as to champion Stewart’s cause, penning a letter to his superior suggesting he should be released.

       But then, in August 1809, Stewart’s time ran out. The British officials could not ignore that he was a fugitive from justice, and the Governor General ordered him to be returned to Sydney. He was placed on board a ship bound for Australia, but before it sailed, Stewart went missing. At first, the captain claimed he had jumped overboard and likely drowned, but it later transpired he had been whisked away in a boat by one of his many admirers and taken back to Calcutta.

       So, Robert Stewart may have escaped justice and settled in India under yet another assumed name, or caught the next ship leaving port. No one knows for the trail grows cold then. One thing is certain: he never returned to New South Wales to serve out his sentence. Nor did he face punishment for masterminding the seizure of the brig Harrington.

    © Copyright C.J. Ison / Tales from the Quarterdeck, 2024.

    Please enter your email address below to be notified of future blogs.

  • Bligh’s Epic Open-Boat Voyage

    The Mutineers turning Lieut. Bligh and part of the officers and crew adrift from his Majesty’s Ship the Bounty / painted and engraved by Robert Dodd, 1790 London

    On 28 April 1789, Lt William Bligh was startled awake by his first mate, Fletcher Christian, and several other HMS Bounty sailors threatening his life. He, along with 18 members of his crew who wanted nothing to do with the unfolding mutiny, would soon be unceremoniously herded into a launch and set adrift. So began one of the great open-boat voyages in maritime history.

       To say the launch was overcrowded is an understatement. Measuring 23 feet (7 metres) in length, there was room for just half those on board. But, in addition to Bligh and his men, space had to be made for their provisions.

       The mutineers allowed them 70 kg of sea biscuits, 10 kg of salted pork, seven litres of rum, six bottles of wine, and 130 litres of water. For navigation, they were provided with only a quadrant and a compass. Fletcher Christian would not allow them to take a chronometer or any of the charts. A few clothes were thrown into the launch at the last moment, as well as four cutlasses for personal protection should they be foolish enough to venture onto any of the neighbouring islands. Lastly, the carpenter was allowed to take his toolbox, and the ship’s clerk had collected some of Bligh’s papers and belongings, including the captain’s nautical almanac. With the launch so heavily weighed down, it was in imminent danger of being swamped.


    Portrait of William Bligh By Alexander Huey – National Library of Australia, Public

    As the Bounty sailed away, Bligh and the others found themselves adrift in the South Pacific Ocean, a very long way from the nearest European settlements. With no viable alternatives, Bligh convinced his men that they should make for the Dutch settlement of Kupang on Timor Island, some 3,500nm (7,000 km) away. But before they could set off on the long voyage, Blight felt they needed to add to their stores. At first glance, the provisions might seem bountiful, but shared among so many people, they would last little more than a week without strict rationing.

       Bligh made for the nearest land, Tofua Island, about 50 km away, to stock up on fresh produce. Initially, the Islanders seemed friendly and happy to trade. But after a couple of days, the mood inexplicably changed. Bligh and his men suddenly found themselves fleeing for their lives under a hail of hurled rocks. One man was felled on the beach, but the rest managed to get away in the launch.   

    But the assault continued. Rocks still rained down among them, thrown by islanders who pursued them in a canoe. Reprieve only came when the launch finally outdistanced the attackers. Bligh noted in his journal that almost all of them had been injured to some extent from the barrage of stones. But they had escaped, though at the cost of one life. Bligh then set a course west through the South Pacific Islands towards New Holland (Australia). He decided that they would not risk stopping anywhere else along the way.

    A page from William Bligh’s logbook. Courtesy State Library of NSW.

    Sacrifices had to be made if they were ever to make it to Timor. Spare clothes, ropes and anything else not essential were tossed overboard to lighten the load and make more room. Even so, conditions remained so cramped in the boat that no one had room to stretch out their legs. Those not seated on the thwarts had to find room where they could, often on the floor with their backsides in a few inches of water. The carpenter’s chest was emptied of tools so it could be filled with sea biscuits to keep them out of the water sloshing around in the bottom of the boat.

       Bligh organised the men into two watches as they sailed west-north-west towards the Fijian Islands and beyond. Beginning on 4 May, they were battered by a powerful storm with gale-force winds and high seas. Water poured into the boat, forcing the men to bail continuously to keep afloat. The storm raged until the following evening, when the weather eased off for a short while.

       Over the next several days and weeks, they passed through the Fijian Islands and then the islands of Vanuatu as they steadily made their way west. The nights were brutally cold, but there was little let-up in the weather, and they remained soaked to the skin for days on end. The only reprieve from their misery came in the form of a small daily ration of rum.

       Even though Bligh had no chart, he was able to compare his observations, when he could make them, with known landmarks recorded in his almanac. Though they passed close to several islands, there was no appetite to go ashore for food despite their growing hunger. Their experience on Tofua was still fresh in their minds.

    Route sailed by the Bounty’s launch. Courtesy Google Maps.

    They began bearing more westerly as they crossed the Coral Sea and weathered several more powerful squalls. Mountainous seas and torrential rain again kept them bailing as hard as they could to remain afloat.

       Then, on 24 May, they were bathed in full sunshine for the first time in nearly two weeks. Over the following few days, they caught several seabirds. The precious little meat was shared out evenly and eagerly eaten raw. The birds also offered hope of another sort, for they signalled that they were approaching the Australian mainland.

       On 28 May, they reached the outer edge of the Great Barrier Reef, clearly delineated by a line of breaking white surf. Bligh pointed the bow towards a gap in the reef, and everyone hung on as they raced through the narrow passage. Once through the coral jaws, they found themselves in calm water in the vicinity of Cape Melville. Bligh then bore north, remaining close to the inside of the reef in hopes that they might catch some fish to supplement their diet.

       A couple of days later, they stepped ashore on what Bligh would name Restitution Island. After being confined to the boat for so long, they were all barely able to walk. Nonetheless, a fire was started using Bligh’s magnifying glass to focus the sun’s rays, and a stew of sea biscuit and salted pork was augmented by some berries, oysters and other shellfish foraged from their surroundings.

       After several days recuperating, they reboarded the boat and island-hopped north until they reached Torres Strait. They then headed west again across open seas until Bligh estimated they were off the southern coast of Timor Island. On 14 June 1789, they sailed into Kupang Harbour, 47 days after the Bounty mutineers cast them adrift. Bligh noted that they were “nothing but skin and bones; our limbs were full of sores; [and] we were clothed in rags.” But they had survived a voyage few would have thought possible.

       The Dutch authorities tended to the survivors and arranged passage back to England; however, five would never see home, dying in their weakened state, probably from malaria, a disease not well understood at the time.     Bligh arrived back in the United Kingdom in March 1790, not to a hero’s welcome but to face a court-martial to explain the loss of his ship. The Court exonerated him and the incident had no noticeable impact on his career. Bligh eventually rose to the rank of Vice Admiral before retiring. He also served a tumultuous two years as the Governor of New South Wales until officers of the NSW Corps deposed him, but that’s a story for another occasion.

    © Copyright C.J. Ison / Tales from the Quarterdeck, 2023.

    To be notified of future blogs, please enter your email address below.

  • The Douro and its Piratical Captain

    A typical trading schooner in the South Seas. Source: Picturesque atlas of Australasia, 1886.

       In the 19th Century, the ship’s captain often considered himself the undisputed master of his vessel, especially when they were at sea. Most, to varying degrees, kept a rein on their power, while others ruled with an iron fist. Then there were those tyrannical few, like Neil Peter Sorensen, who went completely rogue. And, out among the South Pacific islands where the Royal Navy only sporadically patrolled, there were few restraints on those bent on causing trouble.

       In August 1885, a portion of the crew from the schooner Douro put ashore in Cooktown with a harrowing tale of kidnapping and piracy. The culprit, they said, was their own former captain. The Douro’s first mate, Otto Ashe, and two other seamen told authorities that Captain Sorensen was out of control and terrorising communities in the Solomon Islands. They had grown so concerned with Sorensen’s behaviour that they preferred to risk being charged with deserting their ship than to be implicated in their captain’s depredations.

       As he and the others had only joined the Douro in Sydney four months earlier, they had no idea what they were signing on for. Until recently, the Douro had been registered as a British vessel named the Albert, and as such, had been subject to British laws. The ship’s owner registered her as a Portuguese-flagged ship at that country’s Sydney Consulate. They claimed they had done so to save their ship from being seized in the event of war breaking out between Britain and Russia, a genuine concern at the time. In reality, the change in registration and name had more to do with placing the ship and its captain outside the bounds of the British legal system. Sorensen was installed as the Douro’s new captain. He was formerly the Albert’s first mate and was no stranger to the South Pacific or operating outside the law. But this would be his first taste of command.

    Map showing Australia and the Solomon Islands.

       The Douro sailed from Sydney in late April, on a fishing venture around the Solomon Islands. Pearl shell and beche-de-mere both commanded high prices in Sydney, but Sorensen needed to hire local divers. Sorensen landed at a village on San Cristobal Island for recruits, but the village chiefs remembered him from a previous visit. Sorensen had promised to return the men at the end of his last fishing trip, but he never did. Now, no one trusted him.

       Sorensen was forced to go further afield to find his much-needed divers and fishermen. The Douro stopped at a couple of other islands and was able to recruit men on the promise that they would be gone from their villages for only four or five months. This was a lie, for Sorensen expected to be away for at least a year and probably longer.   

    As time passed, the situation on the Douro became intolerable for the crew. Otto Ashe claimed that Sorensen relentlessly bullied and threatened his men. While anchored off Guadalcanal, he beat the schooner’s cook senseless over some perceived infraction of his rules. None of the crew was prepared to stand up to him, for Sorensen was always heavily armed. But as bad as the treatment of his white crew was, it was nothing compared to how he treated most of the Solomon Islanders.

    Newspaper coverage at the time.

       At Isobel Island, he had two chiefs forcibly brought out to the schooner and only released them in exchange for six recruits. Off Wagina Island, the Douro came across a chief and several of his men out fishing in their canoes. He welcomed them aboard and then invited the chief to dinner in his cabin. Sorensen clapped the chief in irons and kept him hostage. He then went back on deck armed with a rifle and ordered the rest of the Islanders to leave. Sorensen only released the village chief after his people had handed over 4000 beche-de-mer, 24 sea turtles, a pig and three “boys,” whom he would exploit as unpaid labour.   

    On one of the Carteret Islands, he took his plundering to a new level.   Sorensen kidnapped four girls and brought them back to the schooner for the men’s entertainment. He then went ashore, armed to the teeth, at the head of a band of Solomon Islanders who had no qualms about following his orders. Sorensen forced the local chief to sign over possession of the island to him. Sorensen and his men then went from hut to hut, gathering up all the weapons. The haul included an assortment of traditional spears, clubs, and tomahawks, as well as an old Snider rifle and two shotguns. After everyone had been disarmed, he forced the menfolk to collect pearl shell and beche-de-mer on his behalf.

    A typical South Sea Islands trading schooner circa 1885.

    By now, the first mate had seen enough and wanted no part of it.   Fearing that Sorensen would continue his reign of terror through the islands, he took the first opportunity to escape. On 23 June, he took off in the schooner’s longboat with two other white seamen and seven Solomon Islanders. They landed in New Britain and reported Sorensen’s crimes to the German Consul there. They then set off in the boat for Australia, eventually landing at Cooktown, where they told the Queensland authorities the same story.

       When the Douro finally sailed into Brisbane in March the following year, the police were waiting. The schooner was seized, and Sorensen was charged with assault and robbery and placed under arrest. He was also charged with sodomy, but that was later dropped because the principal witness was “now in a lunatic asylum,” as the Brisbane Courier reported it at the time. Sorensen denied all the allegations, but a jury found him guilty, and he was sent to prison for ten years. While this episode was particularly heinous, it is a sad indictment that the conviction and hefty sentence were unusual for the times.

    © Copyright C.J. Ison / Tales from the Quarterdeck, 2022.

    1    Brisbane Courier, 25 Mar 1886, p.6.

    To be notified of future blog posts, please enter your email address below.

  • No Charts, No Worries

    A schooner of the early 1800s. Courtesy State Library of Queensland.

    When Captain George Browning sailed the small schooner Caledonia from Sydney in December 1831, he intended to follow the coast north as far as the Tropic of Capricorn.   There he was to collect salvage from a ship that had been wrecked in the Bunker Islands and return it to Sydney to be sold.   But on the way, he was to call in at the Moreton Bay Penal Settlement to collect a whaleboat the crew had used to escape the wreck.   That was where things began to go wrong for the young master mariner.

    While anchored in Moreton Bay his ship was seized by a band of convicts who sent the crew ashore and ordered Browning to take them to the tiny South Pacific Island of Rotuma some 1,500 nautical miles or 3,000 kilometres away over open ocean.   See my blog “The Caledonia’s perilous last voyage,” for a more detailed account.

    Among the many challenges he faced, he had no charts covering the South Pacific.  Yet, Browning had to find a way to deliver his unwanted passengers to their destination if he was to have any chance of saving his ship and preserving his own life.   He consulted his “Epitome of Practical Navigation,” a book all master mariners kept close at hand.   The regularly updated volume was considered the standard text on maritime navigation and was packed with charts and tables to help mariners navigate the world’s oceans.   

    Example from The American Practical Navigator, 1837. There were several such books used by master mariners.

    Browning referred to a table of South Pacific Islands with their corresponding geographic coordinates.  With this information, he flipped over one of his coastal charts and drew a grid labelling the key lines of longitudes and latitudes for the waters he would be sailing and marked the various known islands and features identified in the table, albeit with many reefs, shoals and other hazards left unrecorded.   Notwithstanding its limitations, he could now take observations and plot his whereabouts and relate that to his destination – Rotuma – and any other islands in the course of his travels.   

    Using his makeshift chart, Browning navigated from Moreton Bay to New Caledonia where they stopped to collect fresh drinking water.   From there he charted a course to Rotuma and when he was directed to leave that island at a moment’s notice and make for Wallis Island he did that too.  

    Perhaps the chart’s greatest value came as they sailed towards Wallis Island.   A couple of the convicts warned Browning that their leader intended to scuttle the Caledonia and do away with its captain once they had arrived.   He knew Wallis Island lay a short distance over the horizon and they would likely arrive late that afternoon.  

    He shaped the sails to slow the ship’s progress until nightfall.   Then, during the hours of darkness, he picked up speed again and was able to slip by Wallis thereby prolonging his life a little longer.   A couple of days later they pulled in at the Samoan island of Savai’i.   There the Caledonia was scuttled but Browning was befriended by a local chief and escaped the convicts’ clutches.  He eventually returned to Australia to tell his amazing story.

    The full story is told in A Treacherous Coast: Ten Tales of Shipwreck and Survival from Queensland Waters available through Amazon.

    © Copyright C.J. Ison / Tales from the Quarterdeck, 2022.

    To be notified of future blog posts, please enter your email address below.