Category: Piracy

  • The Mystery of the Missing Madagascar

    By Thomas Goldsworth Dutton (fl 1840) – National Maritime Museum Greenwich, London [1], Public Domain, https://commons.wikimedia.org/w/index.php?curid=30836816

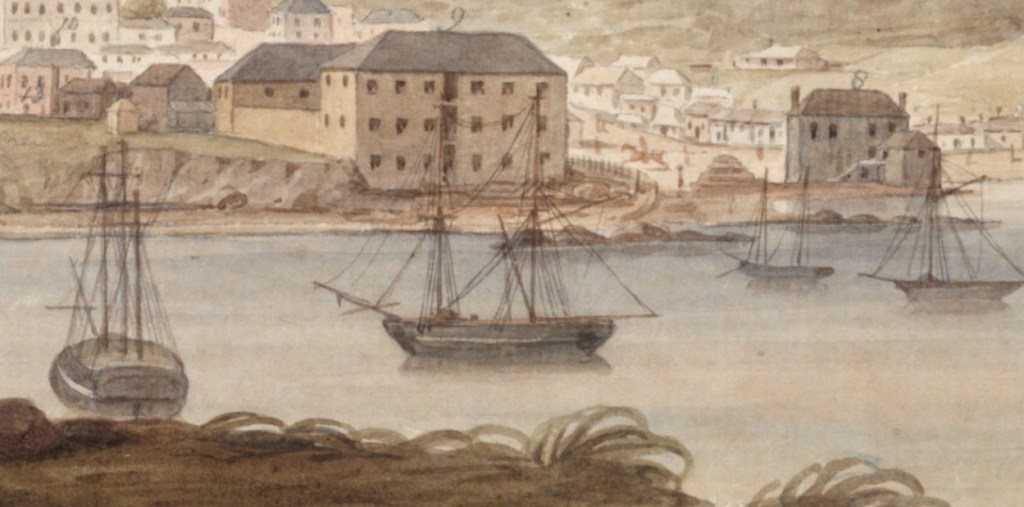
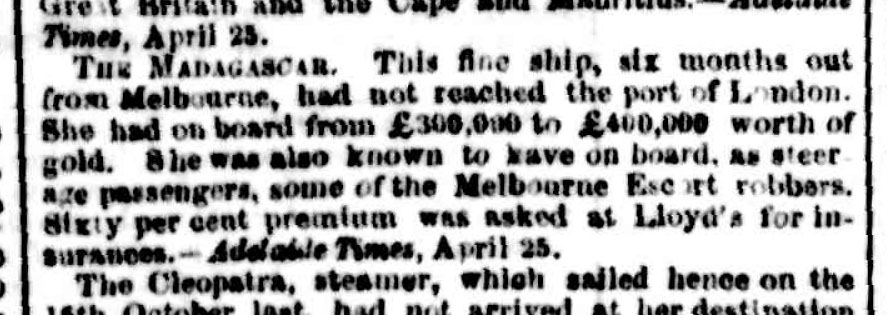
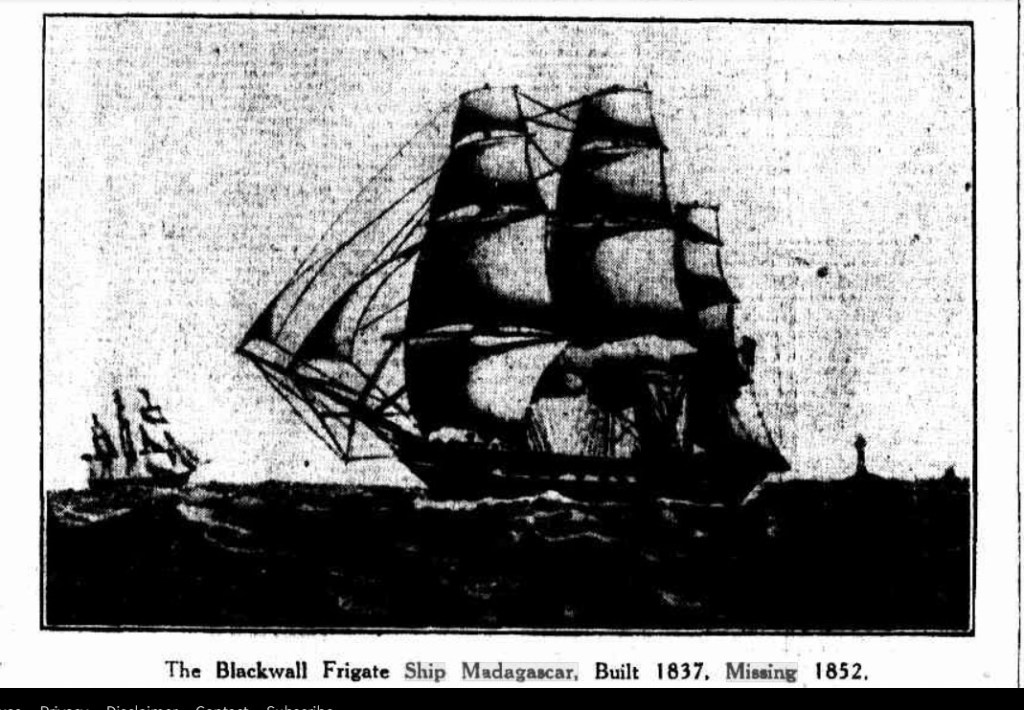
    In August 1853, the Madagascar set sail from Melbourne, Australia, and was never seen again.  On board were her full complement of crew and 62 passengers. Men, women and children all bound for England. She was not the first to vanish at sea, and she would not be the last. But her disappearance has fuelled keen interest over the years, not because of the tragic loss of life, but for her large and valuable cargo of gold.

    The Victorian gold rush was in its third year and was showing no signs of slowing. As well as wool and other cargo, the Madagascar had carried consignments of gold from gold traders and banks, totalling over 68,000 ounces, worth at least a quarter of a million pounds at the time.   Today, the missing fortune would be worth nearly half a billion Australian dollars.

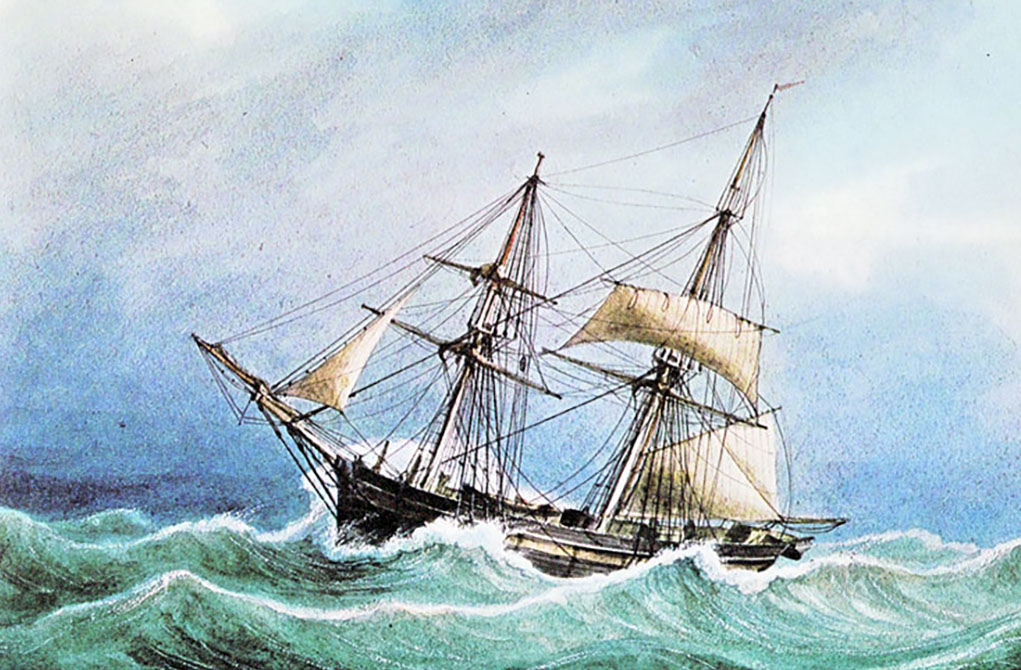
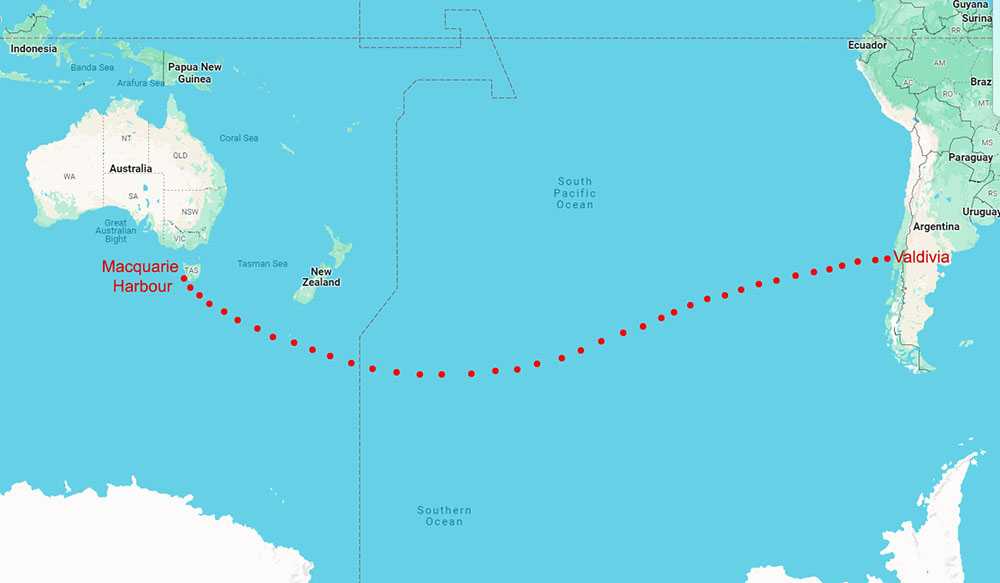
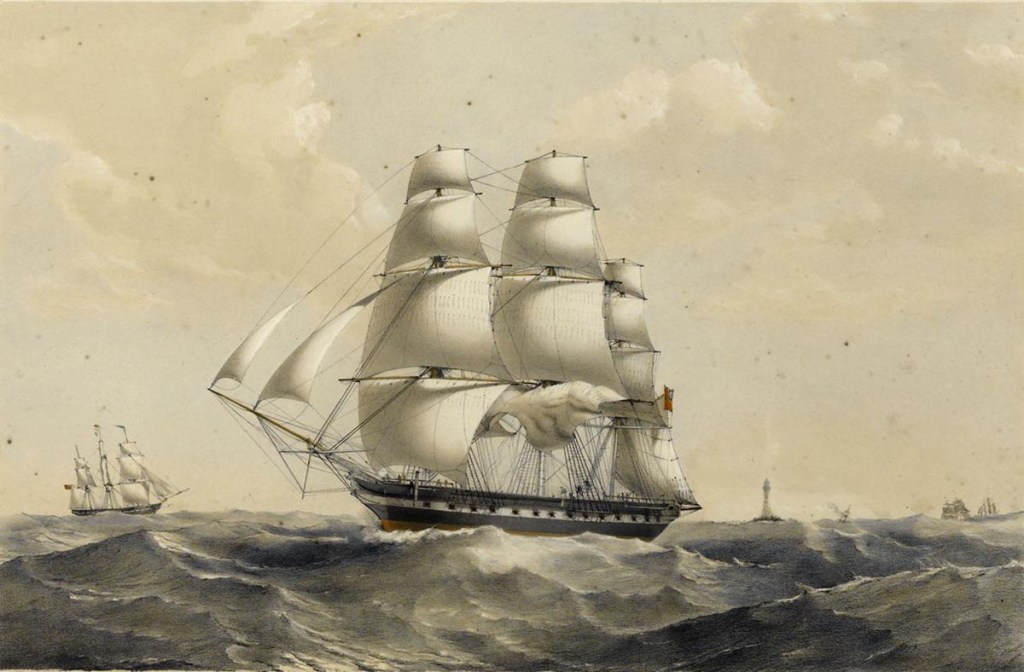
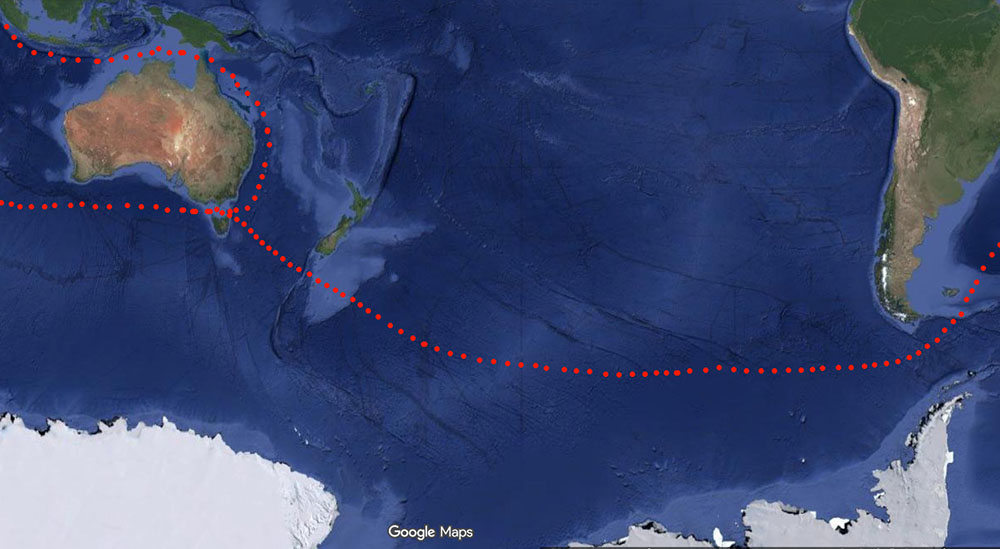
    The Madagascar was a 950-ton fully rigged sailing ship commanded by an experienced and highly respected master mariner named Captain Fortescue W. Harris. He had a choice of three routes he could take on his return voyage to London.   Once clear of Port Phillip, he could have turned his vessel west to cross the Great Australian Bight and the Indian Ocean, then round the Cape of Good Hope before turning north up the East African coast towards home.  He could also have turned to port to cross the South Pacific, round Cape Horn, before again turning north through the Atlantic. Or he might have followed Australia’s east coast north, through the Coral Sea, Torres Strait, and on to Singapore, India, the Cape of Good Hope, and home.   Unfortunately, he left no clue as to which route he intended to take.

    The ship was only 15 years old, solidly built, well-maintained, and had made the passage out to Australia in just 87 days without incident. There was no reason to think the ship would not make the routine passage home in a similar time. But after six months had passed with no sign of the ship, people grew anxious, for she was now long overdue.

    In February 1854, a report reached London via the captain of the Jessica in Calla, Chile, that the Madagascar had put into Rio de Janeiro “in a very leaky state, near upon foundering.” It was thought that her passengers and the gold would have been loaded onto another vessel to complete the remainder of their voyage. However, nothing further was heard, and the report ultimately proved to be an unfounded rumour.

    Word that the ship was missing finally reached Melbourne nearly ten months after she had made her departure. Several theories immediately emerged.   Some thought her cargo of wool might have spontaneously combusted and engulfed the ship in fire. Others thought she might have been sunk by a Russian frigate operating in the southern seas. One experienced mariner dismissed both of these theories. He believed it was more likely that she had struck an iceberg in those freezing latitudes of the Southern Ocean.

    There were also fears that her disappearance might have been at the hands of a ruthless gang of bandits.  Three bushrangers had been taken off the Madagascar the day before she departed. They, and their mates, had robbed the McIvor Gold Escort of £10,000 worth of gold, shooting four troopers in the process.  It was widely believed that other dangerous outlaws had left on the missing ship as paying passengers or members of the crew. Once they were far from land, it was argued, they had plundered the ship and sank her, before taking to the boats with their ill-got gains.    Of course, there is no way to prove or disprove if this actually happened.

    Then, a year later, in May 1855, a gentleman in Geelong received a letter from an acquaintance in Cape Town telling him that the missing Madagascar had been found safe and sound. According to the letter writer, she had become trapped in ice while trying to round Cape Horn and had been stranded for some six months in those remote Antarctic waters. No other corroborating news came out of Cape Town or anywhere else, for that matter, and the rumour was dismissed. What’s more, Lloyds had since listed the ship as missing and had paid out on its insurance liability.

    The Madagascar, The Age, 6 APr 1929, p. 7.

    But some people never gave up hope of finding out what happened to the ship and their loved ones. Twenty-seven years after the ship had vanished, the crew of the ketch Rosebud found 15 skeletons on Bountiful Island in the Gulf of Carpentaria. On learning of the discovery, the nephew of one of the Madagascar’s missing passengers begged the Queensland government to find out if the remains might be linked to the missing ship.   An expedition was sent to Bountiful Island, and concluded the skeletons were likely those of Aborigines or Malay fishermen rather than survivors from the Madagascar. The report also noted that the island was some 350 miles (650 km) away from the regular shipping channel through Torres Strait.

    In 1889, the remains of an old ship were discovered off the New Zealand coast. So sure were some Sydney treasure hunters that they raised sufficient money to send an expedition, including an experienced diver, to New Zealand to examine the wreck. Needless to say, they did not come back with the gold or anything else that shed light on the fate of the Madagascar.

    But the most enduring theory as to the loss of the Madagascar centred on it being seized by desperate robbers who made off with the gold and sank the ship. Some stories came with elaborate details, although they were impossible to verify.

    In 1914, a New Zealand newspaper published a story claiming the Madagascar had been lost off the South American coast.  In a recently discovered written statement made to the police in 1867, a sailor named “Bully” Hayes said he had survived the wreck of a treasure ship off Peru.  Hayes claimed the ship was seized and set on fire by a band of robbers who escaped in the boats laden with thousands of pounds of stolen gold.  He had somehow managed to secure a seat on one of the boats, which later struck a reef. The gold was lost, and he was the only survivor.  Though he would not be drawn on the name of the ship, the man who took his statement believed he was referring to the Madagascar.

    Fifteen years later, another tale emerged regarding the missing ship. Supposedly, a clergyman said that years earlier, he had taken a deathbed statement from a woman who claimed to have survived the sinking of the Madagascar. Her story went thus. The Madagascar had been seized by mutineers who had locked everyone below deck, set fire to the ship, and taken to the boats with the gold and several young women, herself included. The boat was swamped by surf as they tried to land somewhere on the South American coast, and the gold was lost.   A handful of mutineers survived only to die of yellow fever on reaching a small town. Only she and one man survived, and he would later abandon her.   Unfortunately, the story makes no mention of her name or the priest who took her final confession, making it impossible to verify.

    After the passage of some 175 years, it seems likely that we will never know what befell the Madagascar.  Perhaps she struck an iceberg in the deep reaches of the Southern Ocean or perished in a powerful storm. Perhaps her cargo of wool did catch fire and she sank. It would not be the first time a ship had succumbed to such a tragedy. Or maybe an attempt was made to seize the gold, which ended with the loss of the ship. But one thing is for sure: piled among what remains of the ship and the final resting place of her passengers and crew, there is nearly half a billion dollars of gold sitting somewhere on the ocean floor.

    © Copyright C.J. Ison / Tales from the Quarterdeck, 2026.

    Please enter your email address below to be notified of future blogs.

  • Tales from the Quarterdeck

    Sixty bite-sized stories from Australia’s maritime past

    The melancholy loss of H.M.S Sirius off Norfolk Island by George. Raper. Source National Library of Australia 136507434-1

    I have just launched a new book titled Tales from the Quarterdeck: Sixty bite-sized stories from Australia’s maritime past. Sixty of the most popular posts have been reedited. In some cases, I’ve rewritten a couple and updated a few where new information has come to light since first writing them.

    For those who would value ready access to the stories in their bookcase, Tales from the Quarterdeck is available in Kindle ebook and paperback formats through Amazon.

    The stories are organised in chronological order, starting with the Tryall shipwreck off the Western Australian coast in 1622, and finishing with the Second World War exploits of the Krait. See below for a full list of the stories covered in the book.

    Sydney Gazette 22 May 1808, p. 2.

    1622 – The Tryall: Australia’s earliest shipwreck

    1629 – The Batavia Tragedy

    1688 – William Dampier: Navigator, naturalist, writer, pirate

    1770  – The Endeavour’s Crappy Repair

    1788 – Loss of La Astrolabe and La Boussole, a 40-Year Mystery                        

    1789 – Bligh’s Epic Voyage to Timor

    1789 – HMS Guardian: All Hands to the Pumps

    1790 – The Loss of HMS Sirius

    1790 – Sydney’s First Desperate Escape

    1791 – HMS Pandora: Queensland’s earliest recorded Shipwreck

    1791 – William Bryant’s Great Escape

    1797 – The Loss of the Sydney Cove

    1803 – Loss of HMS Porpoise

    1808 – Robert Stewart and the Seizure of the Harrington

    1814 – Wreck of the Morning Star

    1816 – The Life and Loss of HMSC Mermaid

    1824 – The Brig Amity’s Amazing Career

    1829 – The Cyprus mutiny 

    1831 – The Caledonia’s perilous last voyage

    1833 – The Badger’s Textbook Escape

    1835 – The Loss of the Convict Ship Neva

    1835 – The Post Office in the middle of nowhere

    1835 – The Tragic Loss of George III

    1845 – The Cataraqui: Australia’s worst shipwreck

    1846 – The Peruvian’s Lone Survivor

    1847 – The Foundering of the Sovereign

    1850 – The Loss of the Enchantress: A first-hand account

    1851 – The Countess of Minto’s brush with Disaster

    1852 – The Bourneuf’s Tragic Last Voyage

    1852 – The Nelson Gold Heist

    Woodbury, Walter B. (Walter Bentley), 1834-1885. Hamlet’s Ghost, Sourabaya [Surabaya], Java [Boat with Passengers and Crew], ca. 1865. Walter B. Woodbury Photograph Collection (PH 003). Special Collections and University Archives, University of Massachusetts Amherst Libraries

    1854 – Bato to the Rescue 

    1854 – HMS Torch and the rescue of the Ningpo

    1856 – The Loss of the Duroc and the Rise of La Deliverance

    1858 – The Loss of the Saint Paul and its Horrific Aftermath

    1858 – Narcisse Pelletier, An Extraordinary Tale of Survival

    1859 – The Indian Queen’s Icy Encounter

    1859 – The Sapphire and Marina

    1863 – The loss of the Grafton: Marooned for twenty months

    1864 – The Invercauld shipwreck

    1865 – The CSS Shenandoah: Victoria’s link to the American Civil War

    1866 – The Loss of the SS Cawarra: Bad luck or an avoidable tragedy?

    1868 – The Bogus Count and Hamlet’s Ghost

    1871 – The Mystery of the Peri

    1872 – The Loss of the Maria, A Cautionary Tale

    1875 – The Tragedy behind the Gothenburg Medals

    1876 – The Catalpa rescue

    1876 – The Banshee’s Terrible Loss

    1878 – The Loch Ard Tragedy

    1884 – The Macabre case of the Mignonette

    1885 – The Douro and its Piratical Captain

    1889 – The Windjammer Grace Harwar

    1891 – The Spanish Silver of Torres Strait

    1893 – The Foundering of the SS Alert

    1895 – The Norna and the Conman Commodore

    1899 – Cyclone Mahina

    1911 – The Loss of the Mandalay

    1918 – The Orete’s Robinson Crusoe-like Castaway

    1935 – The Life and Loss of  the SS Maheno

    1943 – Surviving the Centaur Sinking

    1943 – The Amazing Krait

  • The Frederick: Stealing the Ship That Never Was

    Example of a merchant Brig of the era. (Water colours by Frederic Roux 1827-1828)

    By December 1833, the penal settlement at Macquarie Harbour in southwest Tasmania was all but deserted.   Only a dozen convicts remained to complete the 120-ton brig Frederick.   She would be the last of nearly 100 vessels to be built there.   Once launched, they were supposed to sail her around to the newly established station at Port Arthur.   However, ten of the convicts had a much more distant destination in mind.

    But, to seize the ship involved overpowering the soldiers and officers left behind to watch over them.   Tackling armed men with just bare hands was daunting, but they had a plan.   One of the convicts, John Barker, happened to be a master blacksmith.   He manufactured two flintlock pistols using discarded scraps of metal and a musket barrel found in the blacksmith shop.   He also forged a pair of tomahawks to add to their small arsenal.  

    The Frederick was finished on 10 January 1834, and at 10 am the next day they set sail.   Captain Taw sailed down the length of Macquarie Harbour but dropped anchor inside the heads.   He judged the weather too foul to safely pass through the narrow passage of Hells Gate and out to sea.    So they waited.   Then, on Monday, 13 January, the wind eased, signalling their imminent departure.    

    For the ten convicts, the time to strike had arrived.    If they did not seize the ship now, they likely never would.    However, they were up against nine men, seven of whom were armed. 

    Then, good fortune smiled upon them, and the odds shifted in their favour.   Two of the soldiers went fishing and took a boat out with a convict at the oars.     He was one of two prisoners not in on the plan.   So, with them gone, nine had been reduced to six.     

    Boat building Yard on Sarah Island, Macquarie Harbour by William Gould, 1833, Courtesy State Library of NSW.

    Around 6 o’clock in the evening, a prisoner beckoned a sentry to join him by the forecastle hatchway.   When the unsuspecting soldier obliged, he was jabbed in the chest with one of Barker’s pistols and ordered down the ladder into the crew’s cabin.   Meanwhile, two other convicts armed with hatchets pounce on the only other two men on deck.  They subdued the remaining soldier and the terrified mate, bundling them too into the forecastle cabin.   A convict stood guard, and a heavy kedge anchor was dragged across the hatchway cover in case they tried to escape.   The convicts now had control of the deck.   Three men were confined in the forecastle, and another three were out fishing, oblivious to what was unfolding on the Frederick.    This just left Captain Taw, David Hoy the shipyard supervisor, and the convict steward William Nicholls.   All were in the captain’s cabin

    The convicts, now armed with the soldiers’ muskets, were ready to confront the last men standing between them and liberty.   Three men stormed down the ladder and attacked Captain Taw and the others, hoping to quickly get the best of them.   However, Taw and Hoy fought back.   Hoy wrestled a pistol from one of the convicts, and the attackers retreated back up the ladder, leaving Taw, Hoy and Nicholls trapped in the cabin, bloodied and bruised from the brief but violent encounter.

    Taw and Hoy were trapped in the cabin.   The convicts would pay dearly if they attacked again, but the captain knew he could not retake the ship.   They were at a stalemate.   But Captain Taw had one small bargaining chip.   He had possession of the Frederick’s navigation instruments, items the convicts would need to escape.  The impasse lasted about ninety minutes, with occasional shots fired through the cabin’s skylight and each side calling for the other to surrender.  

    The Globe (London), 9 Jul 1834, p. 4.

    Around 7.30 in the evening, someone called for the pitch pot to be brought over and threatened to empty its boiling contents into the cabin if the trio did not immediately surrender.    Hoy and Taw agreed there was nothing to be gained by holding out any longer and gave themselves up.  

    Meanwhile, the fishing party had returned to the brig after hearing gunfire, only to find the prisoners already in charge.   The rest of Frederick’s men joined them in the boat, and they were sent ashore with half the ship’s provisions.

    Taw and Hoy assessed their situation.    There was plenty of food, so they would not be going hungry any time soon.    However, how long would it be before a ship was sent to investigate the whereabouts of the Frederick?     Taw had no intention of waiting to find out.   They set off on foot for the nearest settlement, 150 kilometres away.  It would take Taw over two weeks to eventually reach Hobart to report the incident.

    In those two weeks, the mutineers did not waste any time making good their escape. James Porter, one of the convicts, wrote the only record of what happened to the Frederick next.  

    Porter was not a typical convict transported to Australia.    For a start, he was born into a respectable middle-class family.  When he was 12, he dropped out of school and, by his own account, began mixing with the wrong kind of people.   Porter soon got himself in trouble with the law, but his father pulled some strings, and the charges were dropped.   However, to prevent Porter from getting into any more trouble, he was sent to sea to serve an apprenticeship and found himself bound for Rio de Janeiro.   

    So began his career as a seaman.   After changing ships several times, Porter claimed he had spent 12 months on the armed schooner Liberta helping the Chileans win their independence from Spanish rule.   However, by late 1821, he had had enough of life in South America and returned to England. 

    A year later, Porter was caught breaking into a house and was transported to Van Diemen’s Land for life.   He landed in Hobart in January 1824 but was soon caught stealing and sent to Macquarie Harbour.   

    When he was chosen to remain behind to finish work on the Frederick, a plan started to take shape in his mind, and South America once again beckoned.   His companions comprised a mix of experienced seamen like himself, shipwrights and the blacksmith John   Barker who had been schooled in celestial navigation, though he proved to be no seafarer.

    The Frederick was sailed from Macquarie Harbour to South America where it was left to sink. Courtesy Google Maps.

    The Frederick no sooner made it out to sea when the wind freshened to a heavy gale.      It blew hard with mountainous seas for the next nine days as they bore south, then east under much-reduced canvas.   The burden of sailing fell heavily on the shoulders of the seasoned sailors.   The rest of the men, unused to such sea conditions, rarely left their bunks, suffering severely from sea sickness.    Barker was particularly prone to the malady, only coming on deck periodically to make observations and plot their course.  

    After being at sea for about three weeks with few opportunities to take observations, Barker found they had strayed too far south into the dangerous icy waters of the “Furious Fifties”.   He set a northeasterly course for the helmsmen and then retired to his quarters again.   Shortly after this, their voyage nearly came to an end when the Frederick was heeled over on her side by a powerful wind gust.  

    Fortunately, the ship righted herself once the canvas had been brought in.      Then, about six weeks out, they spotted land for the first time since leaving Tasmania.  They had sailed nearly 5,400 nautical miles (10,000 km) and arrived off the coast of South America.  

    On 27 February, they boarded the longboat and left the Frederick to sink as, by now, she was taking on a lot of water.    The next morning, they made landfall near the mouth of the Rio Bueno in Chile.       A week later, they arrived at the provincial capital of Valdivia, where they were promptly thrown in gaol for entering the country in a “clandestine manner.” 

    It was obvious to the Chilean officials that the men claiming to be shipwrecked sailors were not what they claimed to be.   Now that they were behind bars and facing an uncertain future, Porter and his comrades decided to admit to being runaway convicts and beg the Governor for asylum.  

    Illustration of a brig. Source: Nautical Dictionary by Arthur Young, published in 1863.

    They found a sympathetic ear in Governor Sanchez, and he agreed to petition the President of Chile in Santiago on their behalf.    They were released from gaol after promising not to leave town.   All ten men found work at the local shipbuilding yard, where their skills were much in demand.   As time passed, they settled into their new lives and felt their troubles had been put behind them.  

    But the British Consul in Santiago had learned of their presence in Valdivia unbeknownst to Porter and his colleagues.   He, in turn, had called on the Royal Navy to dispatch a ship to apprehend the runaways.   

    Eight months later, in February 1835, HMS Blonde dropped anchor at the mouth of the Valdivia River to collect the runaway convicts.   However, Governor Sanchez refused to hand them over, and the British warship left empty-handed.   While Porter and the others had avoided arrest this time, it was clear to them that the British knew where they were.  

    Life settled back into its regular routines until a few months later, when Governor Sanchez was replaced by a man far less sympathetic to the runaway convicts.    Within a month, three of the convicts departed on a merchant ship bound for North America.   Then Barker and two others left in the dead of night in a whaleboat they had been building for the new governor.    The governor was furious and gaoled Porter and the other three until they could be handed over to the Royal Navy.

    They were put on board the next British warship that stopped at Valdivia and returned to England.   As they had escaped from Van Diemen’s Land, it was decided to return them there to stand trial for piracy.   They arrived back in Hobart on 29 Mar 1837 after an absence of more than three years.  

    In a novel legal argument, Porter contended that because the Frederick had never been officially registered, it could not be considered a ship.  Instead, it was just a collection of timber, ropes, canvas and such like, which just happened to resemble a brig.    Consequently, he argued, they could not be found guilty of piracy.    The jury was unconvinced, and after 30 minutes of deliberation, they returned a guilty verdict, and the four men were banished to Norfolk Island for life.    

    © Copyright C.J. Ison / Tales from the Quarterdeck, 2025.

    Please enter your email address below to be notified of future blogs.

  • William Swallow and the 1829 Cyprus mutiny

    Detail reputedly showing the brig Cyprus (centre) from a panorama of Hobart 1828 – watercolour drawings by Augustus Earle, Courtesy State Library of NSW.

       In August 1829, the brig Cyprus sailed from Hobart bound for Macquarie Harbour with provisions and 31 convicts sentenced to serve hard labour at that infamous penal settlement. However, while windbound at Recherche Bay in Tasmania’s south, the prisoners rose up, overpowered their guards and seized control of the ship. Thus began one of the most extraordinary escapes of Australia’s convict era.

       Their leader was a 37-year-old convict named William Swallow. He was likely the only man among the prisoners who had any seagoing experience, so in true pirate tradition, the men voted for him to be their captain. Swallow had once earned a living as a seaman on colliers plying England’s coastal waters. That was until he tired of the seagoing life and found it was more lucrative to break into portside houses or ships moored in harbour. He finally came undone when the police suspected him of being involved in several recent burglaries and raided his house. A large haul of stolen property was found in the house, and Swallow was whisked off to gaol. This took place in 1821 when Swallow was going by the name William Walker. He was found guilty of housebreaking and sentenced to be transported to Van Diemen’s Land (Tasmania) for seven years.

       William Swallow, however, had no intention of going quietly, leaving his wife and three children to fend for themselves. His first attempt to escape took place even before he had left England. He and a fellow prisoner jumped from the ship carrying them to the prison hulks to await the next Australia-bound convict transport.  His mate drowned in the attempt, but Swallow survived and returned to his hometown. However, he was quickly recaptured and charged with returning from transportation. This time, he was loaded on a ship and sent to Van Diemen’s Land.  

    Swallow made a second attempt to escape eight months after arriving in Hobart. He and three other convicts seized a small schooner, crossed Bass Strait and made it to within 80 kilometres of Sydney before they ran aground and were taken back into custody. Swallow received 150 lashes and was sentenced to serve hard labour at Macquarie Harbour Penal Settlement. But he escaped again before ever setting foot in that much-feared hellhole. This time, he escaped from gaol and stowed away on a merchant ship bound for England. There, he lived free until being discovered in 1828. This time, he was sent to Van Diemen’s Land for life. But Swallow was still not ready to give up and accept his fate. Shortly after arriving back in Hobart, he stowed away on the very ship that had so recently brought him from England. By now, guards were masters at finding stowaways, and Swallow was taken off before it left port. He was flogged again and was on his way to Macquarie Harbour on the Cyprus when, in 1829, he and the other convicts seized the ship.

    A tranquil Recherche Bay in southern Tasmania in 2019. Photo CJ Ison.

       On 13 August, while the Cyprus was windbound in Recherche Bay, the convicts pounced, catching their guards by surprise and wresting control of the ship. They put the soldiers, captain and crew ashore and the following morning, hauled up the anchor, unfurled the sails and gave three hearty cheers as they got underway. The castaways would remain stranded in that remote and inhospitable corner of Tasmania for two weeks before they were discovered. That gave Swallow and his men ample time to get far away from Van Diemen’s Land before the alarm was raised.

       It was supposed by the authorities that the runaways would try to make their way across the Pacific, where they would scuttle the Cyprus and pass themselves off as shipwrecked sailors at some unsuspecting South American port. But Swallow and the others had another idea in mind as Van Diemen’s Land disappeared over the horizon behind them.

       The Cyprus was well stocked with food, for it carried sufficient supplies to see the Macquarie Harbour Penal Settlement through the coming winter months when it was all but cut off from the outside world. Swallow set a course to take them to New Zealand, where the men painted the vessel’s hull black and renamed her the Friends of Boston. Passing themselves off as an American-flagged ship, they then sailed north towards the Friendly Islands, known today as Tonga.

       However, this leg of their voyage was far from smooth sailing. One man was lost overboard during a powerful storm, and the common purpose that had seen the convicts unite to capture the brig had begun to dissipate. After they reached the island of Tongatapu, present-day Nukualofa, seven men chose to remain there when the Cyprus set sail. Swallow continued north across the equator and eventually reached southern Japan after an impressive voyage of nearly 12,500 km. They pulled into a sheltered bay on the island of Shikoku in January 1830, hoping to resupply with firewood and fresh water. However, at the time, Japan was unwelcoming of foreigners. Despite the language barriers, the Japanese made it clear that the Cyprus had to be gone by sunset; otherwise, it would be fired upon.

    A watercolour of what is beieved to be the Cyprus by low-ranking Samurai artist Makita Hamaguchi in documents from the Tokushima prefectural archive. CC BY-SA 4.0, https://commons.wikimedia.org/w/index.php?curid=59397258

       Swallow heeded the warning, hoping to resupply somewhere more friendly, but as the sun dipped towards the horizon, the wind dropped and the ship was becalmed. The Japanese coastal battery opened fire as they warned they would, and one of the cannonballs struck the vessel on the waterline. But before any more damage could be inflicted, a breeze sprang up, and Swallow wasted no time getting the ship underway. They followed the Ryukyu Island chain south before crossing the East China Sea, all the time taking on water.   

    In February 1830, the Cyprus was off the coast of China, near the estuary of the Pearl River (Zhu Jiang River). By now, the leak had worsened, and the pumps had to be manned constantly to keep the ship afloat. Several of the runaways had had enough and wanted to abandon the ship. However, Swallow wasn’t ready to give up on the Cyprus just yet, despite the risk of being discovered by British naval vessels in the area. He hoped they might repair the ship and soon be on their way. However, those wishing to go ashore went below and punched a hole in the hull. They then boarded a lifeboat and left the Cyprus to sink. Swallow and his few remaining loyalists could not stem the steady inflow of water and were forced to abandon the ship a few hours later in the remaining lifeboat and make their way to Canton (Guangzhou).

    View of the Canton factories by William Daniell, circa early 1800s. Courtesy British National Maritime Museum via Wikipedia.

       The unexpected arrival of British subjects in the trading enclave raised the interest of the local East India Company officials. William Swallow was asked to visit their offices, where he was questioned at length.

       As news of the seizure of Cyprus had yet to reach that port, Swallow passed himself off as Captain William Waldon and late master of the 200-ton English brig Edward. His story was a mixture of fact and fiction. He said that they had left London on 14 December 1828, bound for Rio de Janeiro and had then rounded Cape Horn and crossed the Pacific to Japan, where they were fired upon. The Edward, he said, had steadily taken on water as he tried to make for Manila, but his ship had finally foundered near Formosa (Taiwan).

       He told the East India Company officials that he and his crew had boarded two lifeboats and headed for the Chinese mainland, but on the way, he lost contact with the second boat. On the strength that Swallow, AKA Waldon, had a sextant engraved with the ship’s name in his possession, and he had arrived in a longboat bearing the name “Edward of London,” his story was accepted. The East India Company officials gave Swallow and his men free passage to London on a merchant ship about to depart from Canton. The escaped convicts might just have got away with the subterfuge but for a stroke of bad luck.

       A second boat arrived at the docks just days after they left. The men on that boat also claimed to be survivors from the Edward. But their version of the story was at odds with the one provided by Swallow. One of the new arrivals was immediately detained, but the rest fled Canton on an outbound ship one step ahead of the law. Then, two more men from the Cyprus turned up in Canton. They had been found on one of the Ryukyu islands and taken to Canton for questioning. When news of the seizure of the Cyprus finally reached the British enclave, the men in custody were questioned more closely, and they eventually confessed to who they were.

    A watercolour by samurai Makita Hamaguchi showing one of the mutineers. CC BY-SA 4.0, https://commons.wikimedia.org/w/index.php?curid=59845977

       A letter was dispatched to London on the next ship to leave, warning the police to be on the lookout for Swallow and the others. That ship arrived in London before Swallow, and the police were waiting. However, by pure luck, he had disembarked at Margate rather than travel up the River Thames to London.   The rest of Swallow’s travelling companions were arrested at the dock, and a couple of weeks later, Swallow was tracked down to a Lambeth boarding house, living under an assumed name.

       In October 1830, Swallow and four others stood trial for piracy. The jury found the others guilty as charged, but acquitted William Swallow after he convincingly pleaded that he had been forced to take part in the mutiny against his will. Although Swallow escaped punishment for piracy, there was still the matter of his returning to England illegally. He was once again sent to Van Diemen’s Land, where he died at Port Arthur Penal Settlement on 12 May 1834.

    © Copyright C.J. Ison / Tales from the Quarterdeck, 2024.

    Please enter your email address below to be notified of future blogs.

  • A Textbook Escape – The Badger 1833.

    Example of an English Cutter of early 1800s. Source: All About Ships, Dorling, 1912.

       In July 1833, the colonial cutter Badger left Hobart with its hold filled with supplies intended for Port Arthur. Only this time, as she set off down the Derwent River instead of rounding Cape Raoul and delivering her stores, she kept heading east, past Tasman Island, past Cape Pillar and out to sea. The captain and crew, all convicts still under sentence, had likely been planning their escape for some time. Now they were putting it into action.

       The Badger had a crew of four under the command of Captain William Philp.   All the men had been mariners before they had run afoul of the law and been banished to Van Diemen’s Land. All but one were serving life sentences, meaning there was no likelihood they would ever return home. Their captain was a former master mariner who had been found guilty of “Wilfully and maliciously destroying the sloop Jane”. Philp had been a part-owner of the vessel as well as its captain. Late one night, he loaded it with gunpowder and blew it up in Penzance Harbour after a falling out with his business partners.

       He was tried, found guilty and sentenced to transportation for life. Aged 51, Philp was sent out to Van Diemen’s Land on the convict transport Argyle in 1831. During the passage, he was suspected of conspiring with others to seize the ship and make their escape. The evidence was circumstantial and most likely supplied by a convict informant, but that was enough for Philp and eight or so others to be clapped in chains and separated from the rest of the prisoners. On the Argyle’s arrival in Hobart, the conspirators, including Philp, were tried, found guilty and sentenced to serve hard labour at Macquarie Harbour. 

       On his eventual return to Hobart, Philp finally got a break. He was put in charge of the 25-ton schooner Badger, ferrying stores from Hobart to Port Arthur about 70 kilometres sailing down the Derwent River. Port Arthur had recently been established to replace Macquarie Harbour, which was about to be shut down the following year.

    The Colonist, 6 Aug 1833, p. 3.

       By 1833, the Badger’s entire crew were experienced seamen. It was not uncommon for the authorities to assign sailors to work on government vessels, for they already had the necessary skills. However, there was always the obvious risk that the colonial administrators were giving them the means of effecting their own escape. Such was the case with the Badger. Governor Arthur was mercilessly criticised for allowing such a situation to eventuate.

       On Tuesday, 23 July 1833, William Philp took the Badger out of Sullivan Cove and headed down the Derwent River much as he had done many times before. As well as carrying plenty of provisions, on this trip the Badger was also well equipped with nautical charts, navigation instruments and several muskets recently procured by Philp and his men. What’s more, as many as a dozen convicts had also been smuggled aboard and hidden in the hold.

       The Badger left the wharf unchallenged and did not raise any suspicion as she sailed under the guns of Battery Point. To everyone but those on board, she was on her regular passage to Port Arthur. But before she had gone more than five kilometres down the Derwent, she briefly pulled into shore and picked up a final passenger, one George Harding Darby.

       Darby, like all the rest of the men on the Badger, was a convict still under sentence. But he enjoyed many privileges not accorded to ordinary convicts sent out to the colonies. A gentleman by birth, he was a member of the same class as the military officers and administrators governing Van Diemen’s Land. At the time, he was employed as a signalman at Mount Nelson Signal Station, which relayed messages from Port Arthur to Hobart. He had also worked at the Water Bailiff’s office and was likely the person who got Philp his job as the Badger’s master and ensured he had a crew of loyal and competent sailors.

    Courtesy Google Maps

       Darby and Philp, both nautical men, had become friends while held in a prison hulk awaiting transportation. Darby had come out to Van Diemen’s Land on the William Glen Anderson the same year as Philp had come out on the Argyle. George Darby had served in the Royal Navy and, during Greece’s war of independence from the Ottoman Empire, had commanded a naval vessel under Lord Cochrane. He was also reputed to have served with distinction during the battle of Navarino in 1827 further enhancing his reputation among Hobart’s administrators. However, by 1830, he had left the navy and had found employment as a clerk. By 30 March 1830, he was standing in the docks answering charges of stealing £90 from a fellow gentleman. He was found guilty and sentenced to be transported for life.

       Several days passed before anyone realised the Badger had not delivered her stores to Port Arthur. Boats were sent out to track her down. It was thought that Philp might have sought refuge in the Bay of Islands in New Zealand.   So, the brig Isabella was even sent to investigate with a party of soldiers on board. However, she returned to Hobart in late September, having found no trace of the missing Badger. Philp, Darby, and the others had somewhere much further afield in mind when they sailed away from Hobart. They had made their way north, first through the Tasman and from there into the Coral Sea. In September, they pulled into Lifuka in the Friendly Islands (present-day Tonga) before resuming their journey north across the equator and on towards the Philippines.

       Philp, Darby and the rest of the runaways eventually arrived in Manila in a longboat, claiming their ship had sunk not far from that port. It is certainly possible that they ran into trouble close to their destination, as they claimed. But it is more likely they had deliberately scuttled the ship rather than risk it being identified as the missing Badger. Philp and Darby would have known that Governor Arthur would have sent a description of the Badger and its runaways far and wide in his effort to track them down.

    The Pria Granda, Macao, by Thomas Allom, from a sketch by Lieut. White, Royal Marines. (1843)

       The bolters did not linger in Manila for very long. They boarded a Spanish ship bound for the Portuguese colony of Macau. But in Macau, their luck nearly ran out. William Philp was spotted by the master of the British merchant ship Mermaid, which happened to be in port. Before taking command of the Mermaid, Captain Stavers had served as the mate on the convict transport Argyle. He immediately recognised Philp as one of the convicts who was suspected of plotting to seize his ship.

       Stavers tried to have the Portuguese colonial authorities detain the Philp and his mates. He showed the officials an old copy of the Sydney Herald newspaper, which included a report on the seizure of the Badger as evidence. Philp and Darby were picked up and questioned by a Portuguese official, but they claimed to have never heard of the Badger.

       As Philp and the others had kept their noses clean while in Macau, the Governor was not inclined to lock them up on the say-so of a foreigner brandishing an old newspaper in a language he did not understand. Philp and Darby were released to go about their business unmolested, but now that their true identities were known, they thought it was time to move on in. Apparently, most of the runaways had already found berths on an American-flagged ship about to leave port. Philp was last seen in Macau after kindly declining an invitation to join a ship bound for Sydney, telling the British captain, “[he] did not wish to go so far southward.”

    Philp, Darby and the rest of the men who fled from Van Diemen’s Land on the Badger are among a very select group of convicts. Of the many hundreds who escaped in stolen or seized vessels, very few are known to have made it to a friendly port. None of the Badger’s men were ever heard of again after leaving Macau.


    © Copyright C.J. Ison / Tales from the Quarterdeck, 2024.

    Please enter your email address below to be notified of future blogs.