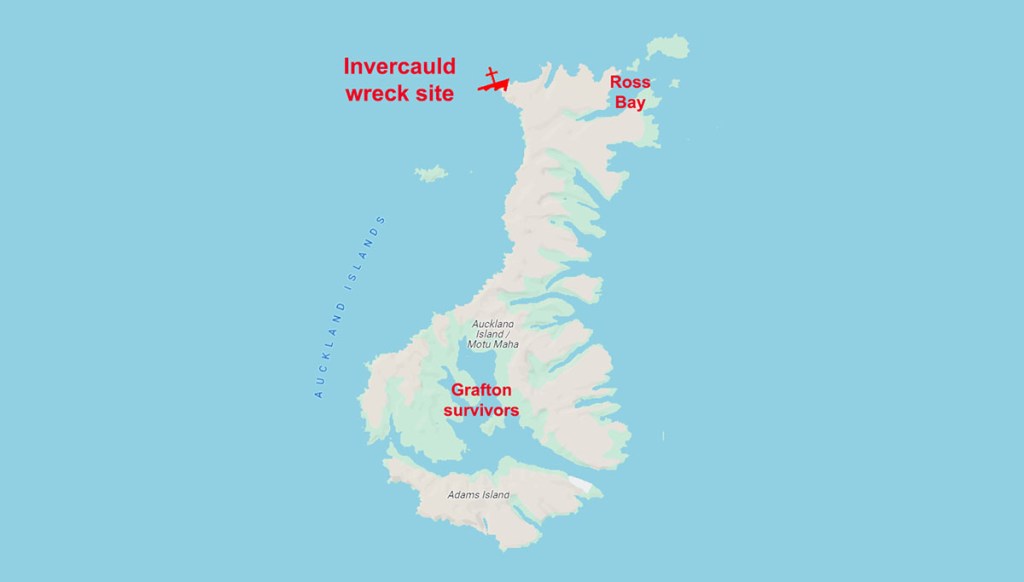
In recent years, the loss of the Invercauld and its tragic aftermath has been held up as an example of what can go horribly wrong when leadership fails. In contrast to the wreck of the Grafton, on the same island at the same time, where all five men survived, only three of the Invercauld’s 25-man crew lived through the ordeal. The considerable loss of life has sometimes been blamed on the captain’s failure of leadership. But that harsh criticism is based largely on a version of events contained in a memoir written by one of the survivors, some 60 years after the event. Robert Holding had little to say in praise of his captain, but his chronicle stands in stark contrast to the only contemporary account left by one of the other survivors. His story is one of grinding struggle against the elements, a hostile landscape, and a scarcity of food.
The Invercauld was a 888-ton merchant ship under the command of Captain George Dalgarno. She sailed from Melbourne on 3 May 1864, bound for the Peruvian port of Callao to load up with guano.
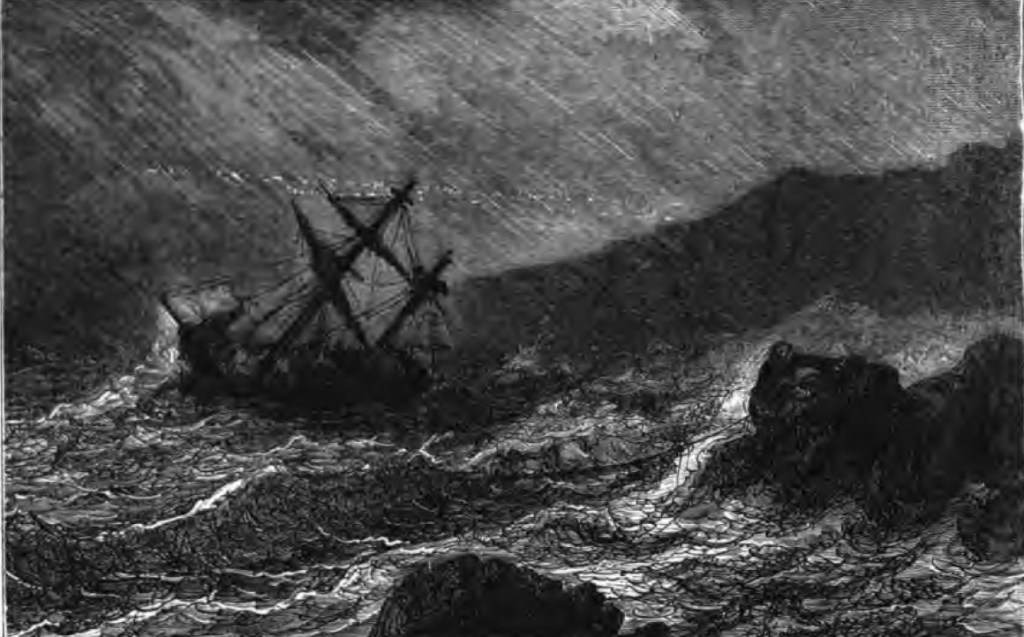
Almost from the outset, they were plagued by foul weather. As they bore southeast in a long, sweeping arc that would take them deep into the South Pacific, they battled strong winds, high seas, rain, sleet, and snow. Then, a week after leaving Melbourne, the lookout sighted the dim outline of land ahead through the pouring rain. Dalgarno took the sighting to be the Auckland Islands, south of New Zealand, at 61 degrees south. He had been unable to take any sightings due to the weather, but had calculated that he was likely approaching their southernmost point. He altered course a few degrees south to clear them with a safe margin. To Dalgarno’s great surprise and alarm, the lookout called land ahead again. Dalgarno’s navigation had been off more than he had anticipated. He realised, too late, that his ship was in mortal danger, for they were being blown towards a lee shore. By now, the sun had set as the storm continued to rage around them. He spied what he thought was a narrow passage separating two islands and decided that this was his best chance to save the ship. He brought the Invercauld around to the north and heaped on as much sail as he dared, hoping to pass unscathed through the channel into calmer waters beyond.
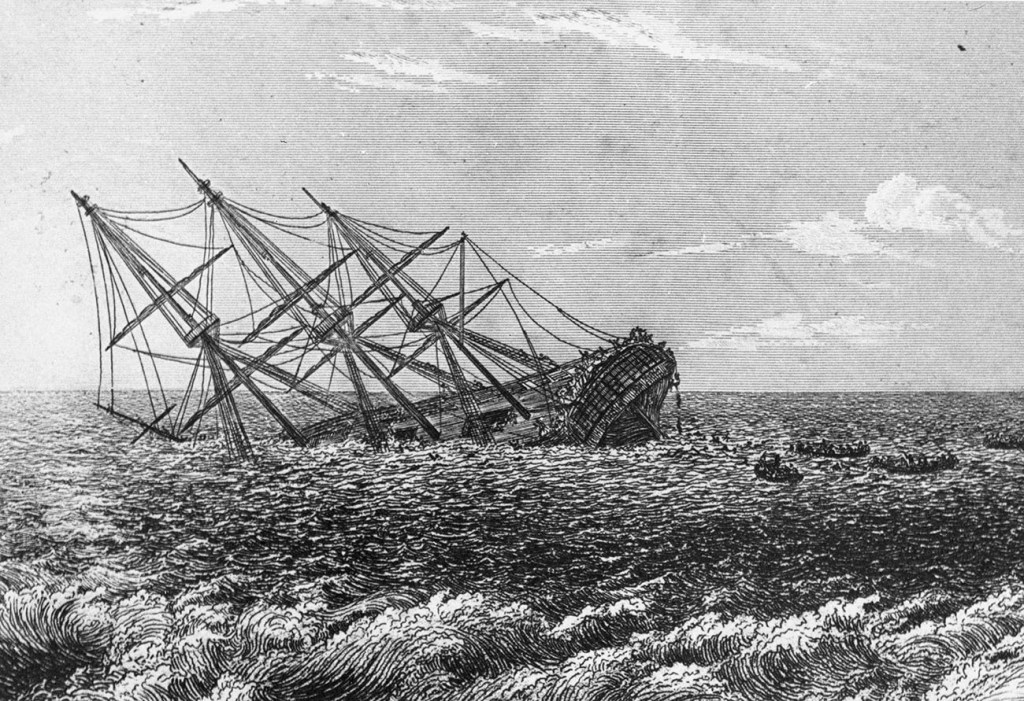
High cliffs loomed out of the inky darkness on the starboard side, and then they were caught in breaking surf. Dalgarno lost all control of the ship. She ran aground broadside on a rocky shore. Huge waves crashed over the deck. There was no time to get the lifeboat over the side, for the Invercauld almost immediately broke apart under the pounding. The men ditched their boots and heavy oilskins as the ship came apart under their feet. Twenty-five men were swept into the turbulent sea to be washed ashore in a small cove backed by towering cliffs. Only 19 men survived the sinking, and all were battered and bruised from being bashed against rocks and wreckage.
The sodden survivors huddled together for warmth during that first freezing night as the sea spray, rain, and sleet beat upon them. In the early hours, they gathered some of the wreckage to build a lean-to, which gave them some shelter from the worst of the elements. When the sun rose, they got their first proper look at where they had been tossed ashore. They were trapped on a narrow crescent of rocky beach hemmed in on three sides by towering cliffs. The only food they had been able to find washed ashore from the wreck was a kilogram of salt pork and a kilogram bag of sea biscuits, not much to sustain 19 cold and hungry men. One item that would aid them in the future, once it had dried out, was a soggy box of matches that the steward had found in his pocket.
To remain where they were would spell the end of them all. The only option they had was to scale the cliffs and see what lay at the top. The climb would claim another sailor who slipped and fell to his death. When Dalgarno and the 17 surviving crew reached the top, they found an inhospitable landscape of dense scrub and coarse grass as far as they could see. Dalgarno thought they would have a better chance of surviving on the more sheltered eastern side of the island. So, off they set, barefoot through the thick vegetation. It took them two weeks to cross the island. Two weeks of pushing through dense scrub, of being lashed by freezing wind and rain, of barely subsisting on a diet of roots and leaves, but for one day, when they caught a small pig.

Four men died from fatigue and exposure during the long trek. Six others broke away from the main group led by Dalgarno, wanting to return to the shipwreck site. Holding was one of them, but he rejoined the main group a few days later. The other five were never seen again.
By the time they reached a bay on the eastern shore, the party had been reduced to just nine men. There, they found an abundance of limpets fixed to the rocky shore and feasted as only starving men could. But even that plentiful supply was eventually exhausted. They decided they would cross a ridge to the south, hoping they would find another bay filled with shellfish.
As they crested the ridge, Dalgarno saw two huts on the edge of a bay. They were the first signs of civilisation they had seen since being tossed ashore. When they reached the huts, they found them to have been abandoned, but they provided welcome shelter from the winter elements and the hope that someone might return during the summer months. In fact, the huts were the remains of Endeby’s short-lived whaling station on Ross Bay, which had lain abandoned for the past decade.
For a time, their fortunes improved. For men who had nothing, the huts were a treasure trove of rubbish that could be repurposed into useful tools of survival. Empty tin cans became boiling pots for limpets. A sheet of iron served as a hotplate over their cooking fire. The discovery of an old adze and hatchet made cutting firewood so much easier. On their first day, they caught a seal, which they feasted on that night. Unfortunately, that was the only one they found, so their diet primarily consisted of limpets, wild roots and greens.
When they had exhausted this bay of shellfish, remaining any longer seemed pointless. Dalgarno and three others remained at Ross Bay while Andrew Smith, the chief mate and narrator of the only contemporary account of the wreck and its aftermath, Robert Holding and the other two sailors set off to find a better source of food further along the coast. By the time they found a suitable cove and returned to collect the others, only Captain Dalgarno was still alive. The others had succumbed to the cold and starvation. Two more would die in the coming months, leaving just Dalgarno, Smith and Holding still alive.

Again, their fortunes seemed to improve, at least for a while. After hunting down a couple of seals, they constructed a canoe by stretching the skins over a sapling frame. Now they were able to venture further afield in their relentless search for food. Surviving on a diet of fish, sea birds and the occasional seal, they made it through to summer, but that brought a new set of miseries. Sandflies savaged them, and any seal meat or fish left uneaten for more than a day or so became fly blown.
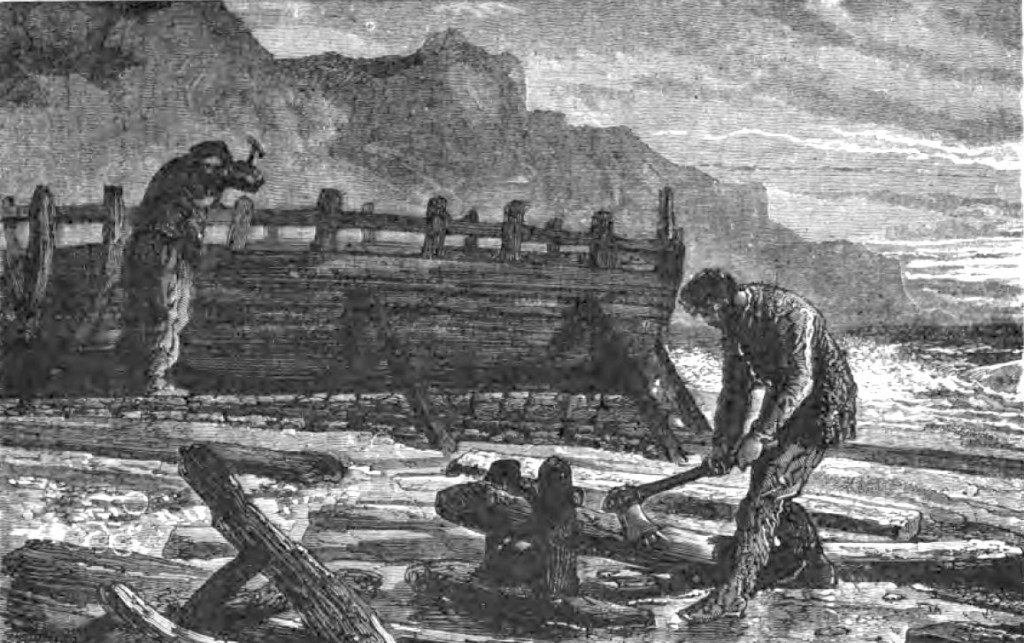
…With rescue looking unlikely, the trio realised their only chance of escape lay in building a boat. It was a move born of desperation, for the nearest port was Invercauld in New Zealand, nearly 500 km away. They returned to the huts and pulled them apart using the timbers to construct a boat. However, no sooner had they finished building it than a storm lashed the island and swept it out to sea. They built a second boat with the remaining timbers and, over the next couple of months, used it to travel around Ross Bay and to nearby islands in search of seals and other food sources. They found that one island was thickly populated with rabbits, which eventually proved to be an easy source of meat and skins.
As their second winter loomed, they built a sturdy sod-walled hut complete with a fireplace and chimney to see them through the coldest months. Then, on 21 May 1865, one year and ten days after being cast upon the island, a vessel dropped anchor in Ross Bay. It was the Portuguese ship Julian, which had pulled in for repairs while on a voyage from Macao to South America. The Julian’s captain had seen Endeby’s whaling station marked on his chart and had hoped to get some help repairing his badly leaking ship. All he found were the Invercauld’s three castaways. When the Julian set off for South America, Dalgarno, Smith, and Holding went with her.
Main sources: The Castaways: A Narrative of the Wreck and Sufferings of the Officers and Crew of the Ship “Invercauld” of Aberdeen on the Auckland Islands by Andrew Smith, 1866; Captain Dalgarno’s letter to the ship’s owners published in the Birmingham Daily Post, 31 July 1865, p. 8; and A Narrative of the wreck of the “Invercauld” among the Auckland Islands by Captain Dalgarno in Wrecked on a Reef by Francois Raynal, 1874.

© Copyright C.J. Ison / Tales from the Quarterdeck, 2024.
Please enter your email address below to be notified of future blogs.