Tag: Western Australia

  • William Dampier: Navigator, naturalist, writer, pirate.

    Life and adventures of William Dampier. Source: Tales of Shipwrecks and Adventures at Sea, 1856.

    William Dampier visited Australian shores twice in the 17th Century. The first time was when he served on the Cygnet in 1688, and the second, 11 years later, when he commanded HMS Roebuck. Dampier was the first Englishman to describe the land, its fauna, flora and people to a European audience. While his contribution to Australia’s history is relatively minor, his story is nonetheless a fascinating look into the golden age of exploration. Navigator, naturalist, writer, and pirate are all words that describe aspects of Dampier’s colourful life.

       Born in Somerset in 1651, William was the son of a tenant farmer. He does not appear to have had any interest in following in his father’s footsteps. Instead, when he turned 17, he went to sea and began his apprenticeship as a mariner. He joined the Royal Navy around 1673 and saw action during the Third Anglo-Dutch War. When hostilities ceased, he left the navy and travelled to the West Indies. Then, when war broke out between England and Spain, he became a privateer, which could best be described as a state-sanctioned pirate. In 1678, now aged 27, he returned to England and married his fiancée. However, he would spend just one year with her before he put to sea again.   

    This time, he would be gone 12 long years. After hunting down Spanish ships off Central America, he joined another privateer and crossed the Pacific Ocean in search of plunder. He visited ports in the Philippines, China and Southeast Asia. Then, in January 1688, he was on the Cygnet when it stopped on Australia’s northwest coast. The ship had pulled in for repairs at King Sound north of present-day Broome and would remain there for a couple of months. Dampier spent his time documenting the unusual fauna and flora. He also wrote at some length about his observations on how the indigenous people lived, but not in particularly flattering terms. To his Eurocentric eye, they existed in appalling conditions, and he thought them to be the most miserable people he had ever encountered.

    A map of the world showing the course of Mr Dampiers voyage round it: From 1679 to 1791. By Herman Moll.

       In 1691, Dampier joined a very exclusive club of men who had circled the globe when he returned to England via the Cape of Good Hope. His various exploits and adventures became the subject of his hugely successful book, “A New Voyage Round the World,” published in 1697. Through his book, Dampier came to the attention of both the Royal Society and the Admiralty. They commissioned him to chart the east coast of New Holland, some 70 years before James Cook would eventually do so. Had Dampier succeeded, he may well have changed the trajectory of modern Australian history. However, as will soon become evident, circumstances would conspire against him.  

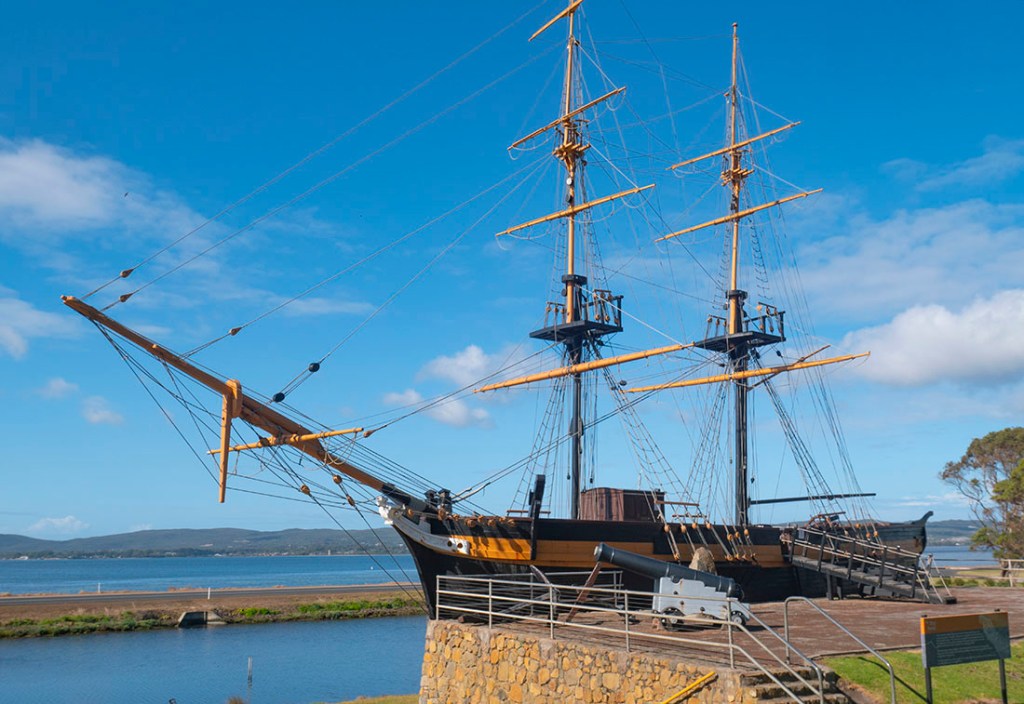
    HMS Roebuck sailed from England on 14 January 1699 with a crew of 50 and provisions to last them 20 months. Dampier originally planned to sail around Cape Horn and then cross the Pacific Ocean until he reached Australia’s east coast. However, his ship was long past its glory days, and its refit for this hazardous voyage had taken far longer than anticipated. By the time he reached the southern tip of South America, it was winter, the worst time to try rounding Cape Horn. Instead, he decided to cross the South Atlantic and round the Cape of Good Hope. He would then cross the Indian Ocean to New Holland’s west coast and begin his survey there.

    HMS Roebuck.

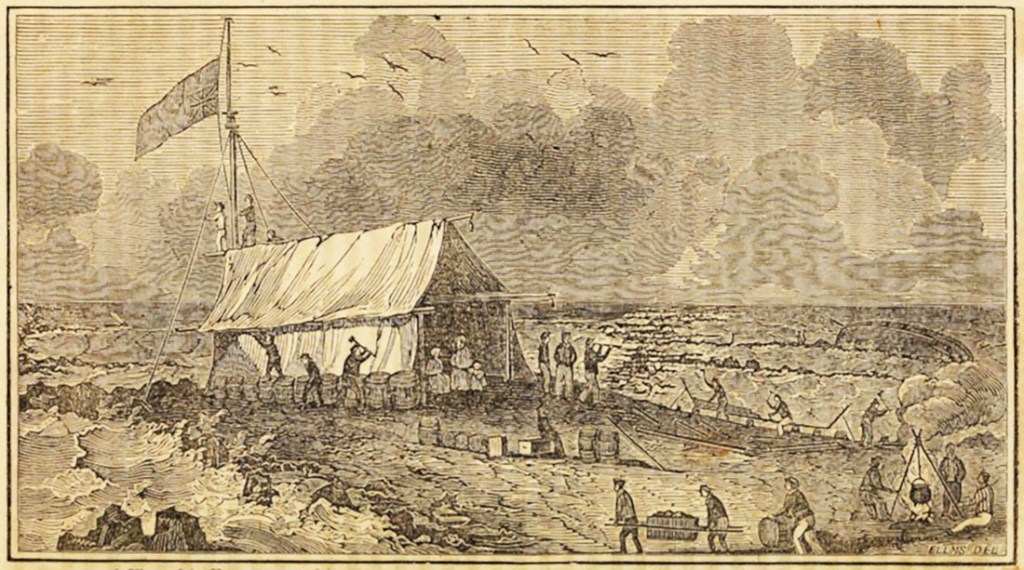
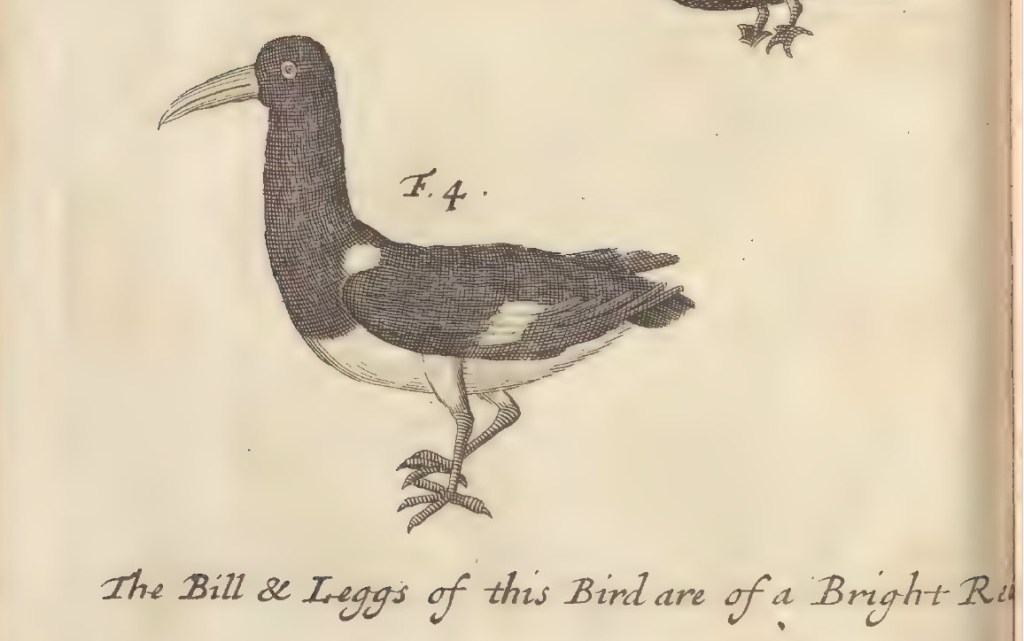
    They made landfall near Dirk Hartog Island in early August 1699.   On 7 August, he sailed past Cape Peron and into Shark Bay, where he spent a week exploring.   Dampier named it for the abundance of sharks he found in those shallow, enclosed waters. He made a detailed chart of the bay and described many of the fish, birds and plants he saw there. Though fish, fowl, and turtles were easily procured and made a welcome addition to the men’s diet, they were unable to find a supply of fresh water. On 14 August, Dampier left Shark Bay by the same passage he entered after encountering shoals and dangerously shallow water between Dorre and Bernier Islands and the mainland.

    A Pied Oyster Catcher. Source: A Voyage to New Holland, in the year 1699.

    They continued north along the coast for another 750 kilometres until they arrived at a small group of islands, now known as the Dampier Archipelago. Freshwater remained elusive, so they continued sailing north until they were at latitude 18° 21’ south, about 60 to 70 km south of present-day Broome. Again, they went in search of water. And, again, they returned empty-handed. Only this time, an encounter with the local inhabitants ended in violence. One of Dampier’s men was speared through his cheek while a Karajarri man was wounded by musket fire. In early September, Dampier resigned himself to temporarily abandoning New Holland and made for Timor to resupply.   

    From Timor, Dampier continued sailing northeast and charted the northern coast of New Guinea. By now, the Roebuck was in such poor shape that he abandoned his plan to locate New Holland’s east coast and turned back towards England. He stopped briefly at Batavia, then crossed the Indian Ocean, rounded the southern tip of Africa, and sailed north through the Atlantic. In February 1701, they reached Ascension Island, but HMS Roebuck would go no further. Her planking was riddled with seaworms. And she was taking on a lot of water. Dampier had to run her ashore to stop her from foundering in deep water. He and his crew would remain stranded there for five weeks until a passing East Indiaman rescued them. Dampier and his men returned to England in August 1701.

    1966 Australian postage stamp commemorating William Dampier.

    William Dampier was court-martialled on his return to England on a charge of ill-treating his first mate on the voyage out. Found guilty, he was stripped of the money the Admiralty owed him, and he was ruled unfit to command any of His Majesty’s ships in the future. Undeterred by the setback, he published a book about his most recent exploits and would go on to circumnavigate the world twice more. When Dampier died in London around 1715, he was the only person to have circled the globe three times.

    Sun sets over Flinders and Stanley Islands in Bathurst Bay with a fishing boat in the forground at Cape Melville on Cape York Peninsular, Far North Queensland. Photo Chris Ison / Wildshot Images.

     © Copyright C.J. Ison / Tales from the Quarterdeck, 2024.

    Please enter your email address below to be notified of future blogs.

  • The Batavia Tragedy – 1629

    Shipwreck of the Batavia, F. Pelsaert, F., & Vliet, J. (1647). Courtesy State Library of NSW FL3726282

    On 4 June 1629, the Dutch East Indies Company (VOC) ship Batavia slammed into a reef off the Western Australian coast, stranding over 300 men, women and children far from any immediate hope of rescue. But that was just the beginning of one of maritime history’s most appalling chapters. About 40 died when the ship ran aground, or in the immediate aftermath, as waves pounded her until she broke apart. But a nightmare far, far worse awaited those survivors who thought they had escaped disaster by reaching ashore alive.

       The 650-ton merchant ship Batavia was launched in 1628 and was immediately adopted as the VOC’s flagship. She sailed from Texel, in Holland, on 29 October of the same year, with a flotilla of six other vessels, all bound for the Dutch East Indies (present-day Indonesia). The ship’s hold was filled with a general cargo, but also included a fortune in gold and silver coins. Passengers on board the Batavia included several women and children, all family members of VOC officials. Counting the sailing crew, a complement of soldiers, there were, in all, 341 souls.

       Shortly after setting off, the convoy became separated during a powerful storm. The Batavia and two other ships remained together as they sailed South until they reached the Cape of Good Hope. There, the Batavia was beset by a problem of a more human character.

       While stopped at the Cape of Good Hope, Francisco Pelsaert had cause to reprimand the Batavia’s captain, Adriaen Jacobsz for drunkenness. Pelsaert was the VOC’s most senior merchant in the flotilla and had overall command of the Batavia, including its captain, Adriaen Jacobsz. The incident would leave the captain with lingering bitterness toward Pelsaert. Another VOC official travelling to the East Indies was a man named Jeronimus Cornelisz, but more about him a little later.

    The Dutch VOC ship Batavia which was wrecked off the Abrohlos Islands off Geraldton, WA. Western Australian Shipwreck Museum

    After leaving Cape of Good Hope, Pelsaert fell ill and spent much of the time confined to his cabin. Meanwhile, Jacobsz and Cornelisz are thought to have formulated a plan to seize the ship and its treasure of gold and silver and do away with Pelsaert and anyone else who got in their way. The first step was to lose the two other VOC ships it was sailing with. One night in the middle of the Indian Ocean, Jacobsz bore away from them before returning to a westerly course. But, before he and Cornelisz could fully implement their plan and take control of the Batavia, she ran aground on Morning Reef in the Houtman Abrolhos Islands about 60 km off the Western Australia coast.

       Around two hours before dawn, Pelsaert was thrown from his bunk as the ship struck the reef. Shortly after sunrise, Pelsaert, Captain Jacobsz and about 40 others set up camp on what would later be known as Traitors Island by those who were left behind. Most of the passengers, the soldiers and the rest of the crew were ferried to nearby Beacon Island along with what food and water could be saved from the wreck. Cornelisz and about 70 or so sailors opted to remain on the Batavia now stranded high on the reef.

       Rather than consolidate the survivors in one place and provide leadership when it was most needed, Pelsaert decided he would take the Batavia’s longboat and go in search of water. With him went every senior officer, a small number of passengers, and several sailors to work the boat, leaving everyone else to fend for themselves.


    Batavia longboat replica moored in the Geraldton Marina. Photo: CJ. Ison.

    The longboat with 48 people crammed on board made for the mainland but failed to find fresh water. They then ventured north possibly as far as Northwest Cape before Pelsaert ordered the captain to make for the Dutch East Indies to seek help. The journey took 33 days, and they arrived without any loss of life, which, to be fair, was no small accomplishment. On reporting the loss of the Batavia, Pelsaert was provided with a vessel to go and rescue the remaining people and bring back the gold and silver and anything else of value that could be salvaged.

       Meanwhile, an unimaginable struggle was playing out among the castaways. Jeronimus Cornelisz had finally landed and taken control of the survivors. He had remained on the Batavia plundering its treasures and alcohol until it finally broke apart, spilling those still on board into the sea. Cornelisz spent two days adrift clinging to a timber plank before he was washed ashore on Beacon Island. Of the 70 or so who had remained on the ship, only 30 made it to dry land.

       Cornelisz was perhaps the worst possible person to lead the survivors. He was a follower of the heretic artist Johannes van der Beeck. Van der Beeck believed that God had put people on earth so they could enjoy their lives in sensual gratification and that religions, including Christianity, restricted those pleasures. It’s thought that Cornelisz may have fled Holland, fearing imminent arrest for his heretical beliefs. And, now that he was stranded on the Abrolhos Islands in the middle of nowhere and free of any moral constraints, he was determined to see out his life in hedonistic bliss. That was, of course, unless Pelsaert returned to rescue the survivors. In that case, Cornelisz planned to seize that ship and make his escape with the Batavia’s gold.

    Portico blocks recovered from the Batavia now housed at the Museum of Geraldton. Photo CJ Ison.

    As the most senior VOC official on the island, Cornelisz took charge and ordered the soldiers to hand in their weapons. He also placed all the food and other supplies under his control. Cornelisz ordered Corporal Wiebbe Hayes and about 20 soldiers to go across to West Wallabi Island to search for water, promising he would send the boat back for them in due course. Cornelisz didn’t expect them to find any water and had sent them on their way so they would no longer pose a threat to him and his plans. He assumed they would be unable to get back off the island and eventually die of thirst.

       He then sent his henchmen out to begin systematically murdering the survivors. Some of the castaways were taken to Long Island ostensibly to look for food and water, where they were abandoned. Others were taken out in boats where they were drowned, and yet other men, women and children were simply butchered in their camp. Interestingly, Cornelisz did not personally kill anyone, preferring to have others do his dirty work for him. Several of the women were kept as sex slaves, including the beautiful 27-year-old wife of a senior VOC official in Batavia named Lucretia Jansz. Cornelisz claimed her for himself. The massacres essentially had two aims. The first was to remove any challengers to his authority, and the second was to reduce the population to make their supplies last longer.

       To Cornelisz’s surprise, Hayes eventually signalled that they had found water on the island. The soldiers had also sustained themselves hunting wallabies, which they found in plentiful numbers. But before Cornelisz thought to send some of his men to investigate, Hayes had already been warned of the terror unfolding on Beacon Island by some of the survivors who had made the perilous passage to West Wallabi on pieces of wreckage.


    Houtman Abrolhos Islands. Courtesy Google Maps

    When Cornelisz and his men finally went to deal with the soldiers, they found that Hayes had organised his men, armed them with makeshift weapons and they had built a breast-high redoubt from which they could repel attackers.

       The skirmish proved disastrous for the mutineers. Several were killed by Hayes and his men when they tried to storm their fortification. The rest withdrew in defeat, abandoning the island to the soldiers.

       Cornelisz then went to meet with Hayes in person to try and persuade him to join the mutineers, but to no avail. In a second skirmish, Hayes took Cornelisz and several of his men prisoner, but the rest escaped in the boat they had come to West Wallabi Island on. From then on, the two parties were at an impasse; neither had the strength to defeat the other.    But in October, more than three months after abandoning the Batavia survivors, Pelsaert sailed into sight. The fate of the remaining survivors now rested on a race to reach the rescuers. It was a close-run affair, but Hayes got to Pelsaert first and reported what had taken place in his absence. Finally, the reign of terror came to an end, but not before more than 100 men, women, and children had been brutally murdered.

    Skeletal remains from the Batavia massacre now housed at the West Australian Shipwreck Museum in Fremantle. Photo CJ Ison.

    Cornelisz’s remaining men were quickly rounded up. Cornelisz and six others had their hands cut off and were then hanged on Long Island after confessing their crimes. Two more were left to their fate on the Australian mainland near present-day Kalbarri, and the rest were taken to Batavia, where they were tried and later executed. Captain Jacobsz steadfastly denied ever conspiring with Cornelisz to mutiny, but he appears to have seen out his days in Batavia’s prison.

       Far from emerging as a hero, Pelsaert was found partly responsible for the tragedy. A VOC inquiry condemned his decision to leave in the longboat, feeling he should have remained with the Batavia survivors, where his leadership could have prevented what took place. Pelsaert lost his entire life savings in fines, and less than twelve months later, he died a broken man. The true hero of the terrible tale was Corporal Wiebbe Hayes. He and some of his men were promoted in rank for their actions. A statue of Hayes stands on Geraldton’s foreshore, 90 km away from the islands, as a testament to his humanity, devotion to duty and courage.

    The Batavia Tragedy is one of the 60 stories that can be found in “Tales from the Quarterdeck.”

    Sun sets over Flinders and Stanley Islands in Bathurst Bay with a fishing boat in the forground at Cape Melville on Cape York Peninsular, Far North Queensland. Photo Chris Ison / Wildshot Images.

    © Copyright C.J. Ison / Tales from the Quarterdeck, 2023.

    To be notified of future blogs, please enter your email address below.

  • The Brig Amity’s Amazing Career

    Brig Amity replica at Albany Western Australia. Photo: C.J. Ison.

       All Australian school children learn of the Endeavour’s role in the history of Australia. Some people may have heard of the First Fleet’s flagship, Sirius, or the Investigator, which Matthew Flinders used to chart much of Australia’s coastline. But, I would wager few have ever heard of the brig Amity or know of her contribution to our colonial past.

       During the brig Amity’s six years as a colonial government vessel, she was employed to establish two new settlements in what would one day become Queensland and Western Australia. She went to the rescue of the Royal Charlotte survivors after that ship ran aground on Frederick Reef in Australia’s dangerous northern waters. She regularly transported convicts, soldiers, and supplies from Sydney to outlying settlements and circumnavigated the continent on two occasions.   

    The Amity was built in New Brunswick, Canada and launched in 1816. She was a modest-sized vessel even by the standards of the day, at 148 tons, measuring a fraction over 23 metres (75 feet) in length. But she was a sound ship and could handle rough weather.

    Officer’s stateroom with tiny individual sleeping cabins leading off the main room. Photo: C.J. Ison.

       The little brig spent the first few years of her life hauling cargo back and forth across the North Atlantic between North America and Britain. In 1823, a Scotsman named Robert Ralston purchased her, having decided to emigrate to Van Diemen’s Land with his large family. He fitted the vessel out for the long voyage and filled its hold with cargo and livestock for his new adopted home.

       After a five-month voyage, the Amity sailed up the Derwent River and dropped anchor in Hobart Town on 15 April 1824. Ralston and his family purchased land and established several businesses in Hobart and Launceston, and a few months after their arrival, he put the vessel up for sale.   

    The New South Wales colonial government purchased the Amity in August 1824. The brig’s first assignment was to establish a new settlement at Moreton Bay. Two years earlier, the Bigge Report had recommended establishing a place of secondary transportation somewhere far north of Sydney for convicts who had committed additional crimes in the colony.

    The Moreton Bay Penal Settlement about 10 years after its founding. Photo Courtesy SLQ.

       On 1 September, the Amity and her crew sailed with a military officer, 20 soldiers, plus wives and children, a handful of civilian administrators, plus 30 convicts. The journey took 11 days and was marked by severe storms. Accommodation between decks measured just 1.5 metres (5 feet) high. Here, the seasick soldiers, wives, and convicts spent a miserable time packed in with the new settlement’s pigs, goats and poultry. Nonetheless, they made it at Moreton Bay and her passengers and stores were disembarked at Redcliffe, where John Oxley decided the new settlement would be established.

       Later in the month, the ship was nearly wrecked. She had been anchored out in Moreton Bay when a storm blew up. The Amity’s anchors started to drag as she was pushed towards shore. A third anchor was dropped, and the ship was held in place, averting disaster. Soon after that, she left the new settlement and returned to Sydney for more stores. On her third trip to Moreton Bay, in mid-1825, she helped relocate the settlement. Redcliffe had proved not as suitable as Oxley had thought it would be. The new location, on the north bank of the Brisbane River, was thought to be a far more suitable one.

       While anchored in Moreton Bay, one of the crew spotted an unfamiliar longboat coming towards them. This turned out to be the first mate and several survivors from the ship Royal Charlotte, which had run aground a month earlier on Frederick Reef, some 720 km (almost 400 nautical miles) north in the Coral Sea.

       The first mate reported that there were still nearly one hundred souls, many of them women and children, stranded on a small sand cay which was almost awash at high tide. The Amity was immediately sent to rescue the castaways and arrived off the reef on 28 July. Getting close to the survivors proved a dangerous operation with powerful breakers crashing into the reef, threatening any vessel that got too close. The Amity eventually anchored several miles distant and its whaleboat was sent to evacuate the survivors and salvage as much as they could from the wreck. With an additional hundred people squeezed into the small brig, she sailed directly for Sydney, arriving there ten days later.

    A view of the encampment of the shipwrecked company of the Royal Charlotte on Frederick’s Reef. Illustration by Charles Ellms (circa 1848)

       For the next 18 months or so the Amity was in constant use ferrying convicts and supplies between Sydney and the outlying settlements at Norfolk Island, Moreton Bay and Port Macquarie. But, in late 1826, Governor Darling, who had recently replaced Governor Brisbane, had another important mission for the Amity and her crew.

       She was ordered to take three officers and a small detachment of soldiers, 23 convicts, plus a handful of civilian officials under the overall command of Major Edmund Lockyer to establish a new settlement. This one was to be located in the remote south-west of the continent at King George Sound (Albany).

    Convicts and other passengers were accommodated between decks which measured just five feet in height. Photo: C.J. Ison.

       Until then, Australia’s southern coast from Bass Strait to Cape Leeuwin was little known outside its indigenous peoples and the haunt of sealers who lived largely outside the law. Darling was increasingly concerned that the French, whom he had learned had recently visited the area, might try to establish a permanent presence there. 

       The small brig weighed anchor on 9 November 1826, but she soon ran into a severe storm, which saw her put into George Town on the Tamar River in Van Diemen’s Land for repairs. She finally anchored safely in King George Sound on Christmas Day, and the next morning, she began disembarking her passengers and cargo. A month later, the Amity returned to Sydney and resumed her regular resupply duties.   

    In May 1827, she accompanied HMS Supply and the brig Mary Elizabeth on a voyage via Torres Strait to Fort Dundas on Melville Island, not too far distant from present-day Darwin in the Northern Territory. Fort Dundas had been established three years earlier to facilitate trade with visiting Macassan fishermen, but it was eventually abandoned, due in part to the determined resistance put up by the indigenous Tiwi people.

    Sketch of Fort Dundas – 1824 by JS Roe. Picture courtesy State Library of Western Australia.

       Leaving Fort Dundas and the other two ships, the Amity continued circumnavigating the continent, stopping to drop off supplies at King George Sound before returning to Sydney via Bass Strait.

       In 1828-29, she paid another visit to the remote northern and western settlements when she dropped off stores before returning to her home port of Sydney, thereby completing a second circumnavigation.

       The following year, December 1830, the New South Wales government sold the brig off. She made her way back to Hobart and passed through several hands over the next decade. A couple of owners tried whaling while others employed her as a cargo ship, but they all seemed to struggle to turn a decent profit.

       In 1842, the Amity was now 26 years old and no doubt past her prime. Her new owner, a Hobart butcher named Gilbert, used her to transport livestock across Bass Strait from the mainland to Van Diemen’s Land.

       On 18 June 1845, she was driven onto a shoal off Flinders Island during one of the ferocious storms Bass Strait is rightly known for.   The ship was destroyed, but fortunately, the captain, owner and crew, numbering 11 in all, survived.    In 1976, a full-size replica of the Amity was completed in Albany to celebrate that town’s 150th anniversary. The replica provides a fascinating close-up look at an early 19th-century sailing ship and to stoop around below decks highlights just how small she really was.

    Brig Amity replica at Albany Western Australia. Photo: C.J. Ison.

    For more interesting stories from Australia’s maritime past check out A Treacherous Coast, Bolters and Tales from the Quarterdeck. All are available now as a Kindle eBook or paperback through Amazon.

    © Copyright: Tales from the Quarterdeck / C.J. Ison, 2020.

    To receive notifications of future blog posts please enter your email address below.

  • The Loss of the Mandalay: Between a Rock and a Hard Place

    Postcard of the Mandalay of Farsund Norway which was shipwrecked at Mandalay Beach near Walpole Western Australia in 1911.

        As Captain Emile Tonnessen saw the sheer granite walls of Chatham Island loom into sight, he knew his ship and crew of 12 men were in serious trouble. He had been pushed dangerously close to Western Australia’s southern coast by unrelenting gale-force wind and high seas for the past several days. And now his 913-ton iron barque Mandalay was in imminent danger. His chart showed that, should he escape crashing into Chatham Island, there was still an uninterrupted line of cliffs beyond which he knew he could not avoid

       The Mandalay had sailed from Delagoa Bay (now Maputo), Mozambique, in early April 1911, bound for Albany WA to take on a cargo of Karri logs destined for Buenos Aires, Argentina. It was to be the 68-year-old captain’s final voyage before retiring to spend time with his children and grandchildren, whom he had seen little of during his more than half a century at sea. But for a last-minute change of plan, he would have returned to his home in Norway directly from Southern Africa.

       The voyage was largely uneventful until Saturday, 13 May, when they neared the Western Australia coast in the vicinity of Cape Leeuwin. The weather had rapidly deteriorated. South-westerly winds grew to hurricane strength, and mountainous seas washed over the vessel. All canvas was taken in, and the Mandalay was swept along under bare poles. The ferocious weather continued for two days, pushing the helpless vessel towards the rugged and sparsely populated coast.

       The crew tried everything they could to get control of the ship. But the only sail they could put up was on the fore-top mast. It was insufficient to deviate the ship from the course the storm was relentlessly pushing them. They had no chance of putting out into open water.

    Chatham Island viewed from Mandalay beach. Photo C.J. Ison.

       On Monday morning, 15 May, they cleared the kilometre-wide and 90-metre-high granite outcrop that is Chatham Island with only a few hundred metres to spare. Tonnessen later recalled that the waves were so large and powerful they crashed completely over the island as his ship raced past.

       While they had escaped being smashed against the granite slopes of the island, it was clear they would not be so lucky to get past the sheer cliffs of Long Point now lying somewhere ahead through the torrential rain. The captain took the only action he could.

       He would have to sacrifice his ship to give his crew a fighting chance of survival. In all his years seafaring, he had never been shipwrecked, but now he was going to deliberately run his vessel aground. It was no doubt made doubly hard for him, as he was a part-owner of the Mandalay, and he knew her to be underinsured.

    The Mandalay stranded on the beach.

       It was now about one o’clock in the afternoon. Tonnessen lined up to run the ship ashore on the only beach he could see, hoping for the best. The crew hoisted as much sail as they could, then donned their cork lifebelts and braced for the impact. About 100 metres from the beach, the bow struck the sand hard. The top main mast came crashing down, and the ship bounced along the seabed as successive waves lifted the ship and pushed it a little closer to shore. Then the Mandalay swung broadside to the ocean swells, and breakers crashed over the deck, sweeping it clean of anything not securely tied down.

       The crew lowered a lifeboat over the lee side, but the seas were too turbulent to safely cross the short distance to land. One of the young seamen, Knut Knutsen, tied a rope to his lifebelt and dived into the sea, intent on getting a line ashore.

       Unfortunately, the rope became entangled around his legs, and he floundered in the chaotic surf. Knutsen was close to drowning when a second sailor, Frank Ward, dived into the maelstrom to rescue him. Ward managed to get his friend to shore, and the two of them anchored their end of the rope. With one end of a line attached to the ship and the other end with Ward and Knutsen on shore, the lifeboat was able to ferry the rest of the men to safety.

    L-R Frank Ward and Knut Knutsen at Fremantle after the wreck of the Norwegian barque Mandalay. Photo published in the Western Mail, 3 June 1911, p. 27.

       The castaways were able to get sufficient materials ashore to build a shelter using some of the ship’s sails and spars. Unfortunately, they soon discovered that most of the food they salvaged had been contaminated with seawater.  They ate it regardless, figuring it was better than starving.

       They spent several miserable days camped on the beach, hoping they might be rescued. They placed a pole high on a sand dune with a distress signal flying. Several ships were seen passing in the distance, but none deviated from their course. Thonnessen knew it would have been suicide to try to get a boat ashore in the appalling conditions. But he hoped that at least one of the ships had seen the wreck and the fluttering flags and reported the disaster to the port authorities in Albany.

    The crew of the barque Mandalay. Photo courtesy Walpole Nornalup and District Historical Society.

       While Captain Tonnessen and the others remained camped on the beach, the first mate, Lars Gjoem, and two seamen set off on Tuesday, the day after the wreck, with compass and chart to see if they could find their way cross-country to the nearest settlement. Two days later, they returned to the beach cold, wet and exhausted, unable to find a path through the dense bush.

       On Friday, 19 May, the day after the party returned, the second mate, Frederick Fincki, climbed the highest hill behind the beach, and from that vantage point, he thought he could see a route through the maze of broken ground. He briefly returned to the camp to collect a staff and a knife and set off towards what he would later learn was Nornalup Inlet.

       He soon found himself wading through a swamp. But he doggedly pushed on for several hours, praying he would eventually reach dry land. Fincki made it to Nornalup inlet, arriving just as a local settler, Frank Thompson, was returning in his boat with supplies from Albany. Fincki was lucky, for that was a trip Thompson only did once every three months.

       Thompson, picked up Fincki and took him to his home, wondering to himself what would have happened had he not been passing when he did. It was bitterly cold, night was fast approaching, and the young Norwegian had been far from dry land. Thompson thought his chances of surviving would have been poor.

       The following day, Thompson, his son and the second mate returned to the beach to rescue the remaining men. Over the next several days, the shipwrecked sailors were cared for by Thompson and other settlers until they could be delivered to the small settlement of Denmark, located further down the coast. From there they were taken on to Albany, where they caught the train to Perth.

    Mandalay Beach with Long Point in the background. The wreck lies approximately in the centre of the photo. Photo C.J. Ison.

       Frank Thompson was presented with a gold fob watch by a grateful Norwegian Consul. Thompson and the other settlers who came to the crew’s aid earned the undying gratitude of Captain Tonnessen and his men. The Mandalay was never refloated and slowly rusted away on the beach that now bears her name. Its remains are periodically exposed when the conditions are right.

    ©Copyright C.J. Ison / Tales from the Quarterdeck, 2020.

    To receive notification of future blog posts, enter your email address below.