Tag: Tasmania

  • The Tragic Loss of George III – 1835

    The Wreck of George III, by Knud Bull, wikimedia commons.

       The 400-ton ship George III sailed from England on 12 December 1834, bound for Van Diemen’s Land (Tasmania). She was carrying nearly 300 people, of whom 220 were convicts. When they were less than 80 km from Hobart, tragedy struck with a terrible loss of life.

       Around 11 a.m. on Sunday, 12 April 1835, the George III made land at South Cape, the southernmost point of Tasmania. By early evening, they had entered the D’entrecasteaux Channel to make the final run up the coast to the mouth of the Derwent River. From there, it would have been a short cruise up the river to Hobart Town. She put the dangerous Actaeon Islands behind her around 8.30 that night. The moon was out, the weather mild, and they were being pushed along at a modest 1 ½ to 2 knots (3 – 4 km/h) by a light breeze blowing off the land.   

    Captain William Moxey had a man in the chains sounding the passage as they made their way north. Repeated soundings showed they were in 20 fathoms (36m) of water, which was more than deep enough for safe passage. Then, shortly before nine o’clock, Moxey was stunned to hear the man call out “quarter less four,” meaning they were in less than four fathoms (7m) of water. He ordered the helm put hard to port. But before the ship could respond, she struck ground and came to a stop where the chart said there was clear passage.
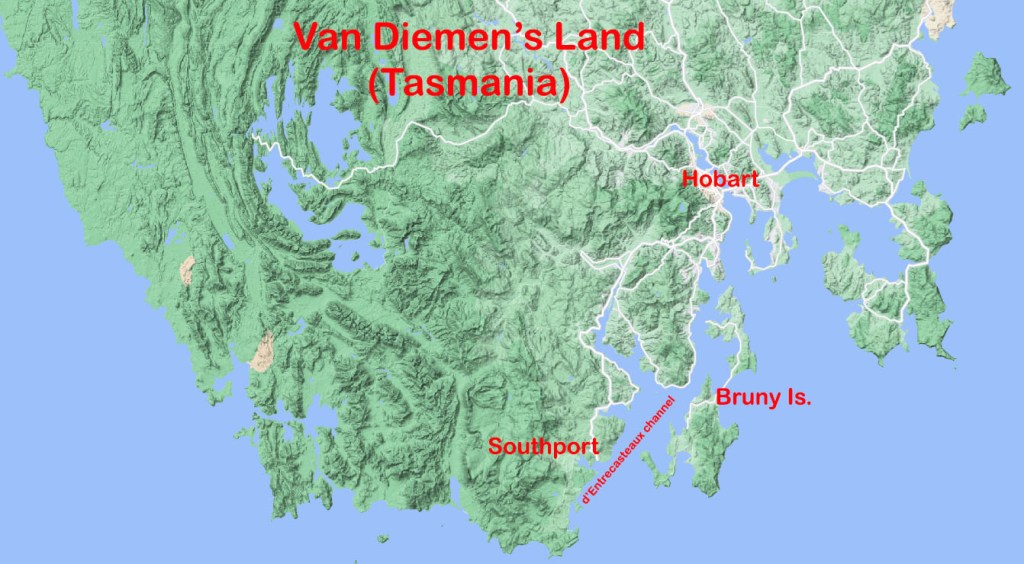
    Southern Tasmania. Google Maps.

       The captain had soundings taken around the ship and found they were stranded on an uncharted rock with between three and five metres of water surrounding them. The initial collision was not particularly violent, but now that the ship was stuck fast, the ocean swells began lifting her up and dropping her back down on her rocky perch. Within minutes, the repeated pounding brought the main mast crashing down. The mizzen mast came down with it, littering the deck with a tangle of rope, canvas and timber spars.

       The crash brought everyone on deck, except for the prisoners. Seamen not on watch, passengers and the complement of soldiers hastily dressed and came up to see what had happened. Captain Moxey gave the order to abandon ship and oversaw the evacuation in the ship’s boats. However, efforts were severely hampered by the continued pounding and the mess of debris strewn across the deck and floating in the water.

       Moxley ordered one of his boats with a crew of seven to make for Hobart as quickly as possible to get help. Then he got the evacuation of the passengers and the rest of the crew underway. Meanwhile, the convicts were still locked below deck with armed guards stationed over the hatchway.

       The situation was becoming dire for the convicts trapped in their prison. They were already standing waist-deep in freezing water, and despite their pleas to the guards to be let out, the hatch covers remained locked. In genuine fear for their lives, several rushed forward and tried to force the hatch cover open with their bare hands. According to one of the surviving convicts, the guards opened fire to force them back, and at least one prisoner was struck by a bullet and killed. In a later inquiry, Moxey would dispute the claim, saying that the guards had only been stationed over the hatchways to keep the panicking prisoners contained below deck until the women and children had safely been evacuated. In fact, the inquiry reads like the minutes of a mutual appreciation society meeting, each officer praising the efforts of the others in saving so many lives.

    The Colonist, 7 May 1835, p. 5.

       Fifteen minutes after striking the rock, the deck was awash with water, and the last of the boats carrying 40 people had left the stranded vessel. Captain Moxley was among them, having been pulled from the water after he became trapped between floating timbers.

       By this time, the guards watching over the hatchways had left in the last boat. The trapped convicts were now able to force their way on deck to find it deserted.  But some 50 or so prisoners had been too ill to save themselves. Most had been suffering from scurvy and had drowned where they lay unable to escape the rising water.

       After putting the survivors ashore, Moxley returned to the ship and began taking off the convicts. By the time he had reached the George III for the third time, a schooner sent from Hobart had arrived and was taking off the last of the survivors.

       One hundred and thirty-four people lost their lives. Three of them were passengers – a woman and two children – and two were members of the ship’s crew. Convicts made up the remaining 128 fatalities. Most never had a chance, trapped in the hold as the water rose around them.

    The next morning, a convict named John Roberts was found dead, lashed to a ringbolt in the surgeon’s cabin. It seems he could not swim, so he had tied himself off, hoping to be washed ashore as the ship broke up.    Despite the heavy loss of life, 160 people were saved. They were all taken to Hobart, cold, wet, and thoroughly exhausted from the ordeal.

    View of Hobart Town by Samuel Davenport, circa 1835.

         The inquiry into the loss of the ship found no one was to blame. It concluded that the George III had struck a rock not recorded on the chart. Then it came time for the inquiry to consider the treatment of the convicts. No officer admitted to ordering the prisoners to be confined below deck as the hold flooded with water. The Corporal of the guard testified that the muskets were only used to “intimidate” the prisoners, and only one shot was fired, and that into the air. No one was held accountable for the loss of so many prisoners.

     © Copyright C.J. Ison / Tales from the Quarterdeck, 2022.

    To be notified of future blogs, please enter your email address below.

  • The May Queen’s Long and Lucky Life

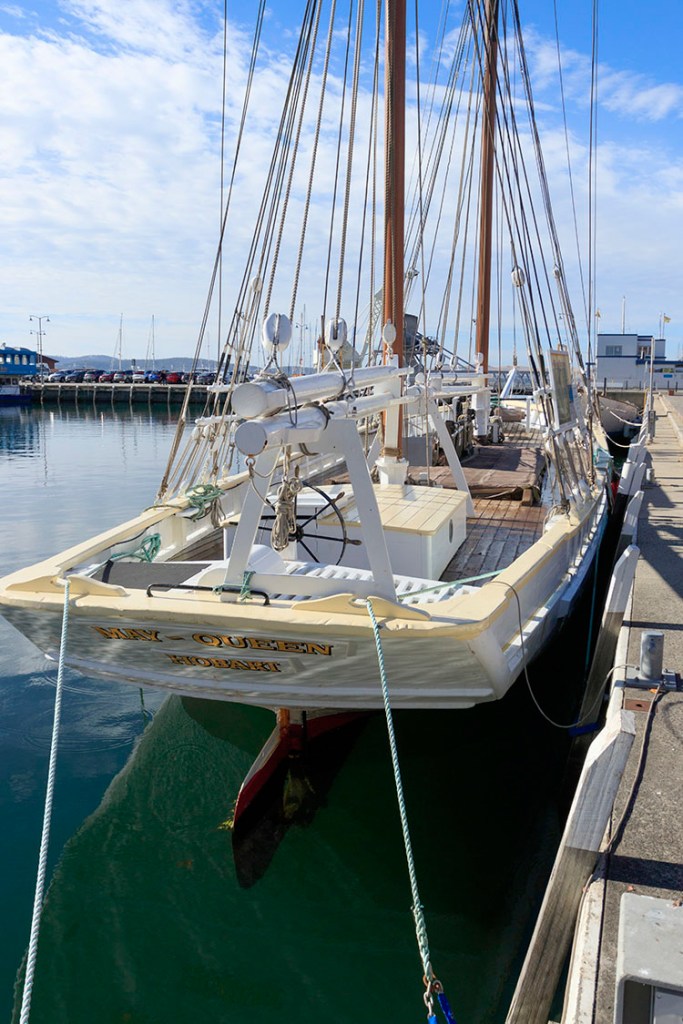
    The May Queen is Australia’s oldest sail trading ketch. Photo C.J. Ison

    Launched in 1867, the May Queen is Australia’s oldest sailing ketch still afloat.   During her century long working life she twice sank, survived several collisions and a myriad of other mishaps that could have been her demise.

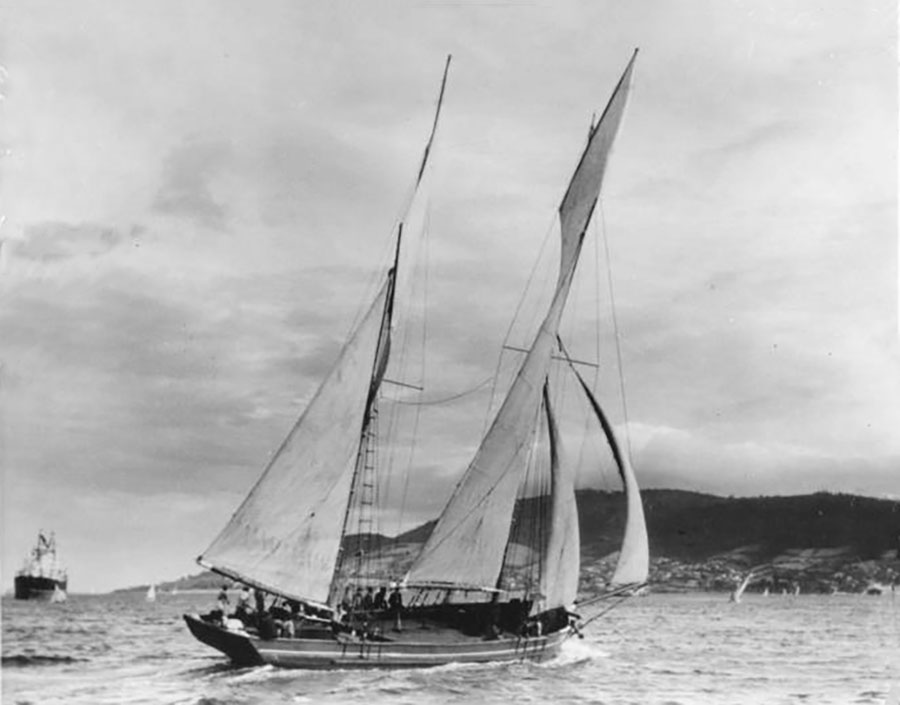
    The 36-ton May Queen was purpose built for carrying timber, but over her long career she transported all manner of cargos between Hobart and settlements along the Derwent River and Tasmania’s east coast.  But she was more than a simple workhorse.   She could sail and won her class in the annual Hobart Sailing regatta nine times over the years and placed in many more.

    May Queen competing in the Annual Hobart Regatta.

    One night in June 1883 the May Queen found herself becalmed off Cape Raoul with a load of timber from Port Arthur bound for Hobart.    Then, out of the dark they saw the Sydney bound steamer Esk bearing down on them.   As she got closer and showed no sign of deviating from her course the captain and crew yelled “LOOK OUT AHEAD” at the top of their lungs.   The steamer’s lookout only saw the stationary vessel when they were about 50 metres away.   The helmsman pulled the wheel over but it wasn’t quite enough and the steamer struck a glancing blow and took away the ketch’s bowsprit.   The May Queen was otherwise undamaged and limped into Hobart once a breeze picked up.  

    Six weeks later while sailing off Bruny Island her mizzen mast snapped off at deck level during a powerful storm.   She came close to being driven ashore during another fierce gale the following year when her anchors started dragging.  Only the addition of a third anchor prevented disaster.   On a separate occasion, another vessel dragged its anchors and crashed into the May Queen punching a hole in her bulwark and caused other serious damage.

    Trading Ketch May Queen. Photo C.J. Ison

    Her worst accident happened on 4 February 1888 when she sank in the Huon River.   It was 2 o’clock in the afternoon and the May Queen had just taken on extra ballast in readiness for a deck cargo of long timber piles.   A squall blew out of nowhere.  The ketch heeled over.  The ballast in her hold shifted and she foundered in 16 fathoms (30 metres) of water.

    That could have been the end of her for there was no air pump available that could get a salvage diver down to that depth.   HMS Egeria had diving equipment but it could only operate at half that depth.    Somehow, the May Queen’s owner managed to hook a line onto his vessel and dragged it into shallower water.  From there she was raised, pumped dry and towed back to Hobart where she received extensive repairs.

    Then in 1940 she sank again, this time in Port Esperance south of Hobart.   While about to deliver a cargo of timber, the May Queen struck Dover Wharf and started taking on water.    At low tide her deck was awash but at high tide only her masts broke the surface.   

    The ketch May Queen tied up at Constitution Dock, Hobart. Photo C.J. Ison.

    She was again raised, repaired and continued working until she was finally retired in 1973.   So ended a working career spanning 106 years.   She was gifted to the Tasmanian Government and has since been maintained as a reminder of Tasmania’s maritime heritage.   As of 2022 she is 155 years old and can be seen tied up at Hobart’s Constitution Dock.

    ©Copyright C.J. Ison / Tales from the Quarterdeck, 2022.

    Enter your email address below to be notified of future blog posts.

  • The Brig Amity’s Amazing Career

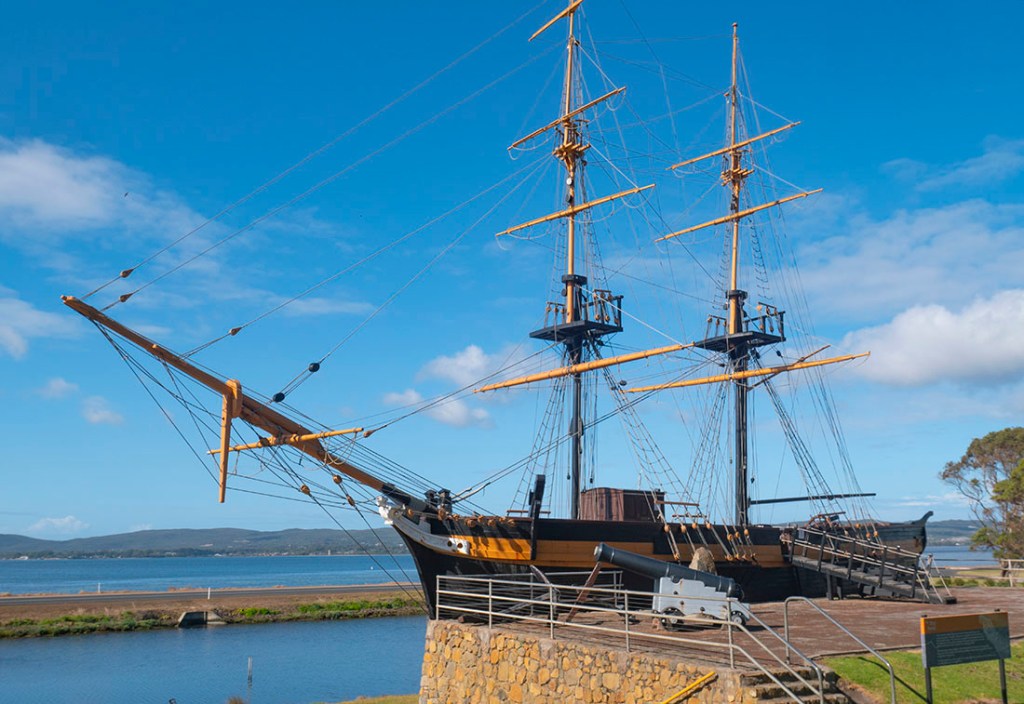
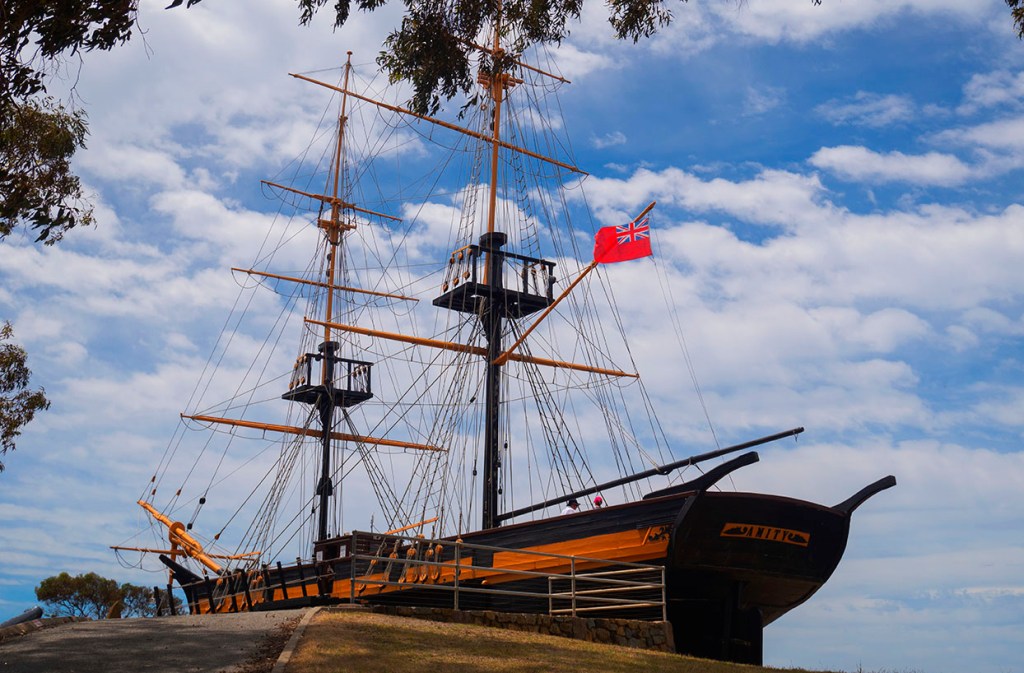
    Brig Amity replica at Albany Western Australia. Photo: C.J. Ison.

       All Australian school children learn of the Endeavour’s role in the history of Australia. Some people may have heard of the First Fleet’s flagship, Sirius, or the Investigator, which Matthew Flinders used to chart much of Australia’s coastline. But, I would wager few have ever heard of the brig Amity or know of her contribution to our colonial past.

       During the brig Amity’s six years as a colonial government vessel, she was employed to establish two new settlements in what would one day become Queensland and Western Australia. She went to the rescue of the Royal Charlotte survivors after that ship ran aground on Frederick Reef in Australia’s dangerous northern waters. She regularly transported convicts, soldiers, and supplies from Sydney to outlying settlements and circumnavigated the continent on two occasions.   

    The Amity was built in New Brunswick, Canada and launched in 1816. She was a modest-sized vessel even by the standards of the day, at 148 tons, measuring a fraction over 23 metres (75 feet) in length. But she was a sound ship and could handle rough weather.

    Officer’s stateroom with tiny individual sleeping cabins leading off the main room. Photo: C.J. Ison.

       The little brig spent the first few years of her life hauling cargo back and forth across the North Atlantic between North America and Britain. In 1823, a Scotsman named Robert Ralston purchased her, having decided to emigrate to Van Diemen’s Land with his large family. He fitted the vessel out for the long voyage and filled its hold with cargo and livestock for his new adopted home.

       After a five-month voyage, the Amity sailed up the Derwent River and dropped anchor in Hobart Town on 15 April 1824. Ralston and his family purchased land and established several businesses in Hobart and Launceston, and a few months after their arrival, he put the vessel up for sale.   

    The New South Wales colonial government purchased the Amity in August 1824. The brig’s first assignment was to establish a new settlement at Moreton Bay. Two years earlier, the Bigge Report had recommended establishing a place of secondary transportation somewhere far north of Sydney for convicts who had committed additional crimes in the colony.

    The Moreton Bay Penal Settlement about 10 years after its founding. Photo Courtesy SLQ.

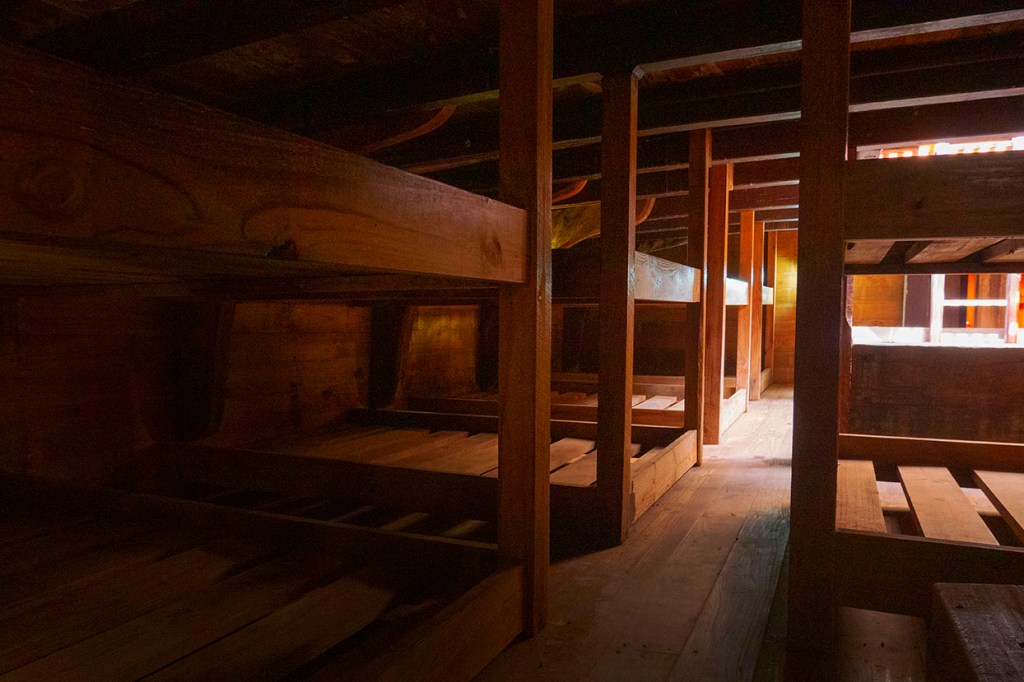
       On 1 September, the Amity and her crew sailed with a military officer, 20 soldiers, plus wives and children, a handful of civilian administrators, plus 30 convicts. The journey took 11 days and was marked by severe storms. Accommodation between decks measured just 1.5 metres (5 feet) high. Here, the seasick soldiers, wives, and convicts spent a miserable time packed in with the new settlement’s pigs, goats and poultry. Nonetheless, they made it at Moreton Bay and her passengers and stores were disembarked at Redcliffe, where John Oxley decided the new settlement would be established.

       Later in the month, the ship was nearly wrecked. She had been anchored out in Moreton Bay when a storm blew up. The Amity’s anchors started to drag as she was pushed towards shore. A third anchor was dropped, and the ship was held in place, averting disaster. Soon after that, she left the new settlement and returned to Sydney for more stores. On her third trip to Moreton Bay, in mid-1825, she helped relocate the settlement. Redcliffe had proved not as suitable as Oxley had thought it would be. The new location, on the north bank of the Brisbane River, was thought to be a far more suitable one.

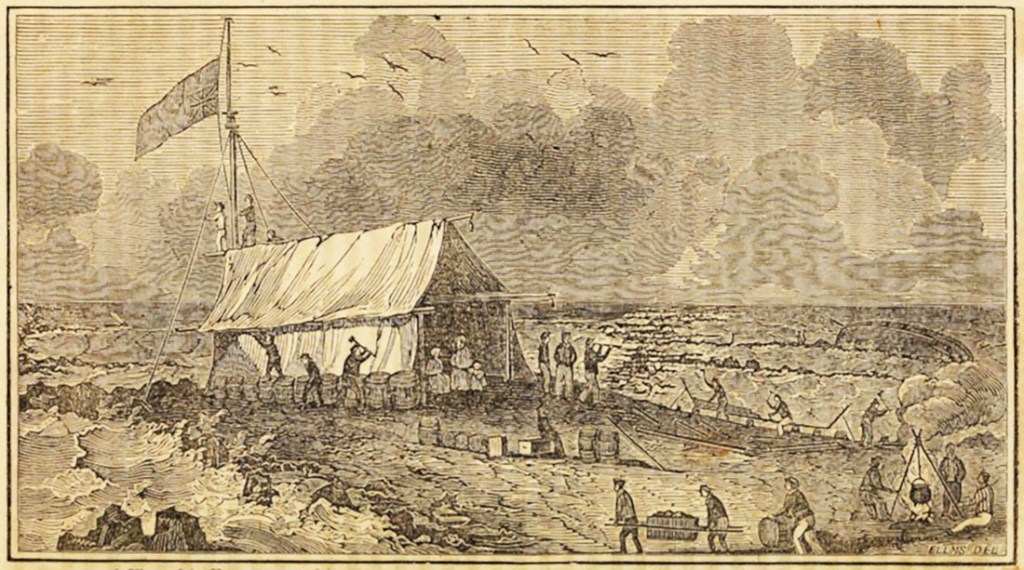
       While anchored in Moreton Bay, one of the crew spotted an unfamiliar longboat coming towards them. This turned out to be the first mate and several survivors from the ship Royal Charlotte, which had run aground a month earlier on Frederick Reef, some 720 km (almost 400 nautical miles) north in the Coral Sea.

       The first mate reported that there were still nearly one hundred souls, many of them women and children, stranded on a small sand cay which was almost awash at high tide. The Amity was immediately sent to rescue the castaways and arrived off the reef on 28 July. Getting close to the survivors proved a dangerous operation with powerful breakers crashing into the reef, threatening any vessel that got too close. The Amity eventually anchored several miles distant and its whaleboat was sent to evacuate the survivors and salvage as much as they could from the wreck. With an additional hundred people squeezed into the small brig, she sailed directly for Sydney, arriving there ten days later.

    A view of the encampment of the shipwrecked company of the Royal Charlotte on Frederick’s Reef. Illustration by Charles Ellms (circa 1848)

       For the next 18 months or so the Amity was in constant use ferrying convicts and supplies between Sydney and the outlying settlements at Norfolk Island, Moreton Bay and Port Macquarie. But, in late 1826, Governor Darling, who had recently replaced Governor Brisbane, had another important mission for the Amity and her crew.

       She was ordered to take three officers and a small detachment of soldiers, 23 convicts, plus a handful of civilian officials under the overall command of Major Edmund Lockyer to establish a new settlement. This one was to be located in the remote south-west of the continent at King George Sound (Albany).

    Convicts and other passengers were accommodated between decks which measured just five feet in height. Photo: C.J. Ison.

       Until then, Australia’s southern coast from Bass Strait to Cape Leeuwin was little known outside its indigenous peoples and the haunt of sealers who lived largely outside the law. Darling was increasingly concerned that the French, whom he had learned had recently visited the area, might try to establish a permanent presence there. 

       The small brig weighed anchor on 9 November 1826, but she soon ran into a severe storm, which saw her put into George Town on the Tamar River in Van Diemen’s Land for repairs. She finally anchored safely in King George Sound on Christmas Day, and the next morning, she began disembarking her passengers and cargo. A month later, the Amity returned to Sydney and resumed her regular resupply duties.   

    In May 1827, she accompanied HMS Supply and the brig Mary Elizabeth on a voyage via Torres Strait to Fort Dundas on Melville Island, not too far distant from present-day Darwin in the Northern Territory. Fort Dundas had been established three years earlier to facilitate trade with visiting Macassan fishermen, but it was eventually abandoned, due in part to the determined resistance put up by the indigenous Tiwi people.

    Sketch of Fort Dundas – 1824 by JS Roe. Picture courtesy State Library of Western Australia.

       Leaving Fort Dundas and the other two ships, the Amity continued circumnavigating the continent, stopping to drop off supplies at King George Sound before returning to Sydney via Bass Strait.

       In 1828-29, she paid another visit to the remote northern and western settlements when she dropped off stores before returning to her home port of Sydney, thereby completing a second circumnavigation.

       The following year, December 1830, the New South Wales government sold the brig off. She made her way back to Hobart and passed through several hands over the next decade. A couple of owners tried whaling while others employed her as a cargo ship, but they all seemed to struggle to turn a decent profit.

       In 1842, the Amity was now 26 years old and no doubt past her prime. Her new owner, a Hobart butcher named Gilbert, used her to transport livestock across Bass Strait from the mainland to Van Diemen’s Land.

       On 18 June 1845, she was driven onto a shoal off Flinders Island during one of the ferocious storms Bass Strait is rightly known for.   The ship was destroyed, but fortunately, the captain, owner and crew, numbering 11 in all, survived.    In 1976, a full-size replica of the Amity was completed in Albany to celebrate that town’s 150th anniversary. The replica provides a fascinating close-up look at an early 19th-century sailing ship and to stoop around below decks highlights just how small she really was.

    Brig Amity replica at Albany Western Australia. Photo: C.J. Ison.

    For more interesting stories from Australia’s maritime past check out A Treacherous Coast, Bolters and Tales from the Quarterdeck. All are available now as a Kindle eBook or paperback through Amazon.

    © Copyright: Tales from the Quarterdeck / C.J. Ison, 2020.

    To receive notifications of future blog posts please enter your email address below.