Tag: Mutiny

  • William Swallow and the 1829 Cyprus mutiny

    Detail reputedly showing the brig Cyprus (centre) from a panorama of Hobart 1828 – watercolour drawings by Augustus Earle, Courtesy State Library of NSW.

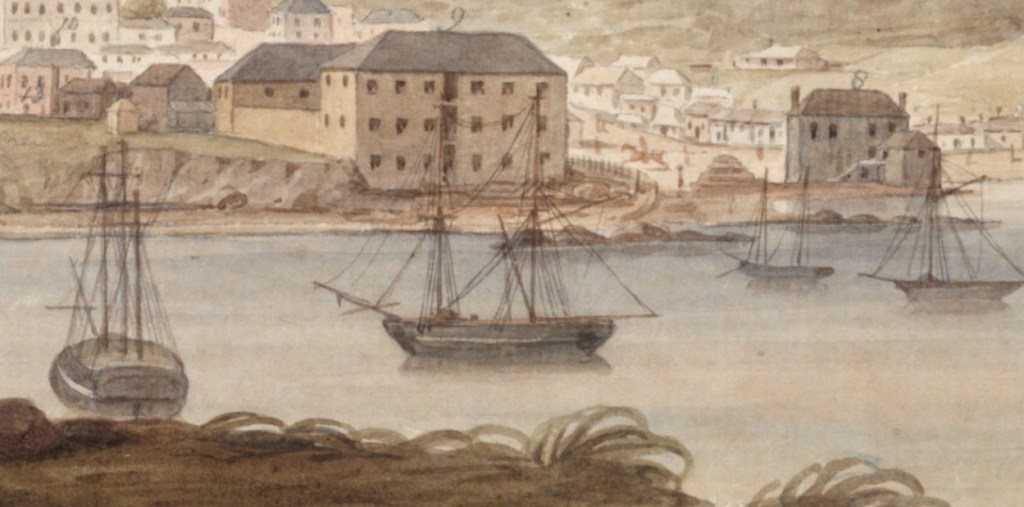
       In August 1829, the brig Cyprus sailed from Hobart bound for Macquarie Harbour with provisions and 31 convicts sentenced to serve hard labour at that infamous penal settlement. However, while windbound at Recherche Bay in Tasmania’s south, the prisoners rose up, overpowered their guards and seized control of the ship. Thus began one of the most extraordinary escapes of Australia’s convict era.

       Their leader was a 37-year-old convict named William Swallow. He was likely the only man among the prisoners who had any seagoing experience, so in true pirate tradition, the men voted for him to be their captain. Swallow had once earned a living as a seaman on colliers plying England’s coastal waters. That was until he tired of the seagoing life and found it was more lucrative to break into portside houses or ships moored in harbour. He finally came undone when the police suspected him of being involved in several recent burglaries and raided his house. A large haul of stolen property was found in the house, and Swallow was whisked off to gaol. This took place in 1821 when Swallow was going by the name William Walker. He was found guilty of housebreaking and sentenced to be transported to Van Diemen’s Land (Tasmania) for seven years.

       William Swallow, however, had no intention of going quietly, leaving his wife and three children to fend for themselves. His first attempt to escape took place even before he had left England. He and a fellow prisoner jumped from the ship carrying them to the prison hulks to await the next Australia-bound convict transport.  His mate drowned in the attempt, but Swallow survived and returned to his hometown. However, he was quickly recaptured and charged with returning from transportation. This time, he was loaded on a ship and sent to Van Diemen’s Land.  

    Swallow made a second attempt to escape eight months after arriving in Hobart. He and three other convicts seized a small schooner, crossed Bass Strait and made it to within 80 kilometres of Sydney before they ran aground and were taken back into custody. Swallow received 150 lashes and was sentenced to serve hard labour at Macquarie Harbour Penal Settlement. But he escaped again before ever setting foot in that much-feared hellhole. This time, he escaped from gaol and stowed away on a merchant ship bound for England. There, he lived free until being discovered in 1828. This time, he was sent to Van Diemen’s Land for life. But Swallow was still not ready to give up and accept his fate. Shortly after arriving back in Hobart, he stowed away on the very ship that had so recently brought him from England. By now, guards were masters at finding stowaways, and Swallow was taken off before it left port. He was flogged again and was on his way to Macquarie Harbour on the Cyprus when, in 1829, he and the other convicts seized the ship.

    A tranquil Recherche Bay in southern Tasmania in 2019. Photo CJ Ison.

       On 13 August, while the Cyprus was windbound in Recherche Bay, the convicts pounced, catching their guards by surprise and wresting control of the ship. They put the soldiers, captain and crew ashore and the following morning, hauled up the anchor, unfurled the sails and gave three hearty cheers as they got underway. The castaways would remain stranded in that remote and inhospitable corner of Tasmania for two weeks before they were discovered. That gave Swallow and his men ample time to get far away from Van Diemen’s Land before the alarm was raised.

       It was supposed by the authorities that the runaways would try to make their way across the Pacific, where they would scuttle the Cyprus and pass themselves off as shipwrecked sailors at some unsuspecting South American port. But Swallow and the others had another idea in mind as Van Diemen’s Land disappeared over the horizon behind them.

       The Cyprus was well stocked with food, for it carried sufficient supplies to see the Macquarie Harbour Penal Settlement through the coming winter months when it was all but cut off from the outside world. Swallow set a course to take them to New Zealand, where the men painted the vessel’s hull black and renamed her the Friends of Boston. Passing themselves off as an American-flagged ship, they then sailed north towards the Friendly Islands, known today as Tonga.

       However, this leg of their voyage was far from smooth sailing. One man was lost overboard during a powerful storm, and the common purpose that had seen the convicts unite to capture the brig had begun to dissipate. After they reached the island of Tongatapu, present-day Nukualofa, seven men chose to remain there when the Cyprus set sail. Swallow continued north across the equator and eventually reached southern Japan after an impressive voyage of nearly 12,500 km. They pulled into a sheltered bay on the island of Shikoku in January 1830, hoping to resupply with firewood and fresh water. However, at the time, Japan was unwelcoming of foreigners. Despite the language barriers, the Japanese made it clear that the Cyprus had to be gone by sunset; otherwise, it would be fired upon.

    A watercolour of what is beieved to be the Cyprus by low-ranking Samurai artist Makita Hamaguchi in documents from the Tokushima prefectural archive. CC BY-SA 4.0, https://commons.wikimedia.org/w/index.php?curid=59397258

       Swallow heeded the warning, hoping to resupply somewhere more friendly, but as the sun dipped towards the horizon, the wind dropped and the ship was becalmed. The Japanese coastal battery opened fire as they warned they would, and one of the cannonballs struck the vessel on the waterline. But before any more damage could be inflicted, a breeze sprang up, and Swallow wasted no time getting the ship underway. They followed the Ryukyu Island chain south before crossing the East China Sea, all the time taking on water.   

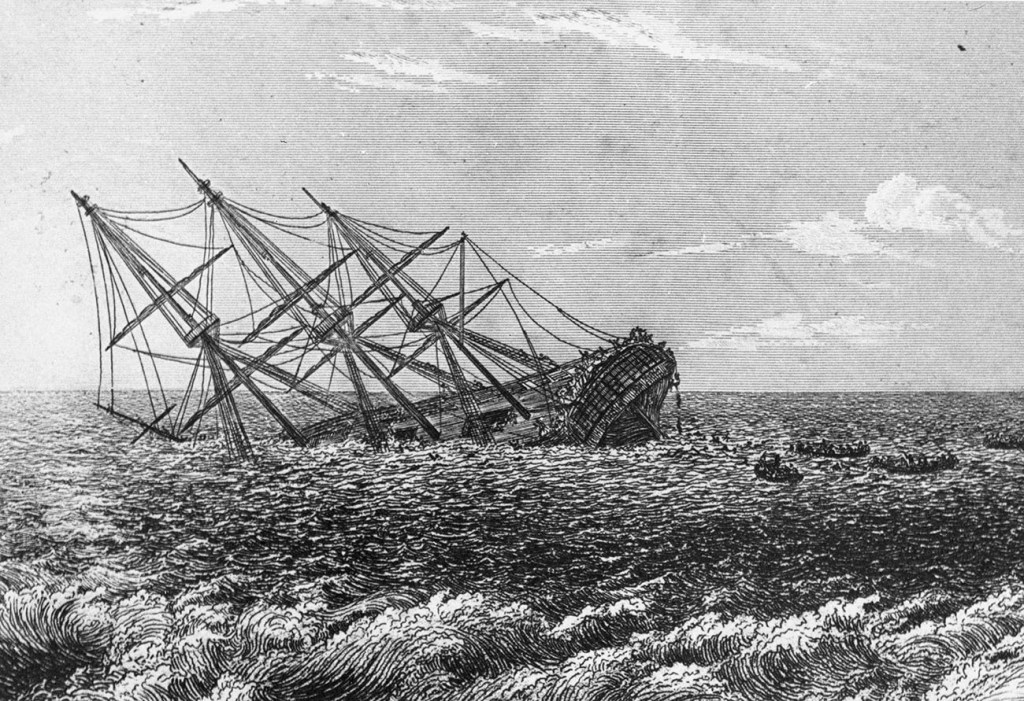
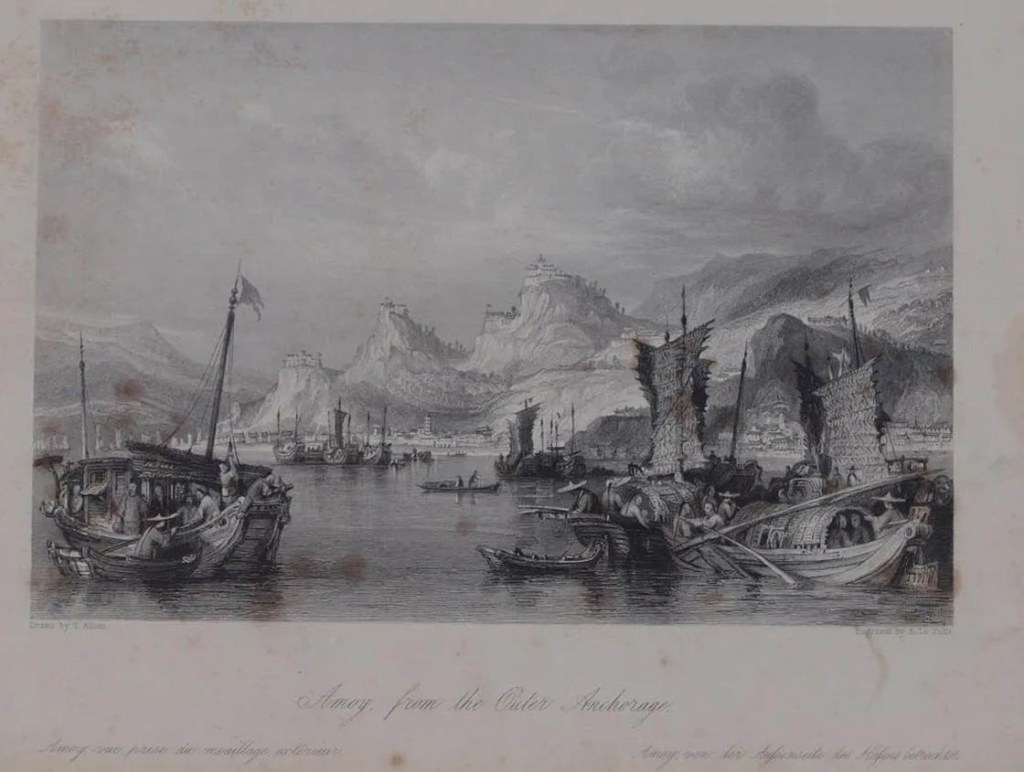
    In February 1830, the Cyprus was off the coast of China, near the estuary of the Pearl River (Zhu Jiang River). By now, the leak had worsened, and the pumps had to be manned constantly to keep the ship afloat. Several of the runaways had had enough and wanted to abandon the ship. However, Swallow wasn’t ready to give up on the Cyprus just yet, despite the risk of being discovered by British naval vessels in the area. He hoped they might repair the ship and soon be on their way. However, those wishing to go ashore went below and punched a hole in the hull. They then boarded a lifeboat and left the Cyprus to sink. Swallow and his few remaining loyalists could not stem the steady inflow of water and were forced to abandon the ship a few hours later in the remaining lifeboat and make their way to Canton (Guangzhou).

    View of the Canton factories by William Daniell, circa early 1800s. Courtesy British National Maritime Museum via Wikipedia.

       The unexpected arrival of British subjects in the trading enclave raised the interest of the local East India Company officials. William Swallow was asked to visit their offices, where he was questioned at length.

       As news of the seizure of Cyprus had yet to reach that port, Swallow passed himself off as Captain William Waldon and late master of the 200-ton English brig Edward. His story was a mixture of fact and fiction. He said that they had left London on 14 December 1828, bound for Rio de Janeiro and had then rounded Cape Horn and crossed the Pacific to Japan, where they were fired upon. The Edward, he said, had steadily taken on water as he tried to make for Manila, but his ship had finally foundered near Formosa (Taiwan).

       He told the East India Company officials that he and his crew had boarded two lifeboats and headed for the Chinese mainland, but on the way, he lost contact with the second boat. On the strength that Swallow, AKA Waldon, had a sextant engraved with the ship’s name in his possession, and he had arrived in a longboat bearing the name “Edward of London,” his story was accepted. The East India Company officials gave Swallow and his men free passage to London on a merchant ship about to depart from Canton. The escaped convicts might just have got away with the subterfuge but for a stroke of bad luck.

       A second boat arrived at the docks just days after they left. The men on that boat also claimed to be survivors from the Edward. But their version of the story was at odds with the one provided by Swallow. One of the new arrivals was immediately detained, but the rest fled Canton on an outbound ship one step ahead of the law. Then, two more men from the Cyprus turned up in Canton. They had been found on one of the Ryukyu islands and taken to Canton for questioning. When news of the seizure of the Cyprus finally reached the British enclave, the men in custody were questioned more closely, and they eventually confessed to who they were.

    A watercolour by samurai Makita Hamaguchi showing one of the mutineers. CC BY-SA 4.0, https://commons.wikimedia.org/w/index.php?curid=59845977

       A letter was dispatched to London on the next ship to leave, warning the police to be on the lookout for Swallow and the others. That ship arrived in London before Swallow, and the police were waiting. However, by pure luck, he had disembarked at Margate rather than travel up the River Thames to London.   The rest of Swallow’s travelling companions were arrested at the dock, and a couple of weeks later, Swallow was tracked down to a Lambeth boarding house, living under an assumed name.

       In October 1830, Swallow and four others stood trial for piracy. The jury found the others guilty as charged, but acquitted William Swallow after he convincingly pleaded that he had been forced to take part in the mutiny against his will. Although Swallow escaped punishment for piracy, there was still the matter of his returning to England illegally. He was once again sent to Van Diemen’s Land, where he died at Port Arthur Penal Settlement on 12 May 1834.

    © Copyright C.J. Ison / Tales from the Quarterdeck, 2024.

    Please enter your email address below to be notified of future blogs.

  • HMS Pandora: Queensland’s earliest recorded shipwreck – 1791

    H.M.S. Pandora in the act of foundering’ . An etching by Lt-Col. Batty after a sketch by Peter Heywood from ‘The Mutiny and Piratical Seizure of H.M.S Bounty’ first edition 1831. Photo courtesy SLQ.

    In August 1791, HMS Pandora was returning to England, having tracked down and captured 14 of the Bounty mutineers in Tahiti. But disaster struck on the night of the 29th, as the Pandora was trying to find a way through the Great Barrier Reef. The ship’s surgeon, George Hamilton, left a nerve-wracking account of the incident in his memoir, “A Voyage Round the World in His Majesty’s Frigate Pandora”, published in 1793 after his return to England.

       Hamilton wrote that on the night of 29 August, a boat sent earlier in the day by the Pandora’s captain, Edward Edwards, to scout for a passage through the maze of reefs had finally returned to the ship. As the crew was hauling it out of the water, the 24-gun frigate unexpectedly struck a submerged coral reef. Captain Edwards immediately ordered the crew to set the sails as he tried to back off the outcrop, hoping to use wind power alone. When that failed to dislodge his ship, he ordered a boat to be made ready to take an anchor out so he might kedge the vessel off. But by the time the anchor was in place and the crew ready to winch, it was already too late.

       The carpenter had examined the hold and found that the Pandora’s hull had sprung a serious leak. In the 20 minutes they had been aground, the water had risen to nine feet (2.7 m). All hands were immediately engaged in efforts to save the ship from sinking. Sailors began bailing at each of the hatchways, and several of the Bounty mutineers were unshackled to help man the bilge pumps.

    Map showing HMS Pandora wreck location (approx).

       “It blew very violently, and she beat so hard upon the rocks, that we expected her, every minute, to go to pieces,” Hamilton recalled. “It was an exceedingly dark, stormy night, and the gloomy horrors of death presented us all around, being everywhere encompassed with rocks, shoals, and broken water. About ten [o’clock] she beat over the reef, and we let go the anchor in fifteen fathoms of water.

       Not yet ready to give up on his ship, Captain Edwards ordered the guns thrown overboard and, at the same time, had some of his men prepared the topsail to be hauled under the ship’s bottom in a vain effort to stem the leak. But before they could get the sheet of canvas over the side, one of the bilge pumps failed, and the water began flowing into the hold faster than it could be bailed out. The topsail was abandoned as every hand was set to work, baling to stop the ship from sinking.

       Soon the Pandora began listing, and the crew experienced their first casualties. A canon broke loose and rolled across the deck, crushing a sailor, while a topmast came crashing down on deck, killing another. The crew laboured at the pumps and bailed with buckets through the night to keep the ship afloat. An ale cask was tapped, and its contents were regularly served out to the men to keep their spirits up.

    Bounty Mutineers accommodation on HMS Pandora. Source: Museum of Tropical Queensland, Townsville.

       Then, about half an hour before dawn, Captain Edwards called his officers together to discuss their next move. It was clear to all that the ship was doomed and that their efforts should shift from saving the ship to preserving the lives of the crew. The Pandora’s four boats had been put over the side earlier in the night, and they were sheltering in the lee of the reef, their coxswains awaiting further orders. Spars, booms, hen-coops and anything else that floated were cut free so that the men might find something to keep themselves from drowning when the ship inevitably sank.

       Hamilton wrote that Captain Edwards ordered that the remaining prisoners be released from their irons. However, it came too late for some of the mutineers who were still shackled in place in their makeshift prison they called “Pandora’s Box.” They went down with the ship.   

    The water began pouring in through the gun ports, causing the frigate to list even further. As the captain and crew scrambled to jump overboard, the Pandora heeled over and sank almost immediately. The boats came to the rescue of the sailors clinging to the wreckage in the water, but for many help came too late. “The cries of the men drowning in the water was at first awful in the extreme,” Hamilton wrote. But as the men disappeared below the surface, the screams faded and then died away entirely.

    Loss of the Pandora on the Great Barrier Reef. Source: Tales of Shipwrecks and Adventures at Sea, 1856.

       As morning heralded a new day, a small sandy cay could be seen about two and a half nautical miles (5 km) to the southeast. Edwards ordered the boats to make for the one tiny speck of land in that vast expanse of sea. The captain took stock of their provisions and ordered a guard to be placed over the remaining surviving mutineers. Fortunately, someone had the forethought to load a barrel of water, a small keg of wine, and some sea biscuits onto one of the boats. To that haul of supplies could be added a few muskets and cartouche boxes of ammunition, along with a hammer and a saw. Not much to preserve life in such remote and hostile waters. Edwards thought their only chance of survival would be to make for the Dutch trading outpost on Timor Island, some 1200 nautical miles (1400 km) away.

       Edwards forbade anyone from drinking on that first day, calculating that they would have only enough water to last 16 days at two small cups per person per diem. They spent two days on the cay preparing the boats for the voyage that lay ahead. Floorboards were torn out and affixed to the sides of the boats, around which canvas was wrapped to increase the freeboard.

       Before leaving, the sailing master, George Passmore, was sent back to the wreck site to see if anything might have floated free in their absence.   He returned two hours later with a small assortment of salvaged materials and a cat that he found clinging to the top-gallant mast-head.

       On the third morning, they set off west towards Torres Strait and beyond to the Dutch settlement of Kupang. Edwards had hoped to refill their water cask at one of the islands dotting Torres Strait before they headed into the expanse of the Arafura Sea. However, an encounter with Islanders, which began friendly enough, inexplicably ended abruptly with a volley of arrows and musket fire being exchanged. They stopped again at Prince of Wales Island (Muralag), where this time they were able to fill their water cask without incident. On 16 September, after an arduous voyage lasting about a fortnight, the four boats pulled into Kupang Harbour. From there, they were taken to Batavia (present-day Jakarta), where Edwards purchased a ship for the return to England.

    Canon recovered from HMS Pandora wrecked on the Great Barrier Reef on display at the Museum of Tropical Queensland, Townsville.

       The shipwreck directly cost the lives of 31 sailors and four mutineers. Another 16 died from disease during or after their stay in Batavia. Of the 134 men who left England on the Pandora, only 78 made it home alive. The ten prisoners who survived the wreck were tried for mutiny. Four were acquitted, two received pardons, one got off on a technicality, and three were hanged. Captain Edwards faced a court-martial to answer for the loss of his ship, but he was found not to have been at fault.   

    The Museum of Tropical Queensland in Townsville has a world-class exhibition of artefacts recovered from the wreck.

    © Copyright C.J. Ison / Tales from the Quarterdeck, 2024.

    Please enter your email address below to be notified of future blogs.

  • The Batavia Tragedy – 1629

    Shipwreck of the Batavia, F. Pelsaert, F., & Vliet, J. (1647). Courtesy State Library of NSW FL3726282

    On 4 June 1629, the Dutch East Indies Company (VOC) ship Batavia slammed into a reef off the Western Australian coast, stranding over 300 men, women and children far from any immediate hope of rescue. But that was just the beginning of one of maritime history’s most appalling chapters. About 40 died when the ship ran aground, or in the immediate aftermath, as waves pounded her until she broke apart. But a nightmare far, far worse awaited those survivors who thought they had escaped disaster by reaching ashore alive.

       The 650-ton merchant ship Batavia was launched in 1628 and was immediately adopted as the VOC’s flagship. She sailed from Texel, in Holland, on 29 October of the same year, with a flotilla of six other vessels, all bound for the Dutch East Indies (present-day Indonesia). The ship’s hold was filled with a general cargo, but also included a fortune in gold and silver coins. Passengers on board the Batavia included several women and children, all family members of VOC officials. Counting the sailing crew, a complement of soldiers, there were, in all, 341 souls.

       Shortly after setting off, the convoy became separated during a powerful storm. The Batavia and two other ships remained together as they sailed South until they reached the Cape of Good Hope. There, the Batavia was beset by a problem of a more human character.

       While stopped at the Cape of Good Hope, Francisco Pelsaert had cause to reprimand the Batavia’s captain, Adriaen Jacobsz for drunkenness. Pelsaert was the VOC’s most senior merchant in the flotilla and had overall command of the Batavia, including its captain, Adriaen Jacobsz. The incident would leave the captain with lingering bitterness toward Pelsaert. Another VOC official travelling to the East Indies was a man named Jeronimus Cornelisz, but more about him a little later.

    The Dutch VOC ship Batavia which was wrecked off the Abrohlos Islands off Geraldton, WA. Western Australian Shipwreck Museum

    After leaving Cape of Good Hope, Pelsaert fell ill and spent much of the time confined to his cabin. Meanwhile, Jacobsz and Cornelisz are thought to have formulated a plan to seize the ship and its treasure of gold and silver and do away with Pelsaert and anyone else who got in their way. The first step was to lose the two other VOC ships it was sailing with. One night in the middle of the Indian Ocean, Jacobsz bore away from them before returning to a westerly course. But, before he and Cornelisz could fully implement their plan and take control of the Batavia, she ran aground on Morning Reef in the Houtman Abrolhos Islands about 60 km off the Western Australia coast.

       Around two hours before dawn, Pelsaert was thrown from his bunk as the ship struck the reef. Shortly after sunrise, Pelsaert, Captain Jacobsz and about 40 others set up camp on what would later be known as Traitors Island by those who were left behind. Most of the passengers, the soldiers and the rest of the crew were ferried to nearby Beacon Island along with what food and water could be saved from the wreck. Cornelisz and about 70 or so sailors opted to remain on the Batavia now stranded high on the reef.

       Rather than consolidate the survivors in one place and provide leadership when it was most needed, Pelsaert decided he would take the Batavia’s longboat and go in search of water. With him went every senior officer, a small number of passengers, and several sailors to work the boat, leaving everyone else to fend for themselves.


    Batavia longboat replica moored in the Geraldton Marina. Photo: CJ. Ison.

    The longboat with 48 people crammed on board made for the mainland but failed to find fresh water. They then ventured north possibly as far as Northwest Cape before Pelsaert ordered the captain to make for the Dutch East Indies to seek help. The journey took 33 days, and they arrived without any loss of life, which, to be fair, was no small accomplishment. On reporting the loss of the Batavia, Pelsaert was provided with a vessel to go and rescue the remaining people and bring back the gold and silver and anything else of value that could be salvaged.

       Meanwhile, an unimaginable struggle was playing out among the castaways. Jeronimus Cornelisz had finally landed and taken control of the survivors. He had remained on the Batavia plundering its treasures and alcohol until it finally broke apart, spilling those still on board into the sea. Cornelisz spent two days adrift clinging to a timber plank before he was washed ashore on Beacon Island. Of the 70 or so who had remained on the ship, only 30 made it to dry land.

       Cornelisz was perhaps the worst possible person to lead the survivors. He was a follower of the heretic artist Johannes van der Beeck. Van der Beeck believed that God had put people on earth so they could enjoy their lives in sensual gratification and that religions, including Christianity, restricted those pleasures. It’s thought that Cornelisz may have fled Holland, fearing imminent arrest for his heretical beliefs. And, now that he was stranded on the Abrolhos Islands in the middle of nowhere and free of any moral constraints, he was determined to see out his life in hedonistic bliss. That was, of course, unless Pelsaert returned to rescue the survivors. In that case, Cornelisz planned to seize that ship and make his escape with the Batavia’s gold.

    Portico blocks recovered from the Batavia now housed at the Museum of Geraldton. Photo CJ Ison.

    As the most senior VOC official on the island, Cornelisz took charge and ordered the soldiers to hand in their weapons. He also placed all the food and other supplies under his control. Cornelisz ordered Corporal Wiebbe Hayes and about 20 soldiers to go across to West Wallabi Island to search for water, promising he would send the boat back for them in due course. Cornelisz didn’t expect them to find any water and had sent them on their way so they would no longer pose a threat to him and his plans. He assumed they would be unable to get back off the island and eventually die of thirst.

       He then sent his henchmen out to begin systematically murdering the survivors. Some of the castaways were taken to Long Island ostensibly to look for food and water, where they were abandoned. Others were taken out in boats where they were drowned, and yet other men, women and children were simply butchered in their camp. Interestingly, Cornelisz did not personally kill anyone, preferring to have others do his dirty work for him. Several of the women were kept as sex slaves, including the beautiful 27-year-old wife of a senior VOC official in Batavia named Lucretia Jansz. Cornelisz claimed her for himself. The massacres essentially had two aims. The first was to remove any challengers to his authority, and the second was to reduce the population to make their supplies last longer.

       To Cornelisz’s surprise, Hayes eventually signalled that they had found water on the island. The soldiers had also sustained themselves hunting wallabies, which they found in plentiful numbers. But before Cornelisz thought to send some of his men to investigate, Hayes had already been warned of the terror unfolding on Beacon Island by some of the survivors who had made the perilous passage to West Wallabi on pieces of wreckage.


    Houtman Abrolhos Islands. Courtesy Google Maps

    When Cornelisz and his men finally went to deal with the soldiers, they found that Hayes had organised his men, armed them with makeshift weapons and they had built a breast-high redoubt from which they could repel attackers.

       The skirmish proved disastrous for the mutineers. Several were killed by Hayes and his men when they tried to storm their fortification. The rest withdrew in defeat, abandoning the island to the soldiers.

       Cornelisz then went to meet with Hayes in person to try and persuade him to join the mutineers, but to no avail. In a second skirmish, Hayes took Cornelisz and several of his men prisoner, but the rest escaped in the boat they had come to West Wallabi Island on. From then on, the two parties were at an impasse; neither had the strength to defeat the other.    But in October, more than three months after abandoning the Batavia survivors, Pelsaert sailed into sight. The fate of the remaining survivors now rested on a race to reach the rescuers. It was a close-run affair, but Hayes got to Pelsaert first and reported what had taken place in his absence. Finally, the reign of terror came to an end, but not before more than 100 men, women, and children had been brutally murdered.

    Skeletal remains from the Batavia massacre now housed at the West Australian Shipwreck Museum in Fremantle. Photo CJ Ison.

    Cornelisz’s remaining men were quickly rounded up. Cornelisz and six others had their hands cut off and were then hanged on Long Island after confessing their crimes. Two more were left to their fate on the Australian mainland near present-day Kalbarri, and the rest were taken to Batavia, where they were tried and later executed. Captain Jacobsz steadfastly denied ever conspiring with Cornelisz to mutiny, but he appears to have seen out his days in Batavia’s prison.

       Far from emerging as a hero, Pelsaert was found partly responsible for the tragedy. A VOC inquiry condemned his decision to leave in the longboat, feeling he should have remained with the Batavia survivors, where his leadership could have prevented what took place. Pelsaert lost his entire life savings in fines, and less than twelve months later, he died a broken man. The true hero of the terrible tale was Corporal Wiebbe Hayes. He and some of his men were promoted in rank for their actions. A statue of Hayes stands on Geraldton’s foreshore, 90 km away from the islands, as a testament to his humanity, devotion to duty and courage.

    The Batavia Tragedy is one of the 60 stories that can be found in “Tales from the Quarterdeck.”

    Sun sets over Flinders and Stanley Islands in Bathurst Bay with a fishing boat in the forground at Cape Melville on Cape York Peninsular, Far North Queensland. Photo Chris Ison / Wildshot Images.

    © Copyright C.J. Ison / Tales from the Quarterdeck, 2023.

    To be notified of future blogs, please enter your email address below.

  • Bligh’s Epic Open-Boat Voyage

    The Mutineers turning Lieut. Bligh and part of the officers and crew adrift from his Majesty’s Ship the Bounty / painted and engraved by Robert Dodd, 1790 London

    On 28 April 1789, Lt William Bligh was startled awake by his first mate, Fletcher Christian, and several other HMS Bounty sailors threatening his life. He, along with 18 members of his crew who wanted nothing to do with the unfolding mutiny, would soon be unceremoniously herded into a launch and set adrift. So began one of the great open-boat voyages in maritime history.

       To say the launch was overcrowded is an understatement. Measuring 23 feet (7 metres) in length, there was room for just half those on board. But, in addition to Bligh and his men, space had to be made for their provisions.

       The mutineers allowed them 70 kg of sea biscuits, 10 kg of salted pork, seven litres of rum, six bottles of wine, and 130 litres of water. For navigation, they were provided with only a quadrant and a compass. Fletcher Christian would not allow them to take a chronometer or any of the charts. A few clothes were thrown into the launch at the last moment, as well as four cutlasses for personal protection should they be foolish enough to venture onto any of the neighbouring islands. Lastly, the carpenter was allowed to take his toolbox, and the ship’s clerk had collected some of Bligh’s papers and belongings, including the captain’s nautical almanac. With the launch so heavily weighed down, it was in imminent danger of being swamped.


    Portrait of William Bligh By Alexander Huey – National Library of Australia, Public

    As the Bounty sailed away, Bligh and the others found themselves adrift in the South Pacific Ocean, a very long way from the nearest European settlements. With no viable alternatives, Bligh convinced his men that they should make for the Dutch settlement of Kupang on Timor Island, some 3,500nm (7,000 km) away. But before they could set off on the long voyage, Blight felt they needed to add to their stores. At first glance, the provisions might seem bountiful, but shared among so many people, they would last little more than a week without strict rationing.

       Bligh made for the nearest land, Tofua Island, about 50 km away, to stock up on fresh produce. Initially, the Islanders seemed friendly and happy to trade. But after a couple of days, the mood inexplicably changed. Bligh and his men suddenly found themselves fleeing for their lives under a hail of hurled rocks. One man was felled on the beach, but the rest managed to get away in the launch.   

    But the assault continued. Rocks still rained down among them, thrown by islanders who pursued them in a canoe. Reprieve only came when the launch finally outdistanced the attackers. Bligh noted in his journal that almost all of them had been injured to some extent from the barrage of stones. But they had escaped, though at the cost of one life. Bligh then set a course west through the South Pacific Islands towards New Holland (Australia). He decided that they would not risk stopping anywhere else along the way.

    A page from William Bligh’s logbook. Courtesy State Library of NSW.

    Sacrifices had to be made if they were ever to make it to Timor. Spare clothes, ropes and anything else not essential were tossed overboard to lighten the load and make more room. Even so, conditions remained so cramped in the boat that no one had room to stretch out their legs. Those not seated on the thwarts had to find room where they could, often on the floor with their backsides in a few inches of water. The carpenter’s chest was emptied of tools so it could be filled with sea biscuits to keep them out of the water sloshing around in the bottom of the boat.

       Bligh organised the men into two watches as they sailed west-north-west towards the Fijian Islands and beyond. Beginning on 4 May, they were battered by a powerful storm with gale-force winds and high seas. Water poured into the boat, forcing the men to bail continuously to keep afloat. The storm raged until the following evening, when the weather eased off for a short while.

       Over the next several days and weeks, they passed through the Fijian Islands and then the islands of Vanuatu as they steadily made their way west. The nights were brutally cold, but there was little let-up in the weather, and they remained soaked to the skin for days on end. The only reprieve from their misery came in the form of a small daily ration of rum.

       Even though Bligh had no chart, he was able to compare his observations, when he could make them, with known landmarks recorded in his almanac. Though they passed close to several islands, there was no appetite to go ashore for food despite their growing hunger. Their experience on Tofua was still fresh in their minds.

    Route sailed by the Bounty’s launch. Courtesy Google Maps.

    They began bearing more westerly as they crossed the Coral Sea and weathered several more powerful squalls. Mountainous seas and torrential rain again kept them bailing as hard as they could to remain afloat.

       Then, on 24 May, they were bathed in full sunshine for the first time in nearly two weeks. Over the following few days, they caught several seabirds. The precious little meat was shared out evenly and eagerly eaten raw. The birds also offered hope of another sort, for they signalled that they were approaching the Australian mainland.

       On 28 May, they reached the outer edge of the Great Barrier Reef, clearly delineated by a line of breaking white surf. Bligh pointed the bow towards a gap in the reef, and everyone hung on as they raced through the narrow passage. Once through the coral jaws, they found themselves in calm water in the vicinity of Cape Melville. Bligh then bore north, remaining close to the inside of the reef in hopes that they might catch some fish to supplement their diet.

       A couple of days later, they stepped ashore on what Bligh would name Restitution Island. After being confined to the boat for so long, they were all barely able to walk. Nonetheless, a fire was started using Bligh’s magnifying glass to focus the sun’s rays, and a stew of sea biscuit and salted pork was augmented by some berries, oysters and other shellfish foraged from their surroundings.

       After several days recuperating, they reboarded the boat and island-hopped north until they reached Torres Strait. They then headed west again across open seas until Bligh estimated they were off the southern coast of Timor Island. On 14 June 1789, they sailed into Kupang Harbour, 47 days after the Bounty mutineers cast them adrift. Bligh noted that they were “nothing but skin and bones; our limbs were full of sores; [and] we were clothed in rags.” But they had survived a voyage few would have thought possible.

       The Dutch authorities tended to the survivors and arranged passage back to England; however, five would never see home, dying in their weakened state, probably from malaria, a disease not well understood at the time.     Bligh arrived back in the United Kingdom in March 1790, not to a hero’s welcome but to face a court-martial to explain the loss of his ship. The Court exonerated him and the incident had no noticeable impact on his career. Bligh eventually rose to the rank of Vice Admiral before retiring. He also served a tumultuous two years as the Governor of New South Wales until officers of the NSW Corps deposed him, but that’s a story for another occasion.

    © Copyright C.J. Ison / Tales from the Quarterdeck, 2023.

    To be notified of future blogs, please enter your email address below.

  • Mutiny on the Ariel

    Hong Kong circa 1840s

    In 1845 the trading schooner Ariel was seized off the coast of China while carrying a valuable cargo worth millions of dollars in today’s money.   This act of piracy was unusual because it was not carried out by a band of desperate cutthroats but by two of the ship’s own officers.

    The schooner Ariel was owned by the powerful trading company Jardine Matheson and was a fast-sailing coastal merchant vessel, probably around the 100-ton class.   She was also well-armed with cannons to ward off marauders in those dangerous waters.   The Ariel was crewed by British officers comprising the captain, first mate, and gunner.   The only other Englishman on board being a young apprentice.   The sailing crew were all Filipino, or “Manila men” as they were called at the time.  A young Chinese woman was also on board who was likely the captain’s mistress although she was variously described as his cook or cabin steward.

    Amoy from the outer anchorage, circa 1845.

    The Ariel regularly cruised between Chinese ports carrying all manner of goods.   This time she was sailing from Xiamen (then called Amoy) bound for Hong Kong with a very valuable cargo.   One account had the ship carrying $100,000 in Spanish silver Reales, the currency of trade at the time.     Another had her carrying a shipment of opium plus a quantity of gold and silver coin.  Either way, the value of the cargo was substantial, probably equivalent to many millions of dollars today, and it proved a temptation too irresistible to the mate and gunner.

    The evening they sailed from Xiamen, Wilkinson, the first mate, called Captain Macfarlane to come up from his cabin.   They were now off Nan’ao Island 160kms south of Xiamen and about one-third of the way through their passage to Hong Kong.   When Macfarlane came on deck he was confronted by Wilkinson and the gunner both armed with cutlass and pistols.   Wilkinson told Macfarlane they had seized the ship and they would be making for Singapore.    The pair offered to make Macfarlane an equal partner in their crime, for there were more than enough riches to go around.   But the captain refused to have any part in it and tried to persuade the men to give up their brazen heist.   

    Map of China showing coast between Amoy and Hong Kong, circa 1850s.

    Meanwhile, the crew was gathered on the forecastle and though they appeared not to be participating in the mutiny, Wilkinson said they were on his side.   The threat was obvious.   Captain Macfarlane was on his own.   Macfarlane was locked in his cabin with the assurance he would be released unharmed as long as he did nothing to disrupt their plans.   

    The next morning the captain asked to be let go in the longboat but the mate refused, telling him they were too close to Hong Kong and he would not risk capture should the captain raise the alarm before they were well out to sea.   A little later the Chinese girl went forward and spoke with the Filipino crew and learned they wanted nothing to do with the mutiny.   They armed themselves with knives and the cannon’s ramrods on the captain’s command and attacked the mate and gunner.   Meanwhile, several men smashed open the cabin skylight to rescue the captain.

    Hong Kong circa 1840s

    By the time Macfarlane was hauled out through the skylight, the mate was lying bashed, stabbed, and bleeding to death on the deck while the gunner had taken refuge in the cabin just vacated by the captain.

    Captain Macfarlane, now back in command of his ship, found a fowling piece (shotgun) belonging to the gunner and ordered him to surrender.   When the gunner opened the hatch leading to the ship’s gunpowder magazine and threatened to blow everything up, Macfarlane shot him in the leg.   He was then quickly overpowered and taken to Hong Kong to stand trial.   Wilkinson died from his wounds before they reached port.   The gunner, whose name is not recorded, was found guilty of piracy and sentenced to transportation for life.

    © Copyright C.J. Ison / Tales from the Quarterdeck, 2022.

    To be notified of future blog posts, please enter your email address below.