Tag: Australian history

  • The Loss of the Sydney Cove – 1797

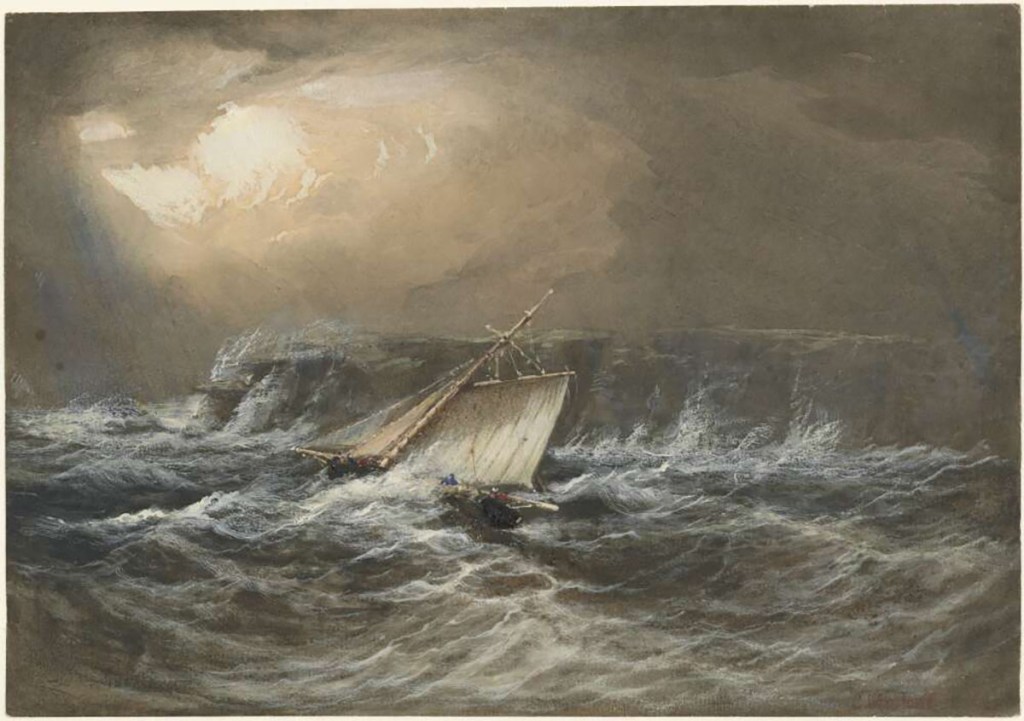
    A barque caught in heavy weather. Source: Tales of Shipwrecks and Adventures at Sea, 1856.

       In May 1797, a fishing party returned to Sydney with more than their daily catch. They had found three shipwreck survivors south of Botany Bay who told them that the merchant ship Sydney Cove had been wrecked somewhere far to the south. The survivors had trekked over 600 km along New South Wales’s rugged southern coast seeking help for their captain and shipmates who were still stranded with the ship.

       On 10 November 1796, the 250-ton Sydney Cove had sailed from Calcutta with her hold full of Indian goods and produce the owners hoped to sell in Sydney. The crew, numbering close to fifty men, was a mix of Indian and European seamen under the command of Captain Guy Hamilton. About a month out, as she cleaved her way south through the Indian Ocean, the Sydney Cove was caught in a terrible storm and began taking on water. Initially, the leak was easily managed with the pumps, so Hamilton continued on his course to round Van Diemen’s Land (Tasmania) before heading north again and on up the New South Wales coast to Sydney.

       By January, as they sailed into the latitudes south of Tasmania, the ship was caught in the grip of another powerful storm. The leak began to worsen, and soon the pumps had to operate continuously to prevent the ship from sinking.

       As they headed up Tasmania’s east coast, they encountered yet more wild weather and heavy seas. By now, water was pouring into the hold faster than the men at the pumps could clear it. The barque was slowly filling with water. Captain Hamilton ordered all non-essential gear to be jettisoned to lighten the load, but that only put off the inevitable.   

    By 9 February, the water in the hold was lapping at the lower-deck hatches. Captain Hamilton realised he had no choice but to beach his ship to save her from foundering in deep water. If that were to happen, he would not only lose his ship and its precious cargo but also much of his crew, for they would not all fit on the Sydney Cove’s two boats. He found a sandy beach on what is today called Preservation Island in the Furneaux group and ran her ashore. Although Hamilton had saved the ship from sinking, his troubles were far from over.
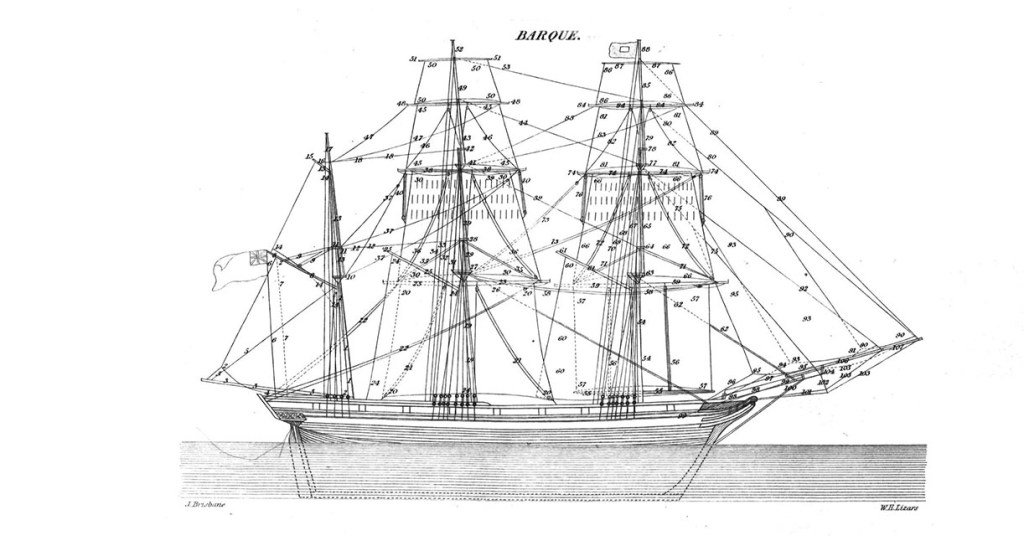
    No illustration of the Sydney Cove exists but it likely looked similar to this example. Source: Nautical Dictionary by Arthur Young, published in 1863.

       Exhausted from constant bailing and battling through rough seas, Hamilton got the crew unloading much of the ship’s stores and cargo onto Preservation Island. But then the weary men discovered the casks of rum stacked among the cargo. Hamilton had to have the liquor taken to a neighbouring island to prevent his men from pillaging it. Captain Hamilton then organised his crew for a prolonged stay, for they had come ashore at a very remote part of the world. The crew erected shelters using sails and spars to give them refuge from the elements. Hamilton rationed everyone to one cup of rice per day, and though they sank a well and found water, it proved so brackish it was barely drinkable. However, their immediate needs were met. Then he turned his mind to their rescue.

       If they were ever to leave Preservation Island, they would have to send for help. It was agreed that the First Mate, Hugh Thomson, with 17 men, would sail north, keeping close to the New South Wales coast until they reached Sydney. Captain Hamilton and the remaining crew, numbering about 30, would remain with the ship.

       Several days after setting off, the longboat was driven ashore on Ninety-Mile Beach and smashed to pieces. Thomson and his men escaped with their lives, but they had little else. With no way to return to the Sydney Cove, their only chance of survival lay in continuing to Sydney, 600 km away, on foot.

       Thomson hugged the coast, knowing that as long as they kept the sea on their right, they would eventually arrive at the young settlement. However, that meant crossing many wide river mouths and scrambling over numerous rocky promontories along the way. The journey was gruelling and took a heavy toll on the men. Encounters with the indigenous peoples varied in nature. Some provided the castaways with food and water, while others were less sympathetic but allowed them to pass unhindered. Yet others set upon the interlopers on their land. Their numbers dwindled as some drowned crossing rivers or otherwise fell victim to the harsh and unforgiving terrain.

    The Sydney Cove party as depicted by Smiths’ Weekly in 1939. Smith’s Weekly 30 Sep 1939 p. 8.

       By late April, there were only three men left. However, they had managed to reach within 20 km of Botany Bay when fishermen finally discovered them. The fishermen took the survivors the rest of the way to Sydney in their boat. On learning of the loss of the Sydney Cove, Governor Hunter ordered vessels to be sent to rescue the remaining sailors and salvage the ship’s cargo.

       After being marooned for some four months, Captain Hamilton and the rest of the crew were in dire straits. Winter was fast approaching. Successive storms had mercilessly battered their shelters, and now they had gaping tears, offering the men little protection from the bitter weather. While they had been able to supplement their rice ration with seabirds nesting on the island, their diet still barely sustained life. To add to their sense of abandonment, they had seen several ships pass in the distance but had been unable to alert any of them to their presence.

       Then, on 10 June 1798, salvation arrived when the sloop Eliza sailed into view and dropped anchor a short distance off the beach. It was later joined by the schooner Francis, under the command of Lt Matthew Flinders. Both ships had left Sydney 10 days earlier under Governor Hunter’s orders. The crews loaded as much of the salvaged cargo as they dared, leaving five volunteers behind to watch over the remaining goods until it could be collected at a later date. Captain Hamilton and his men boarded the Francis and Eliza, and they headed for Sydney.   

    The weather was no less kind as the two small ships battled their way home. It took 15 days of hard sailing through storms and high seas for the Francis to reach Port Jackson. The Eliza never made it back to Sydney and was presumed to have sunk in the terrible weather with the loss of her own crew, plus eight shipwreck survivors. In total, about half of the crew of the Sydney Cove lost their lives.

       The shipwreck is historically significant for the trek undertaken by Thomson and the others. They were the first Europeans to note an outcrop of coal in the Illawarra, which has defined the region to this day. Also, Captain Hamilton recorded strong south-westerly currents during his time on Preservation Island, suggesting there was a large body of water separating Van Diemen’s Land and the Australian mainland. The existence of the strait would later be confirmed by Matthew Flinders and George Bass and named after the latter.

    © Copyright C.J. Ison / Tales from the Quarterdeck, 2023.

    To be notified of future blogs, please enter your email address below.

  • Bligh’s Epic Open-Boat Voyage

    The Mutineers turning Lieut. Bligh and part of the officers and crew adrift from his Majesty’s Ship the Bounty / painted and engraved by Robert Dodd, 1790 London

    On 28 April 1789, Lt William Bligh was startled awake by his first mate, Fletcher Christian, and several other HMS Bounty sailors threatening his life. He, along with 18 members of his crew who wanted nothing to do with the unfolding mutiny, would soon be unceremoniously herded into a launch and set adrift. So began one of the great open-boat voyages in maritime history.

       To say the launch was overcrowded is an understatement. Measuring 23 feet (7 metres) in length, there was room for just half those on board. But, in addition to Bligh and his men, space had to be made for their provisions.

       The mutineers allowed them 70 kg of sea biscuits, 10 kg of salted pork, seven litres of rum, six bottles of wine, and 130 litres of water. For navigation, they were provided with only a quadrant and a compass. Fletcher Christian would not allow them to take a chronometer or any of the charts. A few clothes were thrown into the launch at the last moment, as well as four cutlasses for personal protection should they be foolish enough to venture onto any of the neighbouring islands. Lastly, the carpenter was allowed to take his toolbox, and the ship’s clerk had collected some of Bligh’s papers and belongings, including the captain’s nautical almanac. With the launch so heavily weighed down, it was in imminent danger of being swamped.


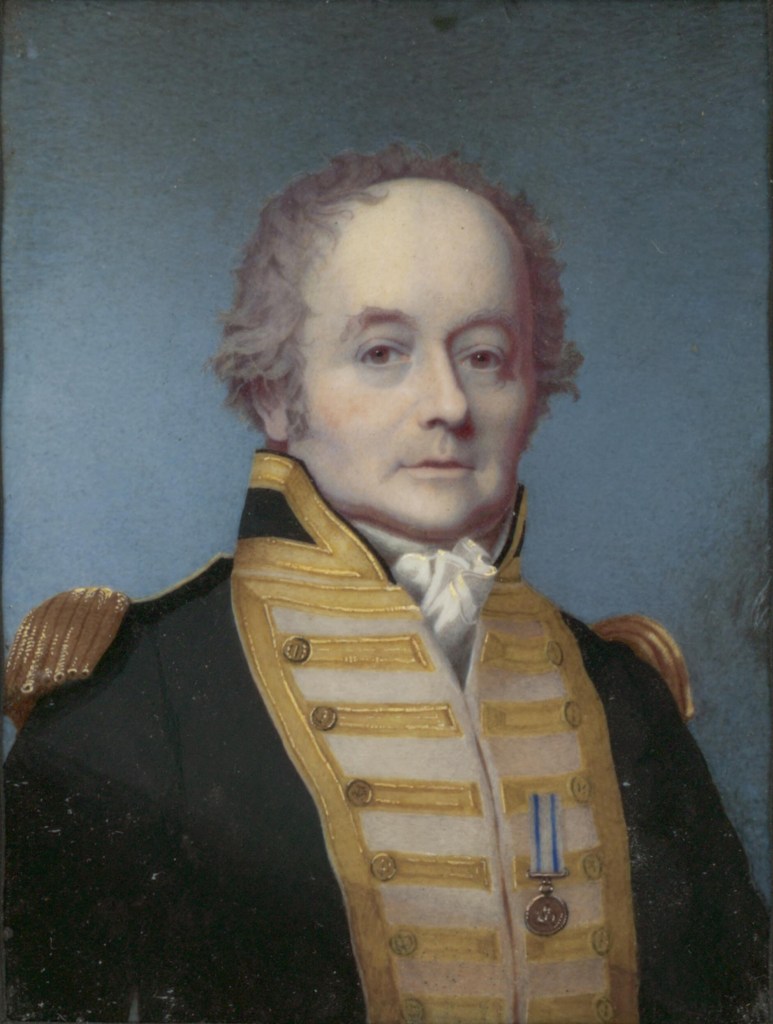
    Portrait of William Bligh By Alexander Huey – National Library of Australia, Public

    As the Bounty sailed away, Bligh and the others found themselves adrift in the South Pacific Ocean, a very long way from the nearest European settlements. With no viable alternatives, Bligh convinced his men that they should make for the Dutch settlement of Kupang on Timor Island, some 3,500nm (7,000 km) away. But before they could set off on the long voyage, Blight felt they needed to add to their stores. At first glance, the provisions might seem bountiful, but shared among so many people, they would last little more than a week without strict rationing.

       Bligh made for the nearest land, Tofua Island, about 50 km away, to stock up on fresh produce. Initially, the Islanders seemed friendly and happy to trade. But after a couple of days, the mood inexplicably changed. Bligh and his men suddenly found themselves fleeing for their lives under a hail of hurled rocks. One man was felled on the beach, but the rest managed to get away in the launch.   

    But the assault continued. Rocks still rained down among them, thrown by islanders who pursued them in a canoe. Reprieve only came when the launch finally outdistanced the attackers. Bligh noted in his journal that almost all of them had been injured to some extent from the barrage of stones. But they had escaped, though at the cost of one life. Bligh then set a course west through the South Pacific Islands towards New Holland (Australia). He decided that they would not risk stopping anywhere else along the way.

    A page from William Bligh’s logbook. Courtesy State Library of NSW.

    Sacrifices had to be made if they were ever to make it to Timor. Spare clothes, ropes and anything else not essential were tossed overboard to lighten the load and make more room. Even so, conditions remained so cramped in the boat that no one had room to stretch out their legs. Those not seated on the thwarts had to find room where they could, often on the floor with their backsides in a few inches of water. The carpenter’s chest was emptied of tools so it could be filled with sea biscuits to keep them out of the water sloshing around in the bottom of the boat.

       Bligh organised the men into two watches as they sailed west-north-west towards the Fijian Islands and beyond. Beginning on 4 May, they were battered by a powerful storm with gale-force winds and high seas. Water poured into the boat, forcing the men to bail continuously to keep afloat. The storm raged until the following evening, when the weather eased off for a short while.

       Over the next several days and weeks, they passed through the Fijian Islands and then the islands of Vanuatu as they steadily made their way west. The nights were brutally cold, but there was little let-up in the weather, and they remained soaked to the skin for days on end. The only reprieve from their misery came in the form of a small daily ration of rum.

       Even though Bligh had no chart, he was able to compare his observations, when he could make them, with known landmarks recorded in his almanac. Though they passed close to several islands, there was no appetite to go ashore for food despite their growing hunger. Their experience on Tofua was still fresh in their minds.

    Route sailed by the Bounty’s launch. Courtesy Google Maps.

    They began bearing more westerly as they crossed the Coral Sea and weathered several more powerful squalls. Mountainous seas and torrential rain again kept them bailing as hard as they could to remain afloat.

       Then, on 24 May, they were bathed in full sunshine for the first time in nearly two weeks. Over the following few days, they caught several seabirds. The precious little meat was shared out evenly and eagerly eaten raw. The birds also offered hope of another sort, for they signalled that they were approaching the Australian mainland.

       On 28 May, they reached the outer edge of the Great Barrier Reef, clearly delineated by a line of breaking white surf. Bligh pointed the bow towards a gap in the reef, and everyone hung on as they raced through the narrow passage. Once through the coral jaws, they found themselves in calm water in the vicinity of Cape Melville. Bligh then bore north, remaining close to the inside of the reef in hopes that they might catch some fish to supplement their diet.

       A couple of days later, they stepped ashore on what Bligh would name Restitution Island. After being confined to the boat for so long, they were all barely able to walk. Nonetheless, a fire was started using Bligh’s magnifying glass to focus the sun’s rays, and a stew of sea biscuit and salted pork was augmented by some berries, oysters and other shellfish foraged from their surroundings.

       After several days recuperating, they reboarded the boat and island-hopped north until they reached Torres Strait. They then headed west again across open seas until Bligh estimated they were off the southern coast of Timor Island. On 14 June 1789, they sailed into Kupang Harbour, 47 days after the Bounty mutineers cast them adrift. Bligh noted that they were “nothing but skin and bones; our limbs were full of sores; [and] we were clothed in rags.” But they had survived a voyage few would have thought possible.

       The Dutch authorities tended to the survivors and arranged passage back to England; however, five would never see home, dying in their weakened state, probably from malaria, a disease not well understood at the time.     Bligh arrived back in the United Kingdom in March 1790, not to a hero’s welcome but to face a court-martial to explain the loss of his ship. The Court exonerated him and the incident had no noticeable impact on his career. Bligh eventually rose to the rank of Vice Admiral before retiring. He also served a tumultuous two years as the Governor of New South Wales until officers of the NSW Corps deposed him, but that’s a story for another occasion.

    © Copyright C.J. Ison / Tales from the Quarterdeck, 2023.

    To be notified of future blogs, please enter your email address below.
  • The Loss of HMS Sirius – 1790

    “The melancholy loss of H.M.S Sirius off Norfolk Island” by George. Raper. Courtesy: National Library of Australia 136507434-1

    When HMS Sirius was wrecked off Norfolk Island in 1790, the loss was keenly felt back in Sydney. She was one of only two ships available to Governor Phillip, and he desperately needed both of them. Sydney had so far been unable to grow sufficient food to feed itself and was now facing starvation. The loss of the Sirius only compounded the colony’s problems. 

       HMS Sirius had sailed from Portsmouth on 13 March 1787 as part of the First Fleet, a social experiment to rid England of its most troublesome and unwanted folk. They arrived in New South Wales in January 1788. A month later HMS Supply sailed for Norfolk Island with a small number of convicts and a detachment of guards to establish a penal settlement there. By October of the same year, Governor Phillip realised that Sydney would soon be facing starvation unless something was urgently done. He ordered Captain John Hunter to sail HMS Sirius to the Cape of Good Hope and purchase livestock, grain and other provisions for the fledgling colony.   

    Some months after her return, the Sirius, in company with HMS Supply, was ordered to sail for Norfolk Island with desperately needed provisions along with additional convicts and guards.

    First Fleet entering Sydney Heads January 1788. By E. Le Bihan, Courtesy State Library of NSW.

       They reached Norfolk Island on 13 March 1790, and over the next few days, they disembarked their passengers; however, the sea conditions were such that neither ship was able to land its stores. On 15 March, the unrelenting gale-force southerly forced them to leave the island. By the 19th, the wind had moderated and shifted around to the southeast, so Captain Hunter made landfall again, hoping to begin unloading.

       As Sirius neared the island, Captain Hunter saw the Supply already anchored in Sydney Bay, and there were signals flying on shore that longboats could land without danger from the surf. Hunter took his ship in as close as he dared, loaded the boats and sent them away, but then the wind freshened.

    “Part of the Reef in Sydney Bay, Norfolk Island, on which the Sirius was wreck’d. 19 March 1790.’ by William Bradley.

         Hunter ordered his men to haul up the anchor and make for open water, but before he could do so, the Sirius was driven onto the rocks. Powerful surf crashed around the stricken ship. Soon after they struck, the carpenter reported that water was pouring into the hold. The masts were cut away in the hope that the lightened vessel might be driven higher onto the reef, where the crew would have a better chance of saving their lives.

       By now, it was about 11 a.m. The provisions were brought up from the hold and stacked on deck so they might be floated ashore if the opportunity arose. However, the sea conditions continued to deteriorate. Towards evening, Hunter received word from shore urging him to abandon ship as it would be too dangerous to remain overnight. A rope was tied to an empty barrel and floated through the surf to waiting hands ashore. Then a seven-inch-thick hawser was sent across the narrow stretch of reef and surging seas and tied to a tree. Now the crew could be hauled ashore three or four at a time. Most sported cuts or bruises by the time the reached land from being bashed against the rocks on the perilous passage. The operation stopped only when it became too dark to continue safely, and the remaining men were taken off the following day.

       A couple of days later, two convicts volunteered to go aboard the Sirius to get the livestock ashore. They got a number of pigs and some poultry over the side and the current did the rest. However, as evening turned to night, the two convicts refused to leave the ship. They had found a cask of rum sometime during the day, and by evening, they were drunk as lords. Probably in an effort to keep themselves warm, they lit two fires, but they soon got out of hand and did significant damage to the ship. The following day, guards were sent out to the ship to forcibly return them to shore, where they were clapped in irons for their troubles.

       When the weather finally eased, Hunter sent some of his men across to begin ferrying the remaining provisions ashore using the hawser. Other stores, sealed in timber casks, were thrown into the water with the hope that they would wash ashore through the surf. Some made it. Some sank to the bottom.

       While the Supply had managed to unload its provisions on the sheltered side of the island, with so many additional mouths to feed, rations for everyone on Norfolk were cut in half.

    The Settlement on Norfolk Island, May 16th 1790 / George Raper. Courtesy State Library of NSW, FL541331.

    Captain Hunter and his crew would be stranded on Norfolk Island for several months before they could return to Sydney. Meanwhile, Governor Phillip was stunned to learn of the Sirius’ loss. He had been relying on her to go on another resupply mission to keep the struggling colony fed.

       His problems just kept mounting. The second fleet had recently arrived, delivering 800 extra mouths to feed, many were already in a terrible physical state when they came ashore. They were too ill to help cultivate crops or contribute in any other meaningful way. One of the fleet’s two supply ships, HMS Guardian, had been wrecked in the Southern Ocean, placing a greater strain on the settlement’s already meagre provisions. Food was tightly rationed and no distinction was made between the lowest convict and the Governor himself. Everyone received the same ration, one and a half pounds (700 g) of flour, two pounds (900 g) of salt pork, one pound (450 g) of rice and one pint (500ml) of peas per week.   

    The few privately owned boats in Sydney were requisitioned and sent out to catch fish. Hunting parties roamed the outskirts in search of game, and guards had to be stationed around the public vegetable gardens to prevent theft. HMS Supply was sent to Batavia for supplies, leaving Sydney without a single ship at its disposal. One hundred forty-three people died of sickness or malnutrition in Sydney that year. There was probably no other time when the existence of the settlement looked so tenuous. 

    © Copyright C.J. Ison / Tales from the Quarterdeck, 2023.

    To be notified of future blogs, please enter your email address below.

  • The Life and Loss of HMSC MERMAID

    HMSC Mermaid off Cape Banks, Dec. 4, 1820, by Conrad Martens. Image Courtesy National Library of Australia.

       Between 1818 and 1820, the small survey cutter HMSC Mermaid played an important role in charting Australia’s vast coastline. So, it is perhaps ironic that her last voyage should have been cut short on an uncharted reef off the north Queensland coast.

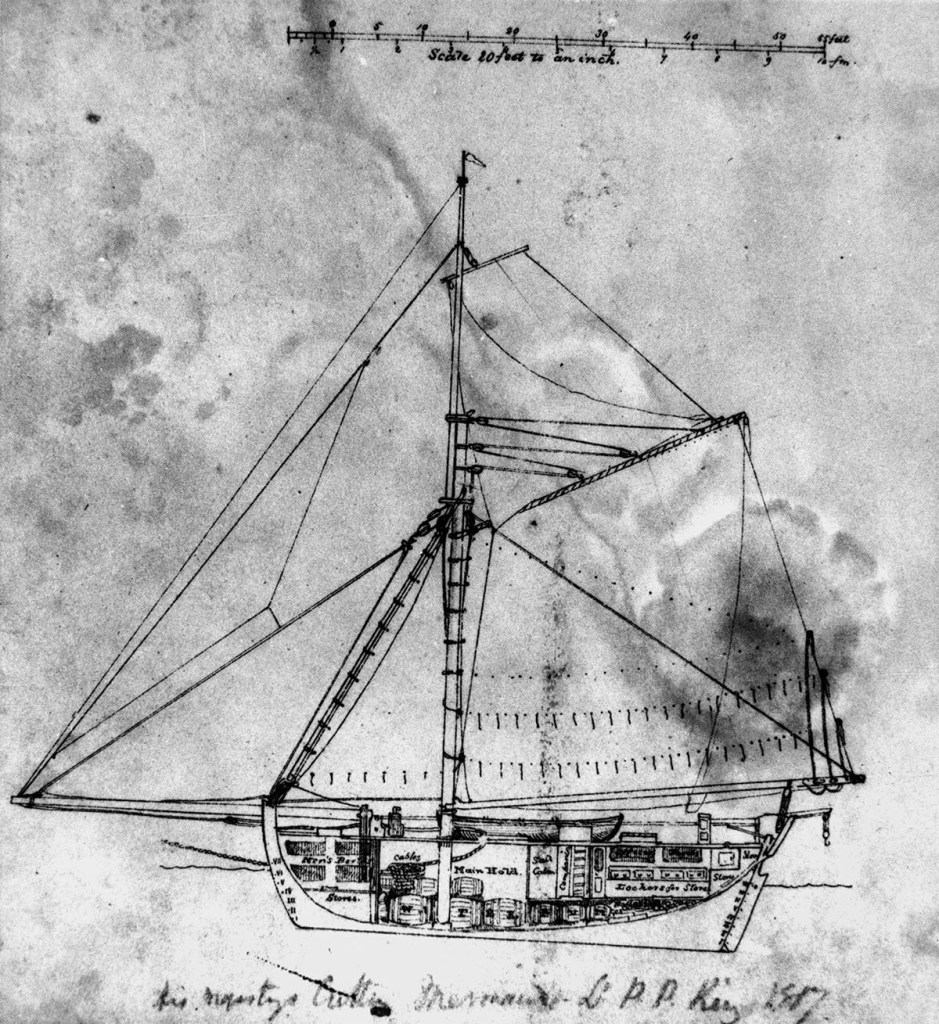
       The Mermaid was an 84-ton cutter launched in Calcutta in 1816. She arrived in New South Wales the following year and was soon purchased by the Government to undertake survey work requested by the British Admiralty.

       Lieutenant Phillip Parker King was dispatched to Australia to carry out a detailed survey of the Australian coastline, particularly those areas bypassed by Matthew Flinders. The son of former NSW Governor Phillip Gidley King, he had been born on Norfolk Island in 1791. On the family’s return to England and completion of his schooling, the young King joined the Royal Navy. He was given command of the Mermaid and got to work.

    Lt Phillip Parker King. Unknown artist. Courtesy State Library of NSW,

       HMSC Mermaid made three extensive voyages under King. They sailed from Sydney on 22 Dec 1817, bound for Australia’s northern and northwest coasts via Bass Strait and Cape Leeuwin. The crew included two sailing masters, 12 seamen and two boys. On board were also the botanist Allan Cunningham and Bungaree, a Kuring-gai man from Broken Bay who had also circumnavigated the continent with Matthew Flinders on the Investigator.

       At Northwest Cape, King surveyed and named Exmouth Gulf before continuing north along the coast until they reached Van Diemen’s Gulf and Cobourg Peninsula. From there, they sailed to Kupang on Timor Island to resupply, where they remained for two weeks. King then set sail for Sydney, returning down the West Australian coast. The return trip was marred by rough weather and a shortage of manpower. Several of the crew had become seriously ill shortly after leaving Timor, and one of them subsequently died. Despite the hardships, the Mermaid arrived back in Sydney on 29 July 1818 after an absence of seven months and seven days.

       Between December 1818 and January 1819, King sailed to Van Diemen’s Land and undertook a survey of Macquarie Harbour, which would soon become the site of one of the convict era’s most brutal places of punishment. Their work done there, the Mermaid was back in Sydney in late February, and in May she was off again.

    Lt King’s survey cutter ‘Mermaid’ Photo courtesy State Library of Queensland.

       The third voyage, and King’s last in the Mermaid, saw them sail up the east coast of Australia on a circumnavigation of the continent. On 20 July, while sheltering in a bay he named Port Bowen at latitude 22.5 S (not to be confused with the present-day township of Bowen), the Mermaid ran aground and became stuck. It was only after considerable effort that the crew were able to warp the vessel into deep water, but she sustained serious hull damage in the process. The full extent of the injury would only become apparent months later.

       The Mermaid continued north, passed through Torres Strait and King again started making a detailed survey of the north-west coast. However, the cutter had been taking on water ever since its beaching at Port Bowen. By September, she was leaking so badly that King was compelled to careen the vessel and attend to the leaking hull. With repairs completed as best they could, he then cut short his survey and ran down the west coast, across the Great Australian Bight, returning to Sydney in December. However, the Mermaid was very nearly wrecked within sight of her home port.

       As they passed Jervis Bay, the wind was blowing strongly from the east-south-east and visibility was much reduced by heavy rain. Lt King steered a course that he thought would find them off Sydney Heads the following morning. But at 2 o’clock in the morning, King, thinking they were still 30 km from land, was surprised when a bolt of lightning revealed they were sailing directly towards Botany Bay’s south head. The Mermaid only just cleared that hazard but lodged on a rock off the north head before being lifted off by a large wave. She ploughed through breakers within metres of the rocky promontory with the sea surging and foaming around them. It was a very close call, but they were soon safely inside Sydney Harbour without further incident.

       Lt King made his fourth and final survey in the Bathurst while the Mermaid underwent much-needed repairs.   But that was not the end of the little cutter’s adventures.   She was decommissioned from the Royal Navy and taken over by the NSW colonial government, where she continued to serve with distinction.

    Mermaid being repaired during King’s voyage. Engraving by John Murray 1825. Image courtesy National Library of Australia.

       In 1828, the Mermaid received a major overhaul, including re-planking, new copper sheathing, and, most importantly, being re-rigged as a two-masted schooner. Then, in early 1829, she was tasked with helping dismantle the failed settlement at Raffles Bay on the Cobourg Peninsula. Once done there, they were to make for the remote settlement of King George Sound (present-day Albany) to deliver stores and dispatches. Under the command of Captain Nolbrow, the Mermaid departed Sydney on 16 May and headed north, keeping to the inner passage inside the Great Barrier Reef.

       Tragedy struck at 6 o’clock in the morning on 13 June when, about 35 km south of present-day Cairns, the Mermaid ran grounded on a reef not recorded on King’s recently published naval chart. At 8 p.m., Captain Nolbrow and his crew, 13 men in all, took to the lifeboat with the hold bilged and water already over the cabin deck.

       Twelve days later, as they continued north towards Torres Strait, the castaways were picked up by the Admiral Gifford. The Admiral Gifford was a 34-ton schooner on a speculative voyage through Australia’s northern waters and was ill-equipped to carry so many additional passengers. On 3 July, Nolbrow and his crew were transferred to the much larger Swiftsure, possibly in the vicinity of Pipon Island. Unfortunately, the Swiftsure was wrecked two days later near Cape Sidmouth and her crew, along with the Mermaid’s, were rescued by the Brig Resource.

       Captain Nolbrow and his men eventually made it back to Sydney via the Swan River settlement (present-day Perth) in November 1829. The remains of the Mermaid were discovered on Flora Reef in 2009.

     © Copyright C.J. Ison / Tales from the Quarterdeck, 2023.

    To be notified of future blogs, please enter your email address below.

  • The Loss of the Sovereign – 1847.

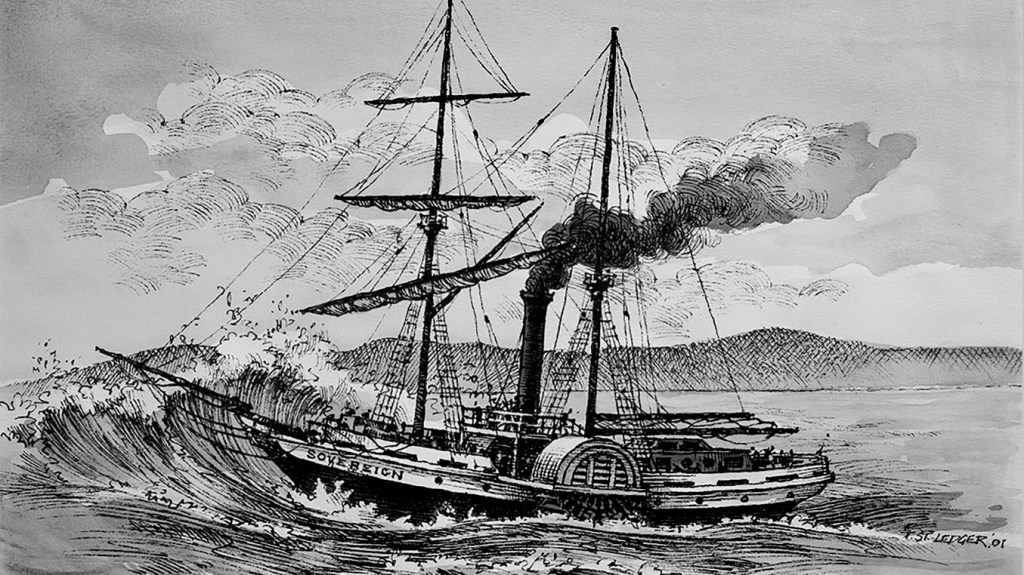
    The Sovereign Side Paddle Steamer moments before disaster. Courtesy North Stradbroke Island Museum.

       When the 119-ton paddle steamer Sovereign foundered in Moreton Bay, resulting in the loss of 44 lives, it was inevitable that people would want someone to blame. The most convenient shoulders to heap that criticism on were the steamer’s master, Captain Henry Cape. But was it deserved, or was the tragic accident a result of the steamer’s owners using her in the open ocean, a role for which she was never built?

       On 3 March 1847, the Sovereign steamed down the Brisbane River. Captain Cape had intended to cross Moreton Bay and head out to sea before bearing south on her regularly scheduled service to Sydney. She had a crew of 24 and there were also 30 passengers. The Sovereign was also loaded down with 140 bales of wool and other cargo. What did not fit in the hold had been stowed on deck, making her sit low in the water.

       By the time the Sovereign reached Amity Point near the southern passage leading from Moreton Bay out into the open ocean, it was too late in the day to cross the bar. Captain Cape anchored for the night off the pilot station so he could set off when the conditions were safe. However, for the next seven days, the winds blew strongly from the south, and he had to wait for the weather to ease off.    Late on the 10th of March, he thought it was safe enough to make the passage between Moreton and Stradbroke Islands. However, as he approached the bar, he realised it was far too dangerous to try crossing. He returned to his anchorage, hoping the next day might prove calmer.

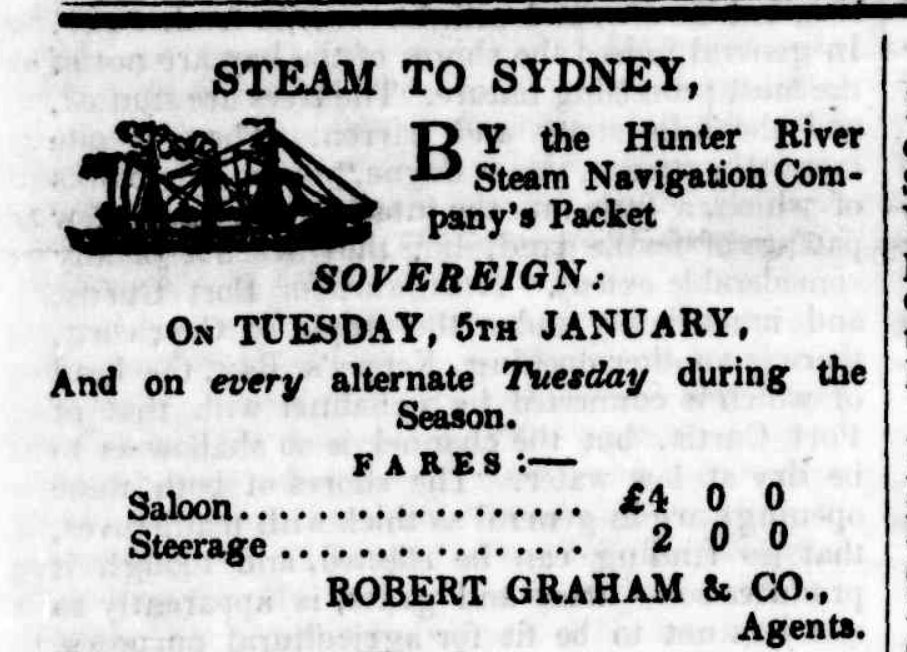
    Advertisement for the paddle steamer Sovereign. Source: Moreton Bay Courier, 26 Dec 1846.

       By 6 o’clock the next morning, 11 March, the wind had dropped to a light south-westerly breeze, so the captain got underway again. When he got to the bar, the Sovereign encountered a heavy swell rolling in from the ocean. Captain Cape had made it through in much worse conditions and was confident he could safely get out to sea that day.

       And, he almost made it. After riding over most of the rolling swells, he failed to climb one huge wave that broke over the Sovereign, smashing the frames that supported the two paddle wheel shafts. The steamer lost propulsion and was instantly at the mercy of the powerful swells. Captain Cape could only rely on his sails at this stage, and with little wind to fill them, they were close to useless.

       Waves swept across the deck, carrying away the cargo. The lifeboats were lost before anyone had a chance to climb aboard them.

       Captain Cape dropped his anchors as the steamer drifted towards the sand spit extending from the southern end of Moreton Island. While they kept the ship’s head to the sea, they dragged along the seabed. The Sovereign was doomed from that moment on. She was inexorably being driven towards disaster.

       Passengers and crew heaved the remaining wool bales overboard in a desperate attempt to lighten the load. Meanwhile, hatch covers leading below decks were washed away, and the sea poured in, filling the hold. The crew and several desperate passengers furiously worked the pumps to keep control of the water, but to no avail.

       The Sovereign began to sink. From the time the engines stopped to that dreadful moment, about 45 minutes had elapsed. In the next five minutes, the ship was pounded to pieces as she wallowed in the breaking surf. 

       Several people clung to wool bales as they floated free, but they were soon left floundering in the tumultuous seas when the sodden bales sank. As a portion of the paddle box broke away, Captain Cape and several others found refuge on it. They held on for dear life and were swept towards Moreton Island, where the paddle box was smashed to pieces in the surf.

    Map of Moreton Bay and approximate site of where the Sovereign foundered. Courtesy Google Maps

       Several Aborigines who had witnessed the disaster waded into the pounding seas and pulled Cape and several others to safety on the beach. Those acts of bravery would later be justly rewarded. Several passengers found debris from the wreck, which had kept them afloat long enough to be picked up by some fishermen and a pilot boat that had been sent out from Amity Point. They had all risked their own lives to come to the rescue. In all, just ten people from the Sovereign survived. Forty-four others drowned.

       Allegations soon circulated that the steamer was ill-suited for the Brisbane – Sydney run and should never have been used for such a long and arduous ocean voyage. Built in Sydney seven years earlier, the Sovereign had begun regularly steaming between Newcastle and Sydney, then between Sydney and Brisbane. But she was thought by some to be ill-suited for the dangerous bar crossing at the entrance to Moreton Bay.

       In response to the criticism, warranted or otherwise, the Sovereign’s owners, the Hunter River Steam Navigation Company, promptly sacked Captain Cape and released a statement absolving themselves of any blame.

       They disputed that any fault lay with the design, build or maintenance of their steamer. Instead, they rejected Captain Cape’s claim that the frames supporting the paddlewheel shafts had failed as he described. Instead, they felt it was Captain Cape’s decision to go to sea under such dangerous conditions or his subsequent handling of the vessel that had resulted in the appalling loss of life.

       Cape was so incensed with his treatment that he challenged his former employer’s report with sworn statements made by the Amity Point pilot and one of the surviving passengers. They swore they had observed the damage to the housings, which ultimately left the paddle steamer dead in the water. Regardless, a marine board inquiry found Captain Cape at fault. To this day, the loss of the Sovereign remains among the worst maritime disasters to occur in Queensland waters.

    © Copyright C.J. Ison / Tales from the Quarterdeck, 2023.

    To be notified of future blogs, please enter your email address below.