Tag: Australian history

  • William Dampier: Navigator, naturalist, writer, pirate.

    Life and adventures of William Dampier. Source: Tales of Shipwrecks and Adventures at Sea, 1856.

    William Dampier visited Australian shores twice in the 17th Century. The first time was when he served on the Cygnet in 1688, and the second, 11 years later, when he commanded HMS Roebuck. Dampier was the first Englishman to describe the land, its fauna, flora and people to a European audience. While his contribution to Australia’s history is relatively minor, his story is nonetheless a fascinating look into the golden age of exploration. Navigator, naturalist, writer, and pirate are all words that describe aspects of Dampier’s colourful life.

       Born in Somerset in 1651, William was the son of a tenant farmer. He does not appear to have had any interest in following in his father’s footsteps. Instead, when he turned 17, he went to sea and began his apprenticeship as a mariner. He joined the Royal Navy around 1673 and saw action during the Third Anglo-Dutch War. When hostilities ceased, he left the navy and travelled to the West Indies. Then, when war broke out between England and Spain, he became a privateer, which could best be described as a state-sanctioned pirate. In 1678, now aged 27, he returned to England and married his fiancée. However, he would spend just one year with her before he put to sea again.   

    This time, he would be gone 12 long years. After hunting down Spanish ships off Central America, he joined another privateer and crossed the Pacific Ocean in search of plunder. He visited ports in the Philippines, China and Southeast Asia. Then, in January 1688, he was on the Cygnet when it stopped on Australia’s northwest coast. The ship had pulled in for repairs at King Sound north of present-day Broome and would remain there for a couple of months. Dampier spent his time documenting the unusual fauna and flora. He also wrote at some length about his observations on how the indigenous people lived, but not in particularly flattering terms. To his Eurocentric eye, they existed in appalling conditions, and he thought them to be the most miserable people he had ever encountered.

    A map of the world showing the course of Mr Dampiers voyage round it: From 1679 to 1791. By Herman Moll.

       In 1691, Dampier joined a very exclusive club of men who had circled the globe when he returned to England via the Cape of Good Hope. His various exploits and adventures became the subject of his hugely successful book, “A New Voyage Round the World,” published in 1697. Through his book, Dampier came to the attention of both the Royal Society and the Admiralty. They commissioned him to chart the east coast of New Holland, some 70 years before James Cook would eventually do so. Had Dampier succeeded, he may well have changed the trajectory of modern Australian history. However, as will soon become evident, circumstances would conspire against him.  

    HMS Roebuck sailed from England on 14 January 1699 with a crew of 50 and provisions to last them 20 months. Dampier originally planned to sail around Cape Horn and then cross the Pacific Ocean until he reached Australia’s east coast. However, his ship was long past its glory days, and its refit for this hazardous voyage had taken far longer than anticipated. By the time he reached the southern tip of South America, it was winter, the worst time to try rounding Cape Horn. Instead, he decided to cross the South Atlantic and round the Cape of Good Hope. He would then cross the Indian Ocean to New Holland’s west coast and begin his survey there.

    HMS Roebuck.

    They made landfall near Dirk Hartog Island in early August 1699.   On 7 August, he sailed past Cape Peron and into Shark Bay, where he spent a week exploring.   Dampier named it for the abundance of sharks he found in those shallow, enclosed waters. He made a detailed chart of the bay and described many of the fish, birds and plants he saw there. Though fish, fowl, and turtles were easily procured and made a welcome addition to the men’s diet, they were unable to find a supply of fresh water. On 14 August, Dampier left Shark Bay by the same passage he entered after encountering shoals and dangerously shallow water between Dorre and Bernier Islands and the mainland.

    A Pied Oyster Catcher. Source: A Voyage to New Holland, in the year 1699.

    They continued north along the coast for another 750 kilometres until they arrived at a small group of islands, now known as the Dampier Archipelago. Freshwater remained elusive, so they continued sailing north until they were at latitude 18° 21’ south, about 60 to 70 km south of present-day Broome. Again, they went in search of water. And, again, they returned empty-handed. Only this time, an encounter with the local inhabitants ended in violence. One of Dampier’s men was speared through his cheek while a Karajarri man was wounded by musket fire. In early September, Dampier resigned himself to temporarily abandoning New Holland and made for Timor to resupply.   

    From Timor, Dampier continued sailing northeast and charted the northern coast of New Guinea. By now, the Roebuck was in such poor shape that he abandoned his plan to locate New Holland’s east coast and turned back towards England. He stopped briefly at Batavia, then crossed the Indian Ocean, rounded the southern tip of Africa, and sailed north through the Atlantic. In February 1701, they reached Ascension Island, but HMS Roebuck would go no further. Her planking was riddled with seaworms. And she was taking on a lot of water. Dampier had to run her ashore to stop her from foundering in deep water. He and his crew would remain stranded there for five weeks until a passing East Indiaman rescued them. Dampier and his men returned to England in August 1701.

    1966 Australian postage stamp commemorating William Dampier.

    William Dampier was court-martialled on his return to England on a charge of ill-treating his first mate on the voyage out. Found guilty, he was stripped of the money the Admiralty owed him, and he was ruled unfit to command any of His Majesty’s ships in the future. Undeterred by the setback, he published a book about his most recent exploits and would go on to circumnavigate the world twice more. When Dampier died in London around 1715, he was the only person to have circled the globe three times.
    Sun sets over Flinders and Stanley Islands in Bathurst Bay with a fishing boat in the forground at Cape Melville on Cape York Peninsular, Far North Queensland. Photo Chris Ison / Wildshot Images.

     © Copyright C.J. Ison / Tales from the Quarterdeck, 2024.

    Please enter your email address below to be notified of future blogs.
  • HMS Pandora: Queensland’s earliest recorded shipwreck – 1791

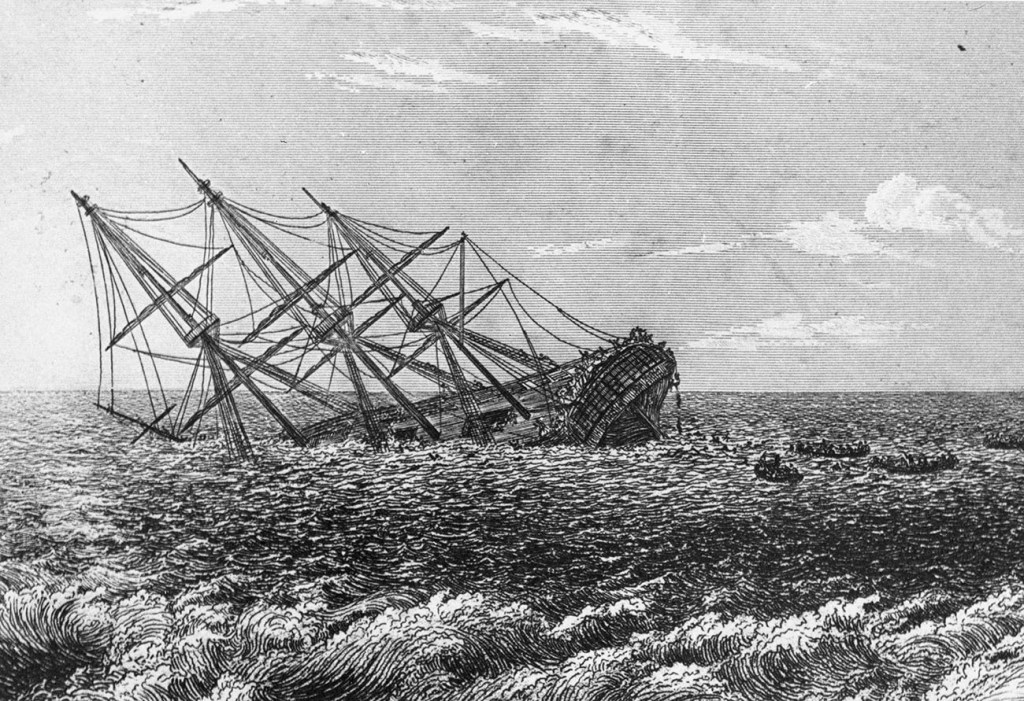
    H.M.S. Pandora in the act of foundering’ . An etching by Lt-Col. Batty after a sketch by Peter Heywood from ‘The Mutiny and Piratical Seizure of H.M.S Bounty’ first edition 1831. Photo courtesy SLQ.

    In August 1791, HMS Pandora was returning to England, having tracked down and captured 14 of the Bounty mutineers in Tahiti. But disaster struck on the night of the 29th, as the Pandora was trying to find a way through the Great Barrier Reef. The ship’s surgeon, George Hamilton, left a nerve-wracking account of the incident in his memoir, “A Voyage Round the World in His Majesty’s Frigate Pandora”, published in 1793 after his return to England.

       Hamilton wrote that on the night of 29 August, a boat sent earlier in the day by the Pandora’s captain, Edward Edwards, to scout for a passage through the maze of reefs had finally returned to the ship. As the crew was hauling it out of the water, the 24-gun frigate unexpectedly struck a submerged coral reef. Captain Edwards immediately ordered the crew to set the sails as he tried to back off the outcrop, hoping to use wind power alone. When that failed to dislodge his ship, he ordered a boat to be made ready to take an anchor out so he might kedge the vessel off. But by the time the anchor was in place and the crew ready to winch, it was already too late.

       The carpenter had examined the hold and found that the Pandora’s hull had sprung a serious leak. In the 20 minutes they had been aground, the water had risen to nine feet (2.7 m). All hands were immediately engaged in efforts to save the ship from sinking. Sailors began bailing at each of the hatchways, and several of the Bounty mutineers were unshackled to help man the bilge pumps.

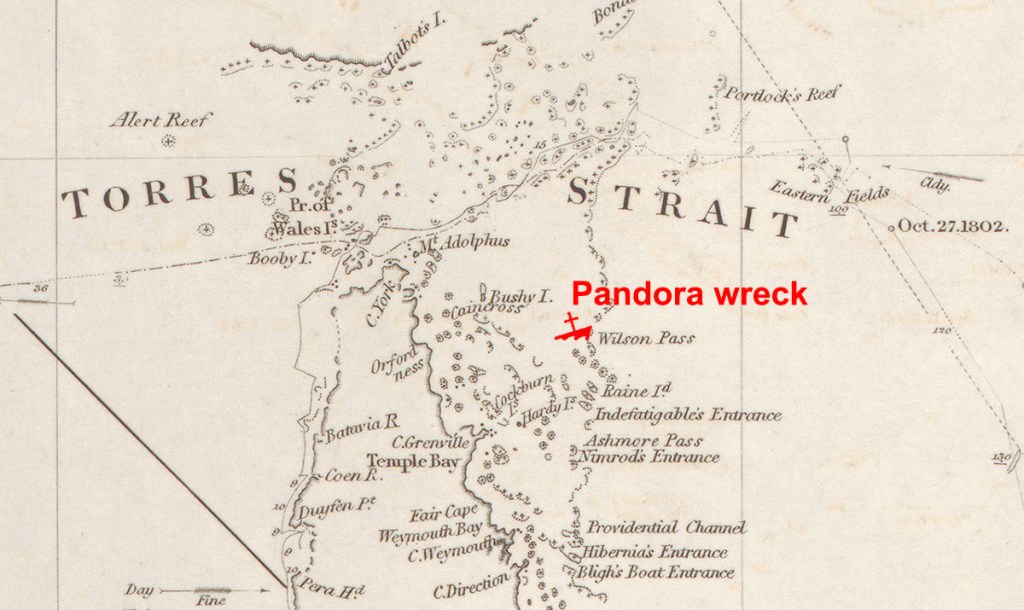
    Map showing HMS Pandora wreck location (approx).

       “It blew very violently, and she beat so hard upon the rocks, that we expected her, every minute, to go to pieces,” Hamilton recalled. “It was an exceedingly dark, stormy night, and the gloomy horrors of death presented us all around, being everywhere encompassed with rocks, shoals, and broken water. About ten [o’clock] she beat over the reef, and we let go the anchor in fifteen fathoms of water.

       Not yet ready to give up on his ship, Captain Edwards ordered the guns thrown overboard and, at the same time, had some of his men prepared the topsail to be hauled under the ship’s bottom in a vain effort to stem the leak. But before they could get the sheet of canvas over the side, one of the bilge pumps failed, and the water began flowing into the hold faster than it could be bailed out. The topsail was abandoned as every hand was set to work, baling to stop the ship from sinking.

       Soon the Pandora began listing, and the crew experienced their first casualties. A canon broke loose and rolled across the deck, crushing a sailor, while a topmast came crashing down on deck, killing another. The crew laboured at the pumps and bailed with buckets through the night to keep the ship afloat. An ale cask was tapped, and its contents were regularly served out to the men to keep their spirits up.

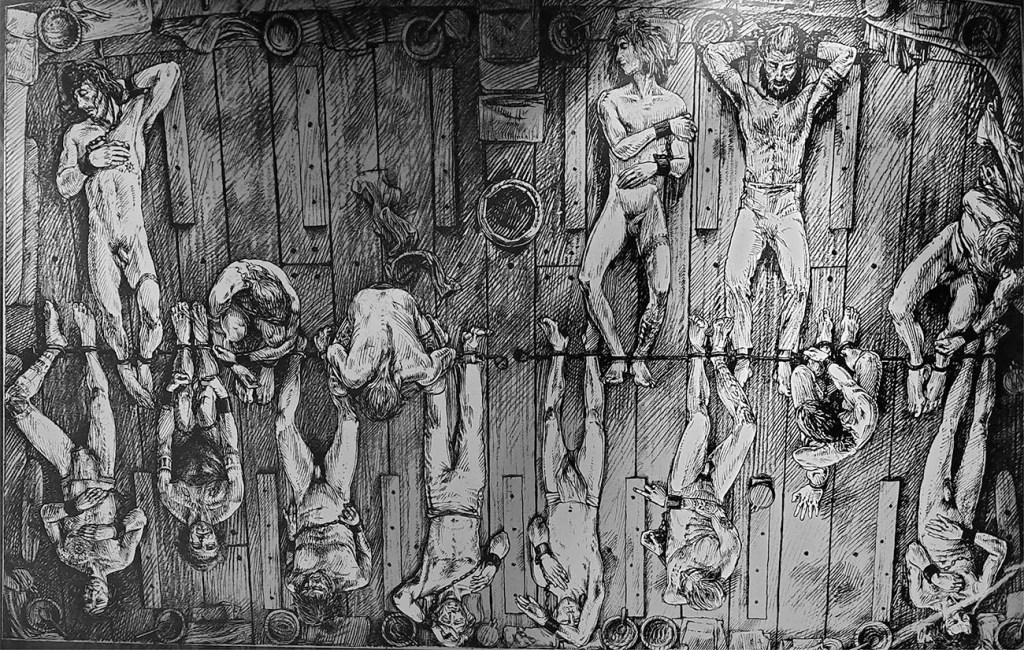
    Bounty Mutineers accommodation on HMS Pandora. Source: Museum of Tropical Queensland, Townsville.

       Then, about half an hour before dawn, Captain Edwards called his officers together to discuss their next move. It was clear to all that the ship was doomed and that their efforts should shift from saving the ship to preserving the lives of the crew. The Pandora’s four boats had been put over the side earlier in the night, and they were sheltering in the lee of the reef, their coxswains awaiting further orders. Spars, booms, hen-coops and anything else that floated were cut free so that the men might find something to keep themselves from drowning when the ship inevitably sank.

       Hamilton wrote that Captain Edwards ordered that the remaining prisoners be released from their irons. However, it came too late for some of the mutineers who were still shackled in place in their makeshift prison they called “Pandora’s Box.” They went down with the ship.   

    The water began pouring in through the gun ports, causing the frigate to list even further. As the captain and crew scrambled to jump overboard, the Pandora heeled over and sank almost immediately. The boats came to the rescue of the sailors clinging to the wreckage in the water, but for many help came too late. “The cries of the men drowning in the water was at first awful in the extreme,” Hamilton wrote. But as the men disappeared below the surface, the screams faded and then died away entirely.

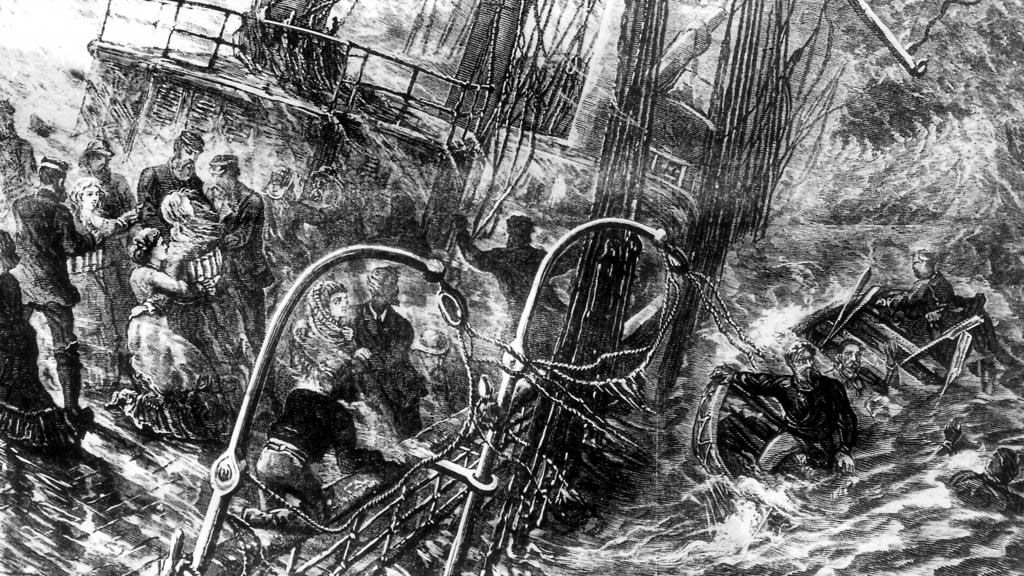
    Loss of the Pandora on the Great Barrier Reef. Source: Tales of Shipwrecks and Adventures at Sea, 1856.

       As morning heralded a new day, a small sandy cay could be seen about two and a half nautical miles (5 km) to the southeast. Edwards ordered the boats to make for the one tiny speck of land in that vast expanse of sea. The captain took stock of their provisions and ordered a guard to be placed over the remaining surviving mutineers. Fortunately, someone had the forethought to load a barrel of water, a small keg of wine, and some sea biscuits onto one of the boats. To that haul of supplies could be added a few muskets and cartouche boxes of ammunition, along with a hammer and a saw. Not much to preserve life in such remote and hostile waters. Edwards thought their only chance of survival would be to make for the Dutch trading outpost on Timor Island, some 1200 nautical miles (1400 km) away.

       Edwards forbade anyone from drinking on that first day, calculating that they would have only enough water to last 16 days at two small cups per person per diem. They spent two days on the cay preparing the boats for the voyage that lay ahead. Floorboards were torn out and affixed to the sides of the boats, around which canvas was wrapped to increase the freeboard.

       Before leaving, the sailing master, George Passmore, was sent back to the wreck site to see if anything might have floated free in their absence.   He returned two hours later with a small assortment of salvaged materials and a cat that he found clinging to the top-gallant mast-head.

       On the third morning, they set off west towards Torres Strait and beyond to the Dutch settlement of Kupang. Edwards had hoped to refill their water cask at one of the islands dotting Torres Strait before they headed into the expanse of the Arafura Sea. However, an encounter with Islanders, which began friendly enough, inexplicably ended abruptly with a volley of arrows and musket fire being exchanged. They stopped again at Prince of Wales Island (Muralag), where this time they were able to fill their water cask without incident. On 16 September, after an arduous voyage lasting about a fortnight, the four boats pulled into Kupang Harbour. From there, they were taken to Batavia (present-day Jakarta), where Edwards purchased a ship for the return to England.

    Canon recovered from HMS Pandora wrecked on the Great Barrier Reef on display at the Museum of Tropical Queensland, Townsville.

       The shipwreck directly cost the lives of 31 sailors and four mutineers. Another 16 died from disease during or after their stay in Batavia. Of the 134 men who left England on the Pandora, only 78 made it home alive. The ten prisoners who survived the wreck were tried for mutiny. Four were acquitted, two received pardons, one got off on a technicality, and three were hanged. Captain Edwards faced a court-martial to answer for the loss of his ship, but he was found not to have been at fault.   

    The Museum of Tropical Queensland in Townsville has a world-class exhibition of artefacts recovered from the wreck.

    © Copyright C.J. Ison / Tales from the Quarterdeck, 2024.

    Please enter your email address below to be notified of future blogs.
  • Cyclone Mahina & the loss of the North Queensland Pearling Fleet, 1899.

    Pearling luggers at Thursday Island. Courtesy State Library of Queensland.

       On 2 March 1899, Cyclone Mahina formed near the Solomon Islands and began tracking south-west towards the Queensland coast. On the same day, a second weather system formed in the Arafura Sea northwest of Darwin. This “monsoonal disturbance” was named Nachon and began moving towards the southwest. Unbeknown to the Thursday Island pearling fleet anchored in Bathurst Bay, 400 kilometres down the Queensland coast, both of these powerful weather systems were bearing down on them. Mahina and Nachon would collide over Bathurst Bay, wreaking havoc on the fleet, resulting in the loss of as many as 400 lives.

    Cyclone tracks for Cyclone Mahina which devastated the Thursday Island Pearling fleet at Cape Melville on 5 March 1899

       The pearling fleet was based at Thursday Island in Torres Strait, but the pearlers regularly ventured across Queensland’s warm tropical waters in search of shells. Pearling schooners served as floating processing stations for their fleet of ten to 15 luggers and diving boats. It was those smaller vessels that ranged out over nearby reefs, collecting the lucrative shells from the sea floor.

       March 4 was a Saturday and, for the pearlers, the much-anticipated start to the weekend. After they had delivered their pearl shells to their respective station schooner, tending to any repairs and restocking with provisions for the next week, it was time to relax and catch up with friends and family whom they had not seen all week.

       The schooners Sagitta, Silvery Wave, and Crest of the Wave were anchored near Cape Melville just inside Bathurst Bay. As the prevailing winds had been blowing from the southeast for the previous three weeks, everyone was anchored close to shore where the mountains extending inland protected them from the worst of the wind.

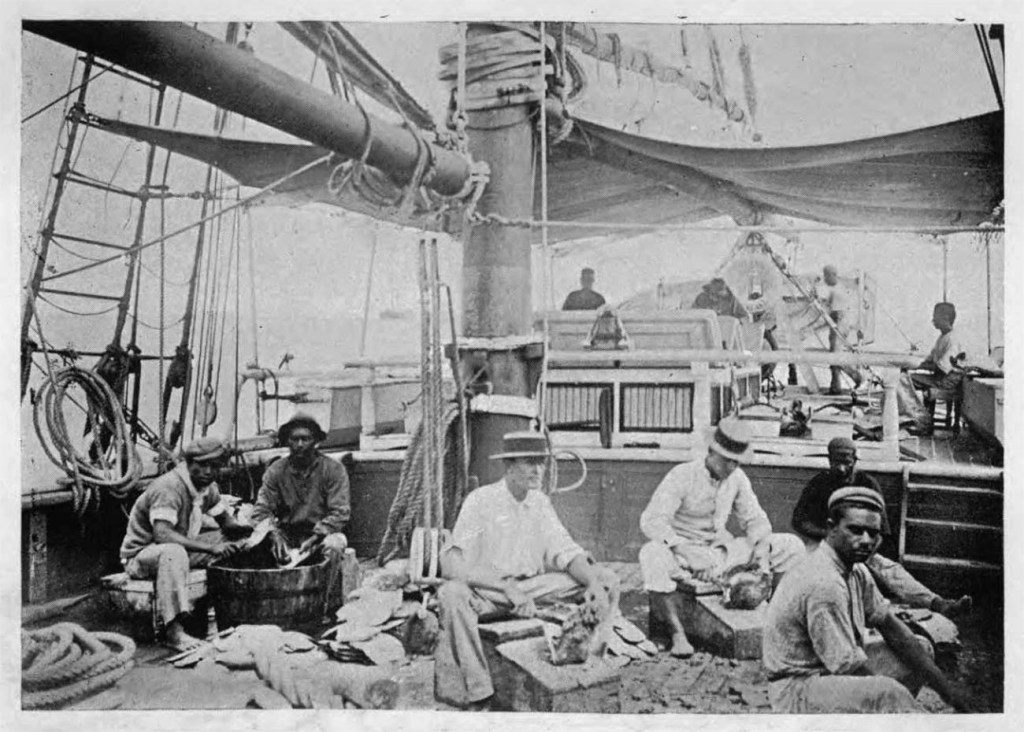
    Opening and cleaning shell on the schooner Olive. Source: The Pearling Disaster, 1899.

       The schooners Tarawa, Meg Merrilees, Olive and Aladin were anchored about 75 kilometres away near Pelican Island on the northwestern end of Princess Charlotte Bay. The manned Channel Rock lightship and several other pearling vessels were scattered along the Great Barrier Reef in the path of the approaching storm. No one, including the local Aboriginal people, could imagine the violent mayhem about to be unleashed upon them.

       At 7 o’clock on Saturday evening, only a moderate breeze was blowing from the southeast. However, just four hours later, the wind had increased to hurricane strength. It had also begun shifting direction from the southeast to the southwest. As Cyclone Mahina tore towards Bathurst Bay, the wind continued shifting further to the west, and eventually it blew from the northwest. For much of the early hours of Sunday, 5 March, the pearling fleet was exposed to the cyclone’s full fury. Torrential rain lashed the vessels. Streaks of angry lightning arced across the night sky while peals of thunder, howling wind and crashing waves competed to drown each other out. The hundreds of men and women trapped on their boats could do nothing but pray that they survived the ordeal.   

    Then, around 4 a.m., a massive storm surge swept through the bay. By 10 o’clock on Sunday morning, the tempest had moved inland, and some sanity returned to the world. It was only then that the few survivors would learn the full devastating impact of the storm.

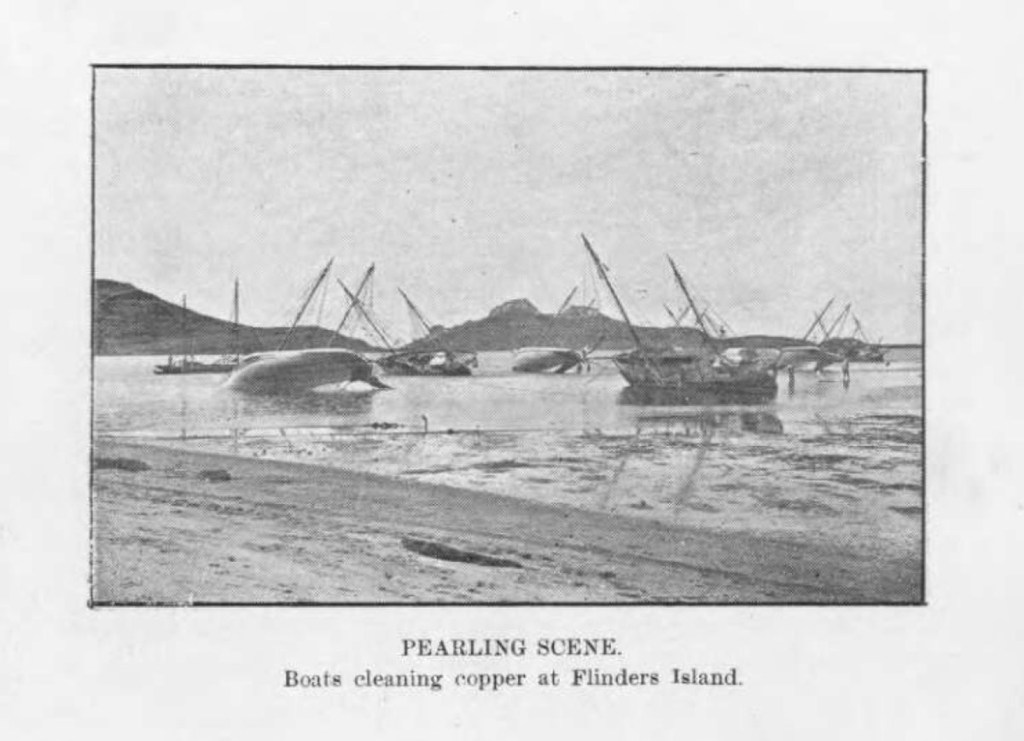
    Boats cleaning copper at Flinders Island. Source: The Pearling Disaster 1899.

       The Tarawa’s anchor cables had parted around 3 a.m., and she was swept onto Pelican Island. However, she was lucky for the damage would be easily patched, and she would limp back to Thursday Island. The Meg Merrilees dragged her anchors and ran onto a coral reef. All hands survived the wild night, but attempts to refloat the schooner were unsuccessful. The tender Weiwera was also lost. Of the 30 or so luggers anchored nearby, one-third sank with the loss of nine lives. The schooners Olive and the Aladin were more fortunate. Their anchors held, and they survived the night.

       The vessels lying off Cape Melville fared far worse. The 25-ton tender Admiral had only arrived in Bathurst Bay on the morning of the cyclone. She foundered at the storm’s height with the loss of her five crew and an unknown number of passengers brought down from Thursday Island to join the fleet. The Silvery Wave likewise was lost. Only a Japanese crew member named Sugimoto survived. The Sagitta was thought to have collided with the Silvery Wave and went to the bottom of Bathurst Bay with nearly 20 hands.   

    Captain W. Field Porter survived to give a harrowing account of that terrible night.  He recounted that his schooner, Crest of the Wave, was anchored near the other vessels off Cape Melville while about 40 luggers were in shallower water close to the beach. As the storm intensified, his anchors began dragging. Fortunately, the wind and current pushed the schooner into deeper water. “The intense darkness and driving rain prevented anything [from] being seen of the other boats or the land. The sea by this time was very rough, and enormous waves broke time after time on board,” Porter later wrote of his experience.

    “Mr Outridge, preparing for deep sea diving and assisted by Captain Porter of the Crest of the Wave.” Source: The Pearling disaster of 1899.

       The eye of the cyclone passed over his ship around 4.30 in the morning. After ten or fifteen minutes of dead calm, Captain Porter recalled, the wind suddenly came from the north-west, “with such terrific force that the schooner was thrown on her beam ends and [was] almost buried in the raging sea.” With much difficulty, the masts were cut away, and the ship righted itself. But by then, she had taken on a lot of water. The bilge pump was manned, and every spare hand bailed with buckets to keep the ship from sinking. Eventually, it was discovered that the water was entering through the rudder trunk. The leak was plugged with blankets and bags of flour, and the ship was saved. However, for 12 long and terrifying hours, the crew battled the elements, not knowing if each moment would be their last. Finally, the wind and seas started to ease, and Captain Porter and his men began to think they might just survive. As for the luggers, they either foundered at their anchorage or were driven ashore, where most were smashed to pieces. Some wreckage was found almost half a kilometre from the beach, taken there by the massive storm surge which swept several kilometres inland in places. Only a handful of the luggers were able to be refloated.

       The Channel Rock Lightship, moored between Cape Melville and Pipon Island, was nowhere to be seen after the storm passed and was believed to have sunk at her moorings with the loss of four lives. The bodies of Captain Gustaf Fuhrman and the mate Douglass Lee were later found near Cape Melville amongst debris from the lightship.

    Wreck of the Zanoni at Cape Melville, Source: The Pearling Disaster, 1899.

       It is estimated that some 300 pearlers lost their lives that night in Queensland’s most deadly natural disaster. While a dozen Europeans perished, most of the casualties were men and women from Torres Strait, the South Pacific, Japan and Malaya. Most were buried where their bodies were found with simple timber markers noting their final resting place. It was thought that as many as 100 local Aborigines were also killed during the storm and its massive tidal surge.

       On Flinders Island, several dolphins were found washed up on rocks almost five metres above the high tide mark. One witness painted a vivid picture of the destruction at Bathurst Bay. “There is quite a forest of mastheads and floating wreckage, the boats having evidently sunk at the anchorage. There are tons of dead fish, fowl, and reptiles of all descriptions, and the place presents the appearance of a large cemetery. All the trees have been stripped of their leaves.”

       Four schooners and 54 luggers were wrecked beyond repair, which devastated Thursday Island’s pearling industry. The human cost was even higher. With so many casualties, barely a family on Thursday Island escaped losing a loved one.

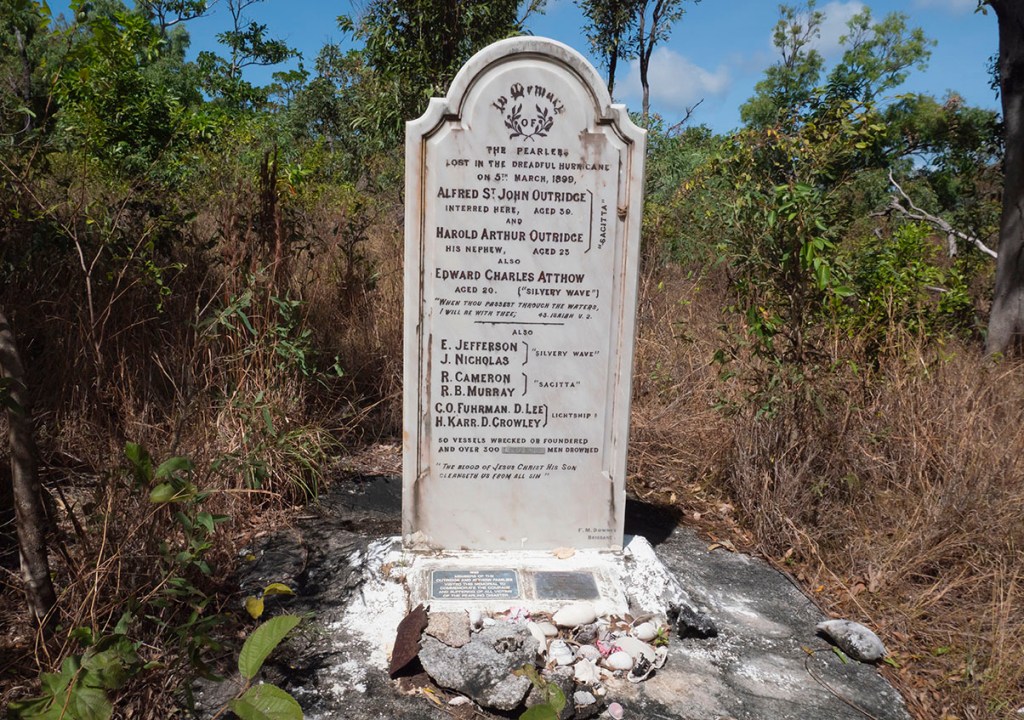
    Cyclone Mahina memorial at Cape Melville which marks the loss of 300 people during the storm. Photo: CJ Ison.

    © Copyright C.J. Ison / Tales from the Quarterdeck, 2024.

    Please enter your email address below to be notified of future blogs.
  • The 1878 Loch Ard Tragedy

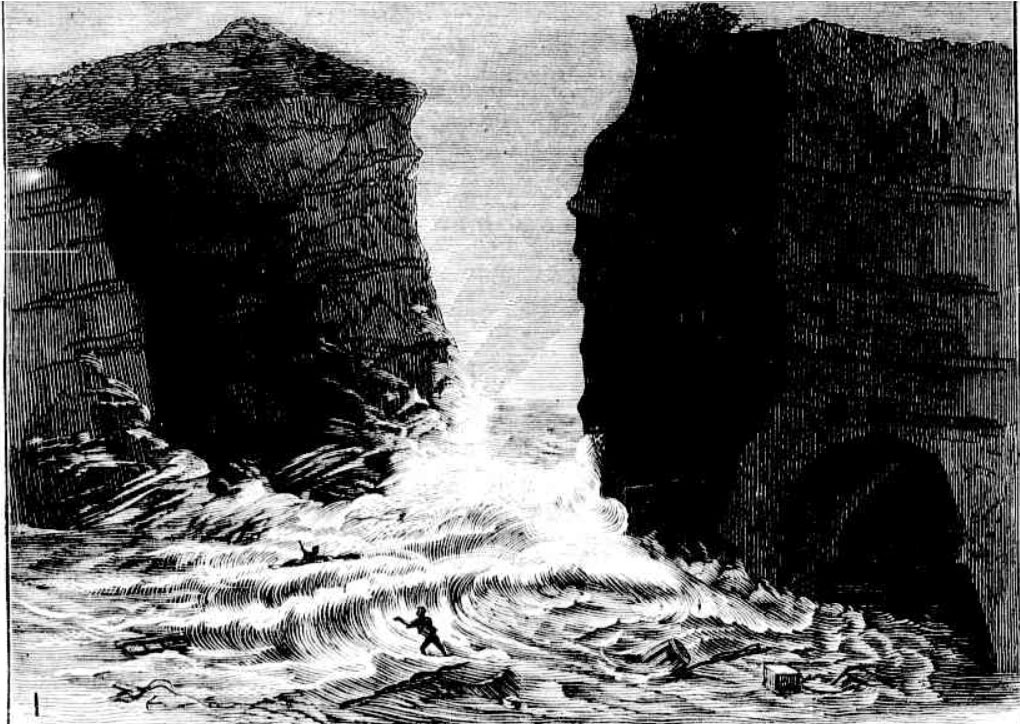
    “The Wreck of the Loch Ard near Sherbrook River.” Source: Illustrated Australian News, 8 July 1878, p. 20.

       In early June 1878, the Scottish merchant ship Loch Ard was expected to arrive in Port Phillip Bay at any time. But that was not to be. News soon reached Melbourne that the ship had been wrecked near the Sherbrook River, some 50 kilometres west of Cape Otway, with a fearsome loss of life.

       The Loch Ard was a 1623-ton fully rigged sailing ship belonging to the Glasgow General Shipping Company. But she proved to be an unlucky vessel. On her maiden voyage, she was twice dismasted. The first time it happened was shortly after she departed Glasgow on a voyage to Melbourne in December 1873. She was struck by a powerful storm and had to return to port to undergo a refit. She then set sail again in January the following year. This time, as she was crossing the Southern Ocean, she lost all three masts and nearly foundered during a ferocious storm. The resourceful captain was able to set jury-rigged masts from spare spars and limp the rest of the way to Melbourne.

       On this most recent voyage, the Loch Ard sailed from London on 27 February 1878 under the command of Captain George Gibbs with around 25 to 30 crew, 17 passengers and over 3,000 tons of cargo. But as she neared the end of her voyage, the weather closed in on that most dangerous stretch of Victoria’s coastline.

    The Loch Ard. By Allan C. Green – State Library of Victoria.

       The weather became squally, and the sky remained overcast for several days, preventing Captain Gibbs from making any observations as his ship ran before the wind under close-reefed topsails. Sailing instructions warned mariners to remain far out to sea until they had passed Cape Otway before making the final approach to the entrance to Port Phillip Bay. Unfortunately, Captain Gibbs was sailing blind and was unaware of how much danger he and his ship were in until it was too late.

       Around 4 a.m. on 1 June, the lookout spotted white-capped waves breaking over a reef half a nautical mile (one kilometre) ahead. Gibbs ordered the ship to be put about, but the wind continued to push them towards danger. He then ordered both anchors to be let go, but they did not hold, and the ship continued towards the jagged fangs of the reef and the towering cliffs beyond.

       When they were just 150 metres from the rocks, Captain Gibbs ordered the anchors to be slipped, and he tried to put on more sail, hoping he might veer the ship back out to sea. But it was far too late. The crew had only managed to set the mainsail when the Loch Ard crashed into the rocks on her starboard quarter. The topmast went over the side, taking two seamen with it. Meanwhile, Gibbs ordered the lifeboats to be readied for the evacuation of the women. But by now, successive waves were crashing onto the deck and sweeping it clean.

    “The rescue of Miss Carmichael” Source: Illustrated Adelaide News, 1 Aug 1878, p. 13.

       Midshipman Thomas Pearce and several other seamen had tried getting one of the lifeboats over the side to begin taking on passengers when it was washed into the swirling seas. Meanwhile, the captain and several sailors were struggling to free another boat from a tangle of fallen rigging. Then, a massive wave lifted the Loch Ard off the reef, and she sank in deep water, spilling everyone into the turbulent seas.

       Pearce managed to cling to his upturned boat, but he never saw any of his shipmates again. By now, it was daylight, and he saw he was drifting towards a small bay. Once in the bay, he left the boat and began swimming towards shore. Then he found an upturned table and climbed onto it. He washed up onto a small sandy beach with all manner of crates, driftwood, and other debris from the wreck. After taking some time to recover his strength, Pearce searched the small bay to see if anyone else had survived. Just then, he heard a cry for help coming from the water. He then spotted a woman clinging to a spar bout 50 metres out in the bay.    He swam out, dragged her ashore, and the pair took shelter in a shallow cave. The young lady was 19-year-old Eva, the eldest daughter of the ship’s surgeon, Dr Carmichael. His wife and three children had accompanied him on the voyage, for they had intended to settle in Victoria.

    Miss Carmichael and Thomas Pearce. Source: The Illustrated Adelaide News, 1 Aug 1878, p. 13.

       After rescuing Eva, Pearce collapsed beside her from sheer exhaustion and slept. He felt somewhat recovered when he woke and turned his mind to scaling the high cliffs surrounding the bay so he could go and find help. He eventually found a route up and then a well-trodden path and began following it. After walking several kilometres, he came upon a shepherd tending to a flock of sheep. Pearce asked him to send for help while he returned to the bay to let Eva know assistance was on the way.

       However, when he returned to the cave, he found Eva was gone. Pearce searched the area but was unable to see her. When help arrived, the search continued. And then, just as night was falling, a faint cry was heard coming from behind a bush. There, they found Eva, barely conscious. She was hauled up the cliff face with the aid of a rope, where a carriage was waiting to whisk her away.

    The cave and wreckage strewn on the beach. Source: Australasian Sketcher, 6 July 1878, p. 11.

       Eva Carmichael and Thomas Pearce were the only survivors from the Loch Ard. The young midshipman had the unenviable task of identifying the remains of several bruised and battered bodies that washed up in the next few days.   

    Among the tons of debris washed ashore was one particularly well-constructed crate that contained a large porcelain peacock. It had been manufactured by Minton and had been sent out on the ship to be displayed at the upcoming 1880 Melbourne International Exhibition. It had survived the wreck without so much as a chip of damage. It and other relics from the Loch Ard are now on display at Warrnambool’s Flagstaff Hill Maritime Museum. The small bay where Thomas Pearce and Eva Carmichael made it ashore is now named Loch Ard Gorge.

    © Copyright C.J. Ison / Tales from the Quarterdeck, 2023.

    Please enter your email address below to be notified of future blogs.

  • The Loss of the SS Cawarra: Bad luck or an avoidable tragedy?

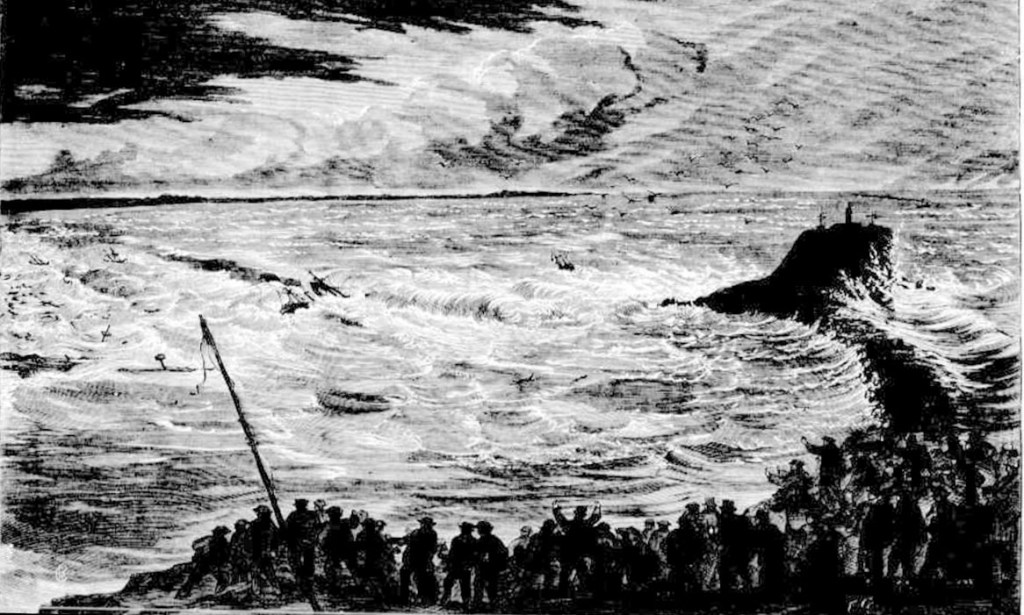
    “Foundering of the S.S. Cawarra off Newcastle.’ Source: Australian News for Home Readers, 27 Aug 1866, p. 4.

       When, in 1866, the Board of Inquiry into the Loss of the Steam Ship Cawarra handed down its report, it was met with much incredulity. After poring over the evidence for six weeks, the commissioners could only conclude that the catastrophe was simply the result of bad luck. That was despite evidence presented to them that the steamer had been grossly overloaded when she had left port.

       The SS Cawarra was a 439-ton side paddle steamer owned and operated by the Australian Steam Navigation Company, and regularly made the passage between Sydney and Brisbane. On what would be her last voyage, she had a crew of 36 and 25 passengers. In all, there were 61 souls on board. Around 6 p.m. on Wednesday, 11 July 1866, she passed through Sydney Heads on her way to Rockhampton via Brisbane. The northern settlement of Rockhampton had not been visited for some time, and basic provisions had run low. So, when the Cawarra’s hold was packed to capacity and no more would fit below, the remaining cargo was stowed on deck.

       As soon as the steamer was heading north through open seas, she was assisted on her way by a strong south-easterly breeze. But during that first night, the weather steadily worsened. By morning, the winds were shrieking at gale force, the seas were mountainous, and the ship was being lashed by torrential rain. In the face of such foul weather, Captain Henry Chatfield decided to take shelter at Newcastle until it was safe to resume his journey.

       Chatfield sighted the distinctive outline of Nobby Head at 2 o’clock in the afternoon, and shortly after that, the steamer rounded the headland to enter the port. However, as the Cawarra was approaching the mouth of the Hunter River, she was struck by a series of large waves that swept over her deck and pushed her around so she was now facing back out towards Nobby Head.

    “Position of Cawarra previous to foundering …” Source: Illustrated Sydney News, 16 Aug 1866, p. 5.

       It is thought that when Captain Chatfield realised his ship was in grave peril, he ordered the foresail to be set and tried to steam back out to sea. However, before he could do so, the Cawarra was hit by several more huge waves. They would spell her end. Water poured through the hatchways snuffing out the steamers’ fires. Now she was dead in the water at the mercy of the large seas. The ship then began to sink by the bow. Chatfield ordered the lifeboats to be made ready, but the treacherous seas swirling around the steamer made abandoning the ship impossible.

       Around 3 o’clock, the Cawarra was driven onto Oyster Bank. The foredeck soon disappeared below the waves, and everyone had gathered on the poop deck or had climbed into the rigging to escape the rising water. Fifteen minutes later, the mainmast and funnel toppled into the sea, taking with them all those sheltering on the poop. The foremast went a few minutes later, tossing the remaining three or four men into the water, and the Cawarra quickly sank from sight. It was as if she had never been there to observers watching the horror unfold from Nobby Head. Only a few pieces of wreckage and cargo washed ashore to testify that a ship had been lost.

       Sixty people died, while one man somehow managed to survive. Frederick Valliant Hedges had only joined the Cawarra eight months earlier. As the steamer began sinking by the bow, he had climbed high into the mainmast rigging only to be flung into the sea when the mast came crashing down. Hedges was later found clinging to a red buoy by a boat sent out from the lighthouse. Ironically, one of the rescuers was a man named John Johnson, who had himself been the sole survivor of the Dunbar when it sank off Sydney nine years earlier.

    The Rescue of F.V. Hedges, the only survivor from the Cawarra. Source: Illustrated Sydney News, 16 Aug 1866, p. 4.

        The violent storm wreaked havoc on shipping up and down the coast between Sydney and Port Stephens. Four more vessels foundered or were driven ashore at Newcastle, and another was wrecked near Port Stephens, further north. Several more were lost around Sydney. In all, 15 vessels were wrecked or driven ashore, adding another 17 fatalities to the grim final tally.

       It is perhaps easy to blame the weather for the Cawarra’s loss. In fact, the commission established to investigate the circumstances found just that. Its report concluded: “We are of the opinion that the catastrophe was one of those lamentable occurrences which befall at times the best ships and the most experienced commanders, and which human efforts are powerless to avert.”

       However, that explanation did not sit well with many folk. It had the whiff of a cover-up. Accusations that the Cawarra had been overladen when she left Sydney flew around maritime circles. She was reportedly carrying 450 tons of coal and cargo, which was 50 tons more than recommended by the ship’s builders. An engineer and surveyor from the Steam Navigation Board testified at the inquiry that when he had seen the Cawarra shortly before her departure, he thought she was sitting lower in the water than usual and believed she had been overloaded. But when he had raised his concerns with his superior and the ship’s owners, they both dismissed his concerns, telling him the Cawarra was a strong ship.    The possibility that overloading could have contributed to the loss was even raised in the New South Wales parliament. The outspoken former clergyman and politician, Dr J.D. Lang, called for the Commission’s findings to be rejected, pointing out the contradictory evidence presented at the inquest. But it was all to no avail. The findings stood, and the loss was attributed to bad luck.

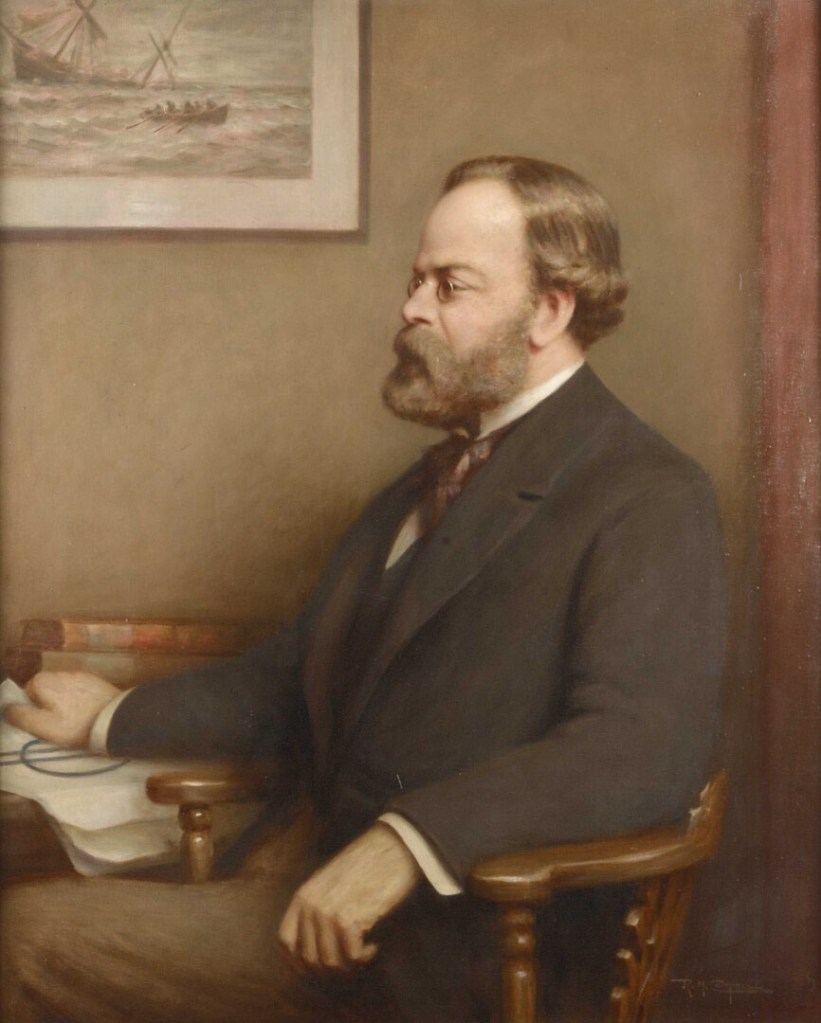
    Samuel Plimsoll. Wikimedia/creative commons.

       However, there were calls for a line to be marked on the hull of cargo ships to show when they were fully loaded. It would take another ten years before British parliamentarian Samuel Plimsoll was able to persuade his colleagues to take action. He was appalled by the number of ships and lives lost due to overloading. In 1876, the British Parliament passed legislation requiring markings on the sides of cargo ships, which would be submerged below the surface if the vessel was overloaded. This became known as the Plimsoll Line and is still in use today.

    © Copyright C.J. Ison / Tales from the Quarterdeck, 2023.

    To be notified of future blogs, please enter your email address below.