Category: Western Australia History

  • The Batavia Tragedy – 1629

    Shipwreck of the Batavia, F. Pelsaert, F., & Vliet, J. (1647). Courtesy State Library of NSW FL3726282

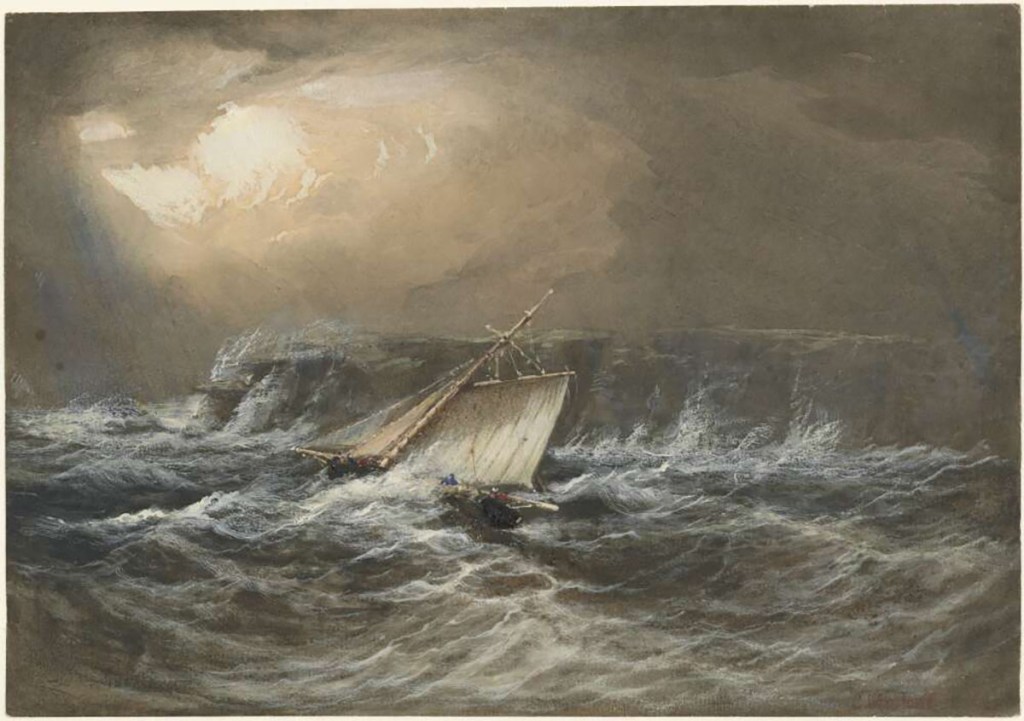
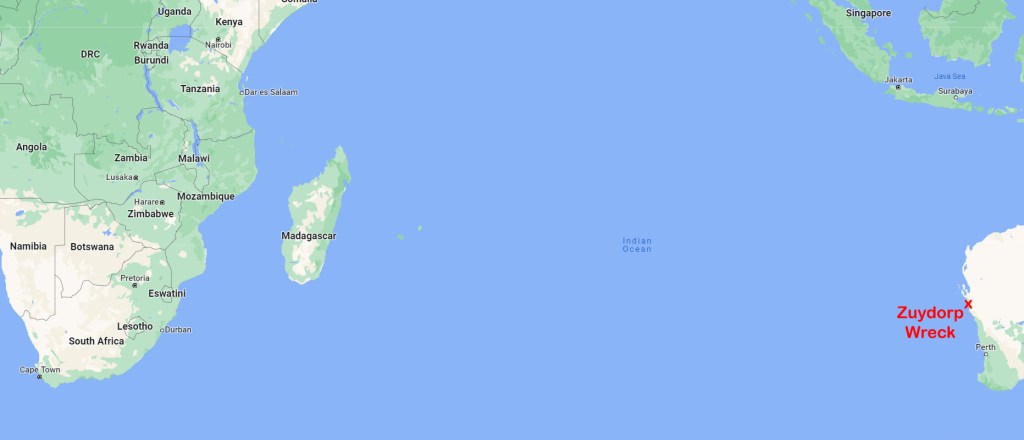
    On 4 June 1629, the Dutch East Indies Company (VOC) ship Batavia slammed into a reef off the Western Australian coast, stranding over 300 men, women and children far from any immediate hope of rescue. But that was just the beginning of one of maritime history’s most appalling chapters. About 40 died when the ship ran aground, or in the immediate aftermath, as waves pounded her until she broke apart. But a nightmare far, far worse awaited those survivors who thought they had escaped disaster by reaching ashore alive.

       The 650-ton merchant ship Batavia was launched in 1628 and was immediately adopted as the VOC’s flagship. She sailed from Texel, in Holland, on 29 October of the same year, with a flotilla of six other vessels, all bound for the Dutch East Indies (present-day Indonesia). The ship’s hold was filled with a general cargo, but also included a fortune in gold and silver coins. Passengers on board the Batavia included several women and children, all family members of VOC officials. Counting the sailing crew, a complement of soldiers, there were, in all, 341 souls.

       Shortly after setting off, the convoy became separated during a powerful storm. The Batavia and two other ships remained together as they sailed South until they reached the Cape of Good Hope. There, the Batavia was beset by a problem of a more human character.

       While stopped at the Cape of Good Hope, Francisco Pelsaert had cause to reprimand the Batavia’s captain, Adriaen Jacobsz for drunkenness. Pelsaert was the VOC’s most senior merchant in the flotilla and had overall command of the Batavia, including its captain, Adriaen Jacobsz. The incident would leave the captain with lingering bitterness toward Pelsaert. Another VOC official travelling to the East Indies was a man named Jeronimus Cornelisz, but more about him a little later.

    The Dutch VOC ship Batavia which was wrecked off the Abrohlos Islands off Geraldton, WA. Western Australian Shipwreck Museum

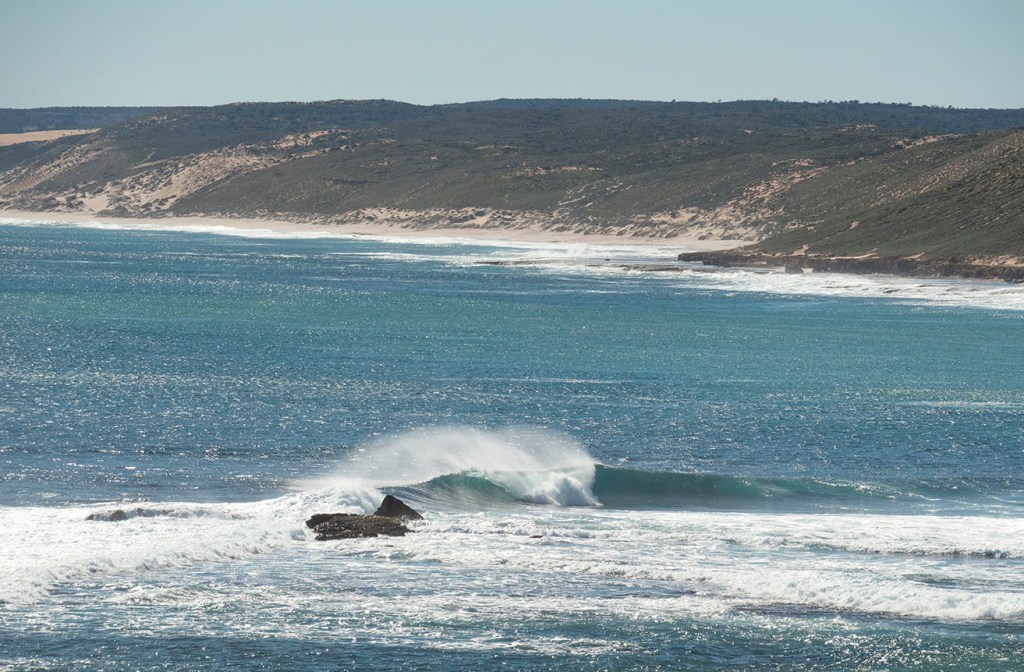
    After leaving Cape of Good Hope, Pelsaert fell ill and spent much of the time confined to his cabin. Meanwhile, Jacobsz and Cornelisz are thought to have formulated a plan to seize the ship and its treasure of gold and silver and do away with Pelsaert and anyone else who got in their way. The first step was to lose the two other VOC ships it was sailing with. One night in the middle of the Indian Ocean, Jacobsz bore away from them before returning to a westerly course. But, before he and Cornelisz could fully implement their plan and take control of the Batavia, she ran aground on Morning Reef in the Houtman Abrolhos Islands about 60 km off the Western Australia coast.

       Around two hours before dawn, Pelsaert was thrown from his bunk as the ship struck the reef. Shortly after sunrise, Pelsaert, Captain Jacobsz and about 40 others set up camp on what would later be known as Traitors Island by those who were left behind. Most of the passengers, the soldiers and the rest of the crew were ferried to nearby Beacon Island along with what food and water could be saved from the wreck. Cornelisz and about 70 or so sailors opted to remain on the Batavia now stranded high on the reef.

       Rather than consolidate the survivors in one place and provide leadership when it was most needed, Pelsaert decided he would take the Batavia’s longboat and go in search of water. With him went every senior officer, a small number of passengers, and several sailors to work the boat, leaving everyone else to fend for themselves.


    Batavia longboat replica moored in the Geraldton Marina. Photo: CJ. Ison.

    The longboat with 48 people crammed on board made for the mainland but failed to find fresh water. They then ventured north possibly as far as Northwest Cape before Pelsaert ordered the captain to make for the Dutch East Indies to seek help. The journey took 33 days, and they arrived without any loss of life, which, to be fair, was no small accomplishment. On reporting the loss of the Batavia, Pelsaert was provided with a vessel to go and rescue the remaining people and bring back the gold and silver and anything else of value that could be salvaged.

       Meanwhile, an unimaginable struggle was playing out among the castaways. Jeronimus Cornelisz had finally landed and taken control of the survivors. He had remained on the Batavia plundering its treasures and alcohol until it finally broke apart, spilling those still on board into the sea. Cornelisz spent two days adrift clinging to a timber plank before he was washed ashore on Beacon Island. Of the 70 or so who had remained on the ship, only 30 made it to dry land.

       Cornelisz was perhaps the worst possible person to lead the survivors. He was a follower of the heretic artist Johannes van der Beeck. Van der Beeck believed that God had put people on earth so they could enjoy their lives in sensual gratification and that religions, including Christianity, restricted those pleasures. It’s thought that Cornelisz may have fled Holland, fearing imminent arrest for his heretical beliefs. And, now that he was stranded on the Abrolhos Islands in the middle of nowhere and free of any moral constraints, he was determined to see out his life in hedonistic bliss. That was, of course, unless Pelsaert returned to rescue the survivors. In that case, Cornelisz planned to seize that ship and make his escape with the Batavia’s gold.

    Portico blocks recovered from the Batavia now housed at the Museum of Geraldton. Photo CJ Ison.

    As the most senior VOC official on the island, Cornelisz took charge and ordered the soldiers to hand in their weapons. He also placed all the food and other supplies under his control. Cornelisz ordered Corporal Wiebbe Hayes and about 20 soldiers to go across to West Wallabi Island to search for water, promising he would send the boat back for them in due course. Cornelisz didn’t expect them to find any water and had sent them on their way so they would no longer pose a threat to him and his plans. He assumed they would be unable to get back off the island and eventually die of thirst.

       He then sent his henchmen out to begin systematically murdering the survivors. Some of the castaways were taken to Long Island ostensibly to look for food and water, where they were abandoned. Others were taken out in boats where they were drowned, and yet other men, women and children were simply butchered in their camp. Interestingly, Cornelisz did not personally kill anyone, preferring to have others do his dirty work for him. Several of the women were kept as sex slaves, including the beautiful 27-year-old wife of a senior VOC official in Batavia named Lucretia Jansz. Cornelisz claimed her for himself. The massacres essentially had two aims. The first was to remove any challengers to his authority, and the second was to reduce the population to make their supplies last longer.

       To Cornelisz’s surprise, Hayes eventually signalled that they had found water on the island. The soldiers had also sustained themselves hunting wallabies, which they found in plentiful numbers. But before Cornelisz thought to send some of his men to investigate, Hayes had already been warned of the terror unfolding on Beacon Island by some of the survivors who had made the perilous passage to West Wallabi on pieces of wreckage.


    Houtman Abrolhos Islands. Courtesy Google Maps

    When Cornelisz and his men finally went to deal with the soldiers, they found that Hayes had organised his men, armed them with makeshift weapons and they had built a breast-high redoubt from which they could repel attackers.

       The skirmish proved disastrous for the mutineers. Several were killed by Hayes and his men when they tried to storm their fortification. The rest withdrew in defeat, abandoning the island to the soldiers.

       Cornelisz then went to meet with Hayes in person to try and persuade him to join the mutineers, but to no avail. In a second skirmish, Hayes took Cornelisz and several of his men prisoner, but the rest escaped in the boat they had come to West Wallabi Island on. From then on, the two parties were at an impasse; neither had the strength to defeat the other.    But in October, more than three months after abandoning the Batavia survivors, Pelsaert sailed into sight. The fate of the remaining survivors now rested on a race to reach the rescuers. It was a close-run affair, but Hayes got to Pelsaert first and reported what had taken place in his absence. Finally, the reign of terror came to an end, but not before more than 100 men, women, and children had been brutally murdered.

    Skeletal remains from the Batavia massacre now housed at the West Australian Shipwreck Museum in Fremantle. Photo CJ Ison.

    Cornelisz’s remaining men were quickly rounded up. Cornelisz and six others had their hands cut off and were then hanged on Long Island after confessing their crimes. Two more were left to their fate on the Australian mainland near present-day Kalbarri, and the rest were taken to Batavia, where they were tried and later executed. Captain Jacobsz steadfastly denied ever conspiring with Cornelisz to mutiny, but he appears to have seen out his days in Batavia’s prison.

       Far from emerging as a hero, Pelsaert was found partly responsible for the tragedy. A VOC inquiry condemned his decision to leave in the longboat, feeling he should have remained with the Batavia survivors, where his leadership could have prevented what took place. Pelsaert lost his entire life savings in fines, and less than twelve months later, he died a broken man. The true hero of the terrible tale was Corporal Wiebbe Hayes. He and some of his men were promoted in rank for their actions. A statue of Hayes stands on Geraldton’s foreshore, 90 km away from the islands, as a testament to his humanity, devotion to duty and courage.

    The Batavia Tragedy is one of the 60 stories that can be found in “Tales from the Quarterdeck.”

    Sun sets over Flinders and Stanley Islands in Bathurst Bay with a fishing boat in the forground at Cape Melville on Cape York Peninsular, Far North Queensland. Photo Chris Ison / Wildshot Images.

    © Copyright C.J. Ison / Tales from the Quarterdeck, 2023.

    To be notified of future blogs, please enter your email address below.

  • The Life and Loss of HMSC MERMAID

    HMSC Mermaid off Cape Banks, Dec. 4, 1820, by Conrad Martens. Image Courtesy National Library of Australia.

       Between 1818 and 1820, the small survey cutter HMSC Mermaid played an important role in charting Australia’s vast coastline. So, it is perhaps ironic that her last voyage should have been cut short on an uncharted reef off the north Queensland coast.

       The Mermaid was an 84-ton cutter launched in Calcutta in 1816. She arrived in New South Wales the following year and was soon purchased by the Government to undertake survey work requested by the British Admiralty.

       Lieutenant Phillip Parker King was dispatched to Australia to carry out a detailed survey of the Australian coastline, particularly those areas bypassed by Matthew Flinders. The son of former NSW Governor Phillip Gidley King, he had been born on Norfolk Island in 1791. On the family’s return to England and completion of his schooling, the young King joined the Royal Navy. He was given command of the Mermaid and got to work.

    Lt Phillip Parker King. Unknown artist. Courtesy State Library of NSW,

       HMSC Mermaid made three extensive voyages under King. They sailed from Sydney on 22 Dec 1817, bound for Australia’s northern and northwest coasts via Bass Strait and Cape Leeuwin. The crew included two sailing masters, 12 seamen and two boys. On board were also the botanist Allan Cunningham and Bungaree, a Kuring-gai man from Broken Bay who had also circumnavigated the continent with Matthew Flinders on the Investigator.

       At Northwest Cape, King surveyed and named Exmouth Gulf before continuing north along the coast until they reached Van Diemen’s Gulf and Cobourg Peninsula. From there, they sailed to Kupang on Timor Island to resupply, where they remained for two weeks. King then set sail for Sydney, returning down the West Australian coast. The return trip was marred by rough weather and a shortage of manpower. Several of the crew had become seriously ill shortly after leaving Timor, and one of them subsequently died. Despite the hardships, the Mermaid arrived back in Sydney on 29 July 1818 after an absence of seven months and seven days.

       Between December 1818 and January 1819, King sailed to Van Diemen’s Land and undertook a survey of Macquarie Harbour, which would soon become the site of one of the convict era’s most brutal places of punishment. Their work done there, the Mermaid was back in Sydney in late February, and in May she was off again.

    Lt King’s survey cutter ‘Mermaid’ Photo courtesy State Library of Queensland.

       The third voyage, and King’s last in the Mermaid, saw them sail up the east coast of Australia on a circumnavigation of the continent. On 20 July, while sheltering in a bay he named Port Bowen at latitude 22.5 S (not to be confused with the present-day township of Bowen), the Mermaid ran aground and became stuck. It was only after considerable effort that the crew were able to warp the vessel into deep water, but she sustained serious hull damage in the process. The full extent of the injury would only become apparent months later.

       The Mermaid continued north, passed through Torres Strait and King again started making a detailed survey of the north-west coast. However, the cutter had been taking on water ever since its beaching at Port Bowen. By September, she was leaking so badly that King was compelled to careen the vessel and attend to the leaking hull. With repairs completed as best they could, he then cut short his survey and ran down the west coast, across the Great Australian Bight, returning to Sydney in December. However, the Mermaid was very nearly wrecked within sight of her home port.

       As they passed Jervis Bay, the wind was blowing strongly from the east-south-east and visibility was much reduced by heavy rain. Lt King steered a course that he thought would find them off Sydney Heads the following morning. But at 2 o’clock in the morning, King, thinking they were still 30 km from land, was surprised when a bolt of lightning revealed they were sailing directly towards Botany Bay’s south head. The Mermaid only just cleared that hazard but lodged on a rock off the north head before being lifted off by a large wave. She ploughed through breakers within metres of the rocky promontory with the sea surging and foaming around them. It was a very close call, but they were soon safely inside Sydney Harbour without further incident.

       Lt King made his fourth and final survey in the Bathurst while the Mermaid underwent much-needed repairs.   But that was not the end of the little cutter’s adventures.   She was decommissioned from the Royal Navy and taken over by the NSW colonial government, where she continued to serve with distinction.

    Mermaid being repaired during King’s voyage. Engraving by John Murray 1825. Image courtesy National Library of Australia.

       In 1828, the Mermaid received a major overhaul, including re-planking, new copper sheathing, and, most importantly, being re-rigged as a two-masted schooner. Then, in early 1829, she was tasked with helping dismantle the failed settlement at Raffles Bay on the Cobourg Peninsula. Once done there, they were to make for the remote settlement of King George Sound (present-day Albany) to deliver stores and dispatches. Under the command of Captain Nolbrow, the Mermaid departed Sydney on 16 May and headed north, keeping to the inner passage inside the Great Barrier Reef.

       Tragedy struck at 6 o’clock in the morning on 13 June when, about 35 km south of present-day Cairns, the Mermaid ran grounded on a reef not recorded on King’s recently published naval chart. At 8 p.m., Captain Nolbrow and his crew, 13 men in all, took to the lifeboat with the hold bilged and water already over the cabin deck.

       Twelve days later, as they continued north towards Torres Strait, the castaways were picked up by the Admiral Gifford. The Admiral Gifford was a 34-ton schooner on a speculative voyage through Australia’s northern waters and was ill-equipped to carry so many additional passengers. On 3 July, Nolbrow and his crew were transferred to the much larger Swiftsure, possibly in the vicinity of Pipon Island. Unfortunately, the Swiftsure was wrecked two days later near Cape Sidmouth and her crew, along with the Mermaid’s, were rescued by the Brig Resource.

       Captain Nolbrow and his men eventually made it back to Sydney via the Swan River settlement (present-day Perth) in November 1829. The remains of the Mermaid were discovered on Flora Reef in 2009.

     © Copyright C.J. Ison / Tales from the Quarterdeck, 2023.

    To be notified of future blogs, please enter your email address below.

  • The Mystery of the Zuydorp

    Illustration of the Dutch ship Zuytdorp, 1712. Western Australian Shipwreck Museum.

    In August 1711 the Zuydorp sailed from the Netherlands bound for Batavia (Jakarta) in the Dutch East Indies (Indonesia).   However, after rounding the Cape of Good Hope, the ship vanished without a trace.    For more than 200 years the fate of the ship and all those on board her remained a mystery. 

    The Zuydorp was a large merchant ship around 30 to 50 metres long carrying 200 or more people and cargo including a large quantity of freshly minted silver coins.   Unlike other ships to come to grief on New Holland’s dangerous coast, no survivors made it to Batavia to tell what happened.

    It was not until 1927 when the head stockman at Tamala Station, Tom Pepper and his family discovered relics from the long-lost ship about 60kms north of Kalbarri on the Murchison River.   Some of the artefacts were silver coins minted in 1711 which helped identify the wreck.   By 1954 the site where the survivors had landed was examined in more detail, and a decade later divers finally found the wreck site and its trove of silver coins.

    Looking north from the mouth of the Murchison River towards the rugged coast where the Zuydorp was wrecked. Photo CJ Ison.

    At the time the Zuydorp was on her way to Batavia, ships were using the “Roaring Forties” to push them across the southern Indian Ocean before bearing north following the coast of New Holland to reach the East Indies.    It seems the captain misjudged his position and the Zuydorp struck the reef at the base of cliffs that now bear the ship’s name.

    The accident probably happened at night, the captain unaware of how close he was to land.   The archaeological evidence suggests that an unknown number of people survived the wreck and managed to get ashore.   The remains of what may have been signaling fires have been found on top of the cliffs but apart from a scattering of other artefact nothing remains to hint at what befell the survivors.    The place is devoid of fresh water for much of the year and no one could have lived long without the help of the local Nhanta people who inhabit that stretch of coast.    

    Interestingly in 1834, an Aboriginal man told settlers in Perth that there had been a ship wrecked far to the north of Perth.   From his description, it was thought to be somewhere in the vicinity of Shark Bay, a bit further north than where the Zuydorp was ultimately discovered, but they also thought the wreck he was referring to was recent.   A search party was dispatched to investigate but no wreck or survivors were found.   It is quite likely he was drawing on oral history passed down the generations which had recorded the loss of the Dutch ship.

    Courtesy Google Maps.

    © Copyright C.J. Ison / Tales from the Quarterdeck, 2022.

    To be notified of future blogs, please enter your email address below.

  • Von Mucke’s Great Escape

    The Emden shore party at Cocos Island with the Ayesha moored in the distance. Photo courtesy Australian War Memorial.

    Before the German Cruiser Emden was engaged by HMAS Sydney, a fifty-strong party was sent ashore at Cocos Island to destroy the telegraph station linking Australia to South Africa.   As the two ships exchanged shells in a battle that lasted ten hours, the shore party could do little but watch on and hope for the best.  

    On 9 November 1914 Lt von Mucke had been ordered to lead a party ashore to disable the cable station on Cocos Island.   But shortly after the Germans had disabled the station and rounded up the telegraph operators, the Emden signalled for them to return to the ship.   Then von Mucke saw the Emden raise its battle flag and fire a salvo at a target then hidden from his sight.  

    The Emden then steamed off leaving the shore party stranded on the island.   They had no chance of catching up to the fast-moving cruiser then fighting for its life.    As the Emden continued to engage HMAS Sydney, von Mucke immediately declared Martial Law over the island and deployed his four machine guns and 30 or so sailors to defend against any landing.

    Lt. Hellmuth von Mucke. Photo by Oscar Brockhus, Novitas Verlag Berlin.

    At one time German sailors and Australian telegraph operators stood together watching the naval battle play out in front of them.   But eventually, the two ships disappeared over the horizon, the Emden clearly the worse for the ongoing encounter.  

    Von Mucke held out little hope that his ship would return for them victorious.   The mortally damaged Emden was deliberately run aground the next day and the survivors surrendered to HMAS Sydney.   Von Mucke also realised that he and his men would eventually have no choice but to surrender should they remain on the island.   He decided to leave while they still could, seizing the schooner Ayesha.

    The three-masted schooner was the property of John Clunies-Ross, who also happened to own the Cocos Islands themselves.   His Great Grandfather had claimed the uninhabited islands in the 1820s and began a coconut plantation using workers brought from Malaya.

    Von Mucke requisitioned provisions to last his men 8 weeks at sea and had them loaded onboard.    The departure had an oddly festive quality to it.   Residents asked for autographs from the Germans, and also had them pose for photographs.   Then, as the sun set in the west, von Mucke bid the residents “auf wiedersehen” and sailed out of the harbour to three resounding cheers.

    Schooner Ayesha.

    Before leaving he hinted they were bound for East Africa to throw any pursuers off his scent.   However, his real intention was to head north to the Dutch port of Padang on the island of Sumatra.    Von Mucke and his men arrived at Padang on 26 November after 17 days sailing.   There, he hoped to get help from any German ships in port while he planned the next leg of his return to Germany.    While the Dutch were neutral during the First World War, that meant they would neither hinder nor aid any of the combatants.   “The master of the port declined to let us have, not only charts, but also clothing and toothbrushes,” as he rigorously enforced the port’s neutrality, von Mucke later lamented.    The Dutch authorities asked von Mucke and his men to surrender themselves to internment but the German officer declined and 24 hours later they left the harbour.   

    For two weeks they remained close to the Sumatran coast hoping to cross paths with a German ship while avoiding Allied naval vessels patrolling those waters.       Their luck held out and on 16 December the German merchant ship Choising, which had been undergoing repairs at Padang, came into sight.   

    Map showing von Mucke’s escape route. Source: The Story of the Great War, Vol 3.

    Von Mucke and his men transferred onto the ship and with heavy hearts, they scuttled the schooner which had been their home for the past six weeks.     The Choising to the port of Al Hudaydah in the Red Sea.   From there the men made their way to Damascus and then on to Constantinople in Turkey.   Von Mucke finally reported to the German Embassy there on 9 May 1915.    For his efforts, he was awarded an Iron Cross.

    Source: The Story of the Great War, Vol III, Chapter 31, “Story of the Emden.”

    © Copyright C.J. Ison / Tales from the Quarterdeck, 2022.

    To be notified of future blogs, please enter your email address below.

  • The Tryall: Australia’s earliest recorded shipwreck.

    Example of a fully rigged ship of the early 17th Century, similar to the Tryall. Source: Sailing Ships by Chatterton, 1909.

       Some people might be surprised to learn that the oldest recorded shipwreck off the Australian coast dates back to 1622. That predates Cook’s voyage up the east coast by 148 years. It occurred 20 years before Abel Tasman partially circumnavigated the island of Tasmania. Or just six years after the Dutch navigator Dirk Hartog nailed a pewter plate to a post near Shark Bay, recording his discovery of a big lump of land that had until then been unknown to anyone but its inhabitants.

       The Tryall* was a 500-ton East India Company merchant ship launched in 1621. Her maiden voyage was meant to take her from England to the East Indies to deliver cargo before returning home with her hold filled with spices. The East India Company chose a master mariner named John Brooke to command the vessel on this most important voyage.

       The Tryall departed from Plymouth on 4 September 1621 with a crew of about 140 men. Captain Brooke sailed down the west coast of Africa and pulled into Table Bay for water and fresh supplies. While there, he learned that a new route across the Indian Ocean had been established, cutting the sailing time to Batavia by several months. The traditional route to the East Indies had ships follow the coast around Africa’s southern tip, then pass through the Mozambique Channel. Once north of Madagascar, they would venture out into the Indian Ocean. The new “Brouwer Route,” as it was called, took full advantage of the roaring forties, which swirled around the bottom of the world unimpeded by any significant land mass.  Captain Brooke received orders to take the Tryall below 35 degrees South and use the Brouwer Route.    Brooke tried to hire a sailing master for this leg of the voyage, for neither he nor anyone else on the ship had sailed the southern route before. He was unable to recruit anyone, so on 19 March 1622, Captain Brooke sailed the Tryall out of Table Bay and into the unknown. Six weeks later, they were off the coast of Western Australia.

    Map of Western Australia coast. Courtesy Google Maps.

       Brooke likely sighted land in the vicinity of Point Cloates around 22.7 S 113.6 E, mistaking it for Barrow Island about 200 km further north. It would appear that he had underestimated the strength of the roaring forties and had been blown too far east before he turned his ship north, something easily done with the rudimentary navigation instruments of the day. But it was an error he would never admit to having made.

       For the next couple of weeks, the Tryall struggled to make progress against fresh northerly winds, but when the wind swung around to the south again, they got underway. Then, on the night of 25 May 1622, disaster struck.

       The Tryall slammed into submerged rocks near the Montebello Islands. Stuck fast on the reef and being smashed by powerful swells, the Tryall began to break apart. Brooke and a handful of men, including his son, managed to get a small skiff over the side and escaped the doomed ship, apparently leaving everyone else to their fate. Soon after, some of the crew were able to launch the ship’s longboat, and 35 sailors clambered aboard and got clear of the Tryall. They landed on one of the Montebello Islands, where they remained for about a week, preparing the boat for the 2,000 km-long voyage to Batavia. Ninety-three men lost their lives.    Captain Brooke reached Batavia on 5 July, where he penned a letter to the ship’s owners reporting the ship’s loss. In it, he claimed that he had followed the proscribed route precisely, but had struck a reef not laid down on his chart. Brooke probably thought that they were the only survivors, and his version of events would go unchallenged. His letter, he hoped, would absolve him of any blame for the loss of the ship, its valuable cargo, and so many lives.

    Translates to read “Here the English ship Trial was wrecked in June 1622” from copy of Hessel Gerritsz’ 1627 map of the north west coast of Australia. Source: National Library of Australia.

    When the longboat finally made it to Batavia, those survivors had a very different story to tell. One of them, a trader named Thomas Bright, wrote his own scathing letter to London condemning Captain Brooke. Bright blamed the wreck on Brooke’s poor navigation that had brought them so close to New Holland and the fact that he had not posted a lookout despite knowing he was in those dangerous waters. He also claimed that Brooke had abandoned the wreck as quickly as he could in the partially filled skiff, leaving the rest of the men to their fate.

       In his report to the ship’s owners, Brooke had also recorded that the wreck site was much further west than where it had occurred to mask his error in navigation.  For the next three centuries, the non-existent rocks caused some confusion and uncertainty among navigators sailing those waters. It was not until 1936 that the historian Ida Lee established that the wreck site was likely to be off the northwest of the Montebello Islands. Then, in 1969, amateur scuba divers found the wreck site where Lee had said it would be.

    * Tryall is also seen spelled as Tryal and Trial.

    © Copyright C.J. Ison / Tales from the Quarterdeck, 2022 (Updated 2025).

    To be notified of future blogs, please enter your email address below.