Category: Western Australia History

  • Tales from the Quarterdeck

    Sixty bite-sized stories from Australia’s maritime past

    The melancholy loss of H.M.S Sirius off Norfolk Island by George. Raper. Source National Library of Australia 136507434-1

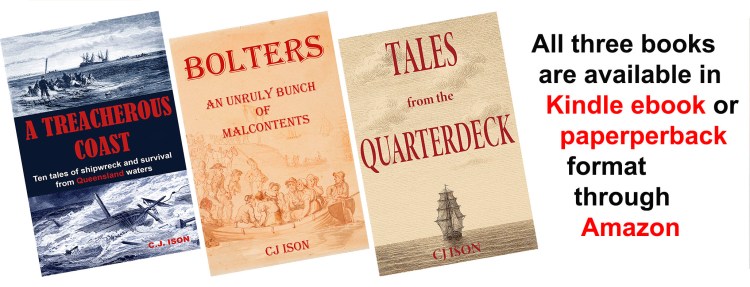
    I have just launched a new book titled Tales from the Quarterdeck: Sixty bite-sized stories from Australia’s maritime past. Sixty of the most popular posts have been reedited. In some cases, I’ve rewritten a couple and updated a few where new information has come to light since first writing them.

    For those who would value ready access to the stories in their bookcase, Tales from the Quarterdeck is available in Kindle ebook and paperback formats through Amazon.

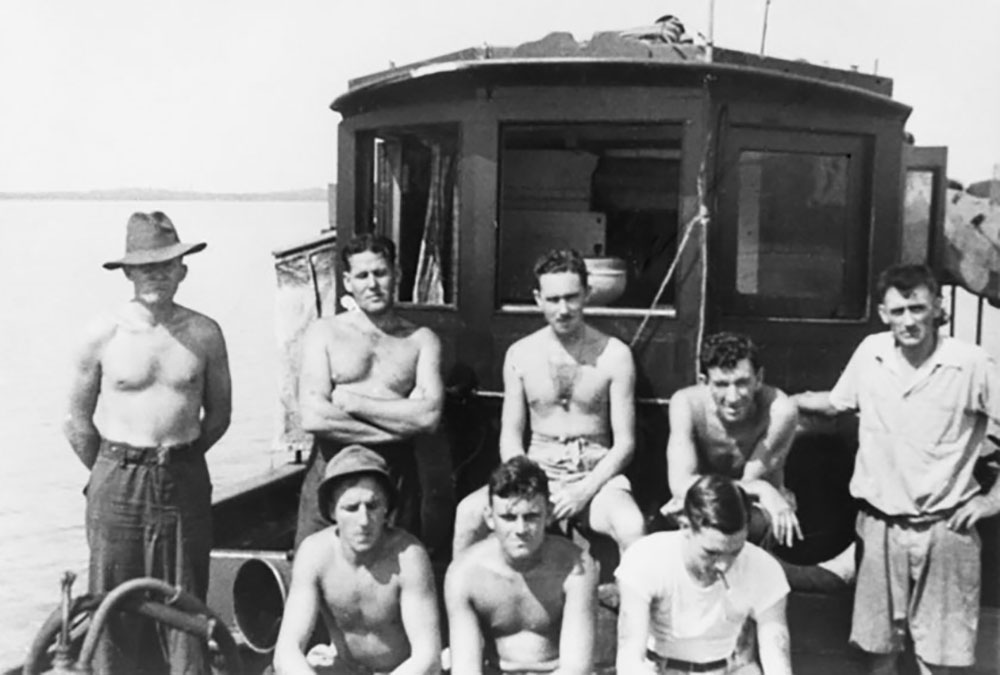
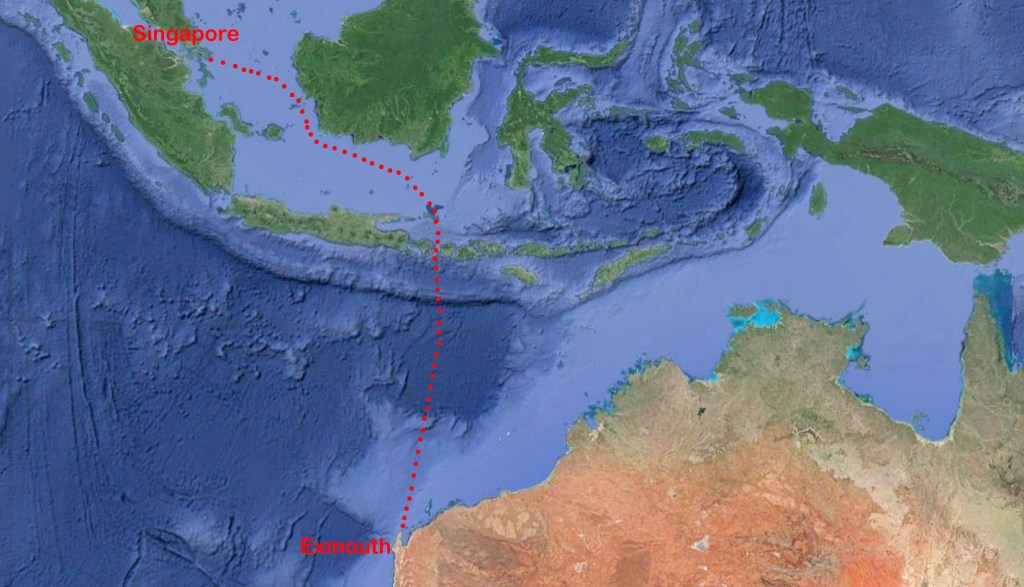
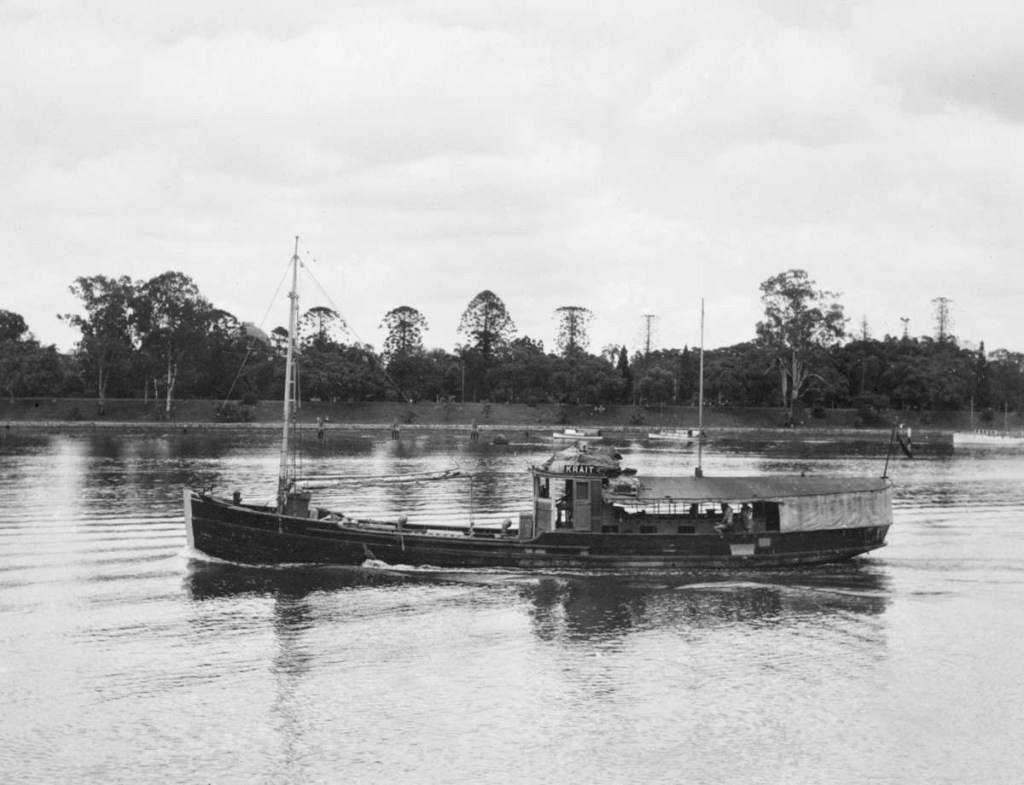
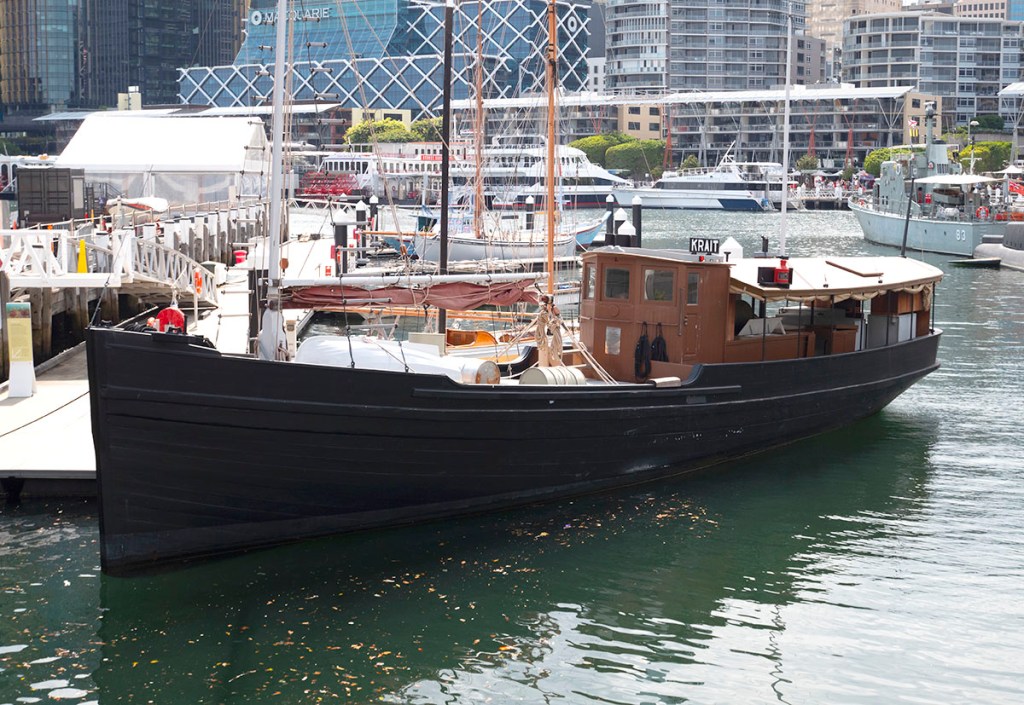
    The stories are organised in chronological order, starting with the Tryall shipwreck off the Western Australian coast in 1622, and finishing with the Second World War exploits of the Krait. See below for a full list of the stories covered in the book.

    Sydney Gazette 22 May 1808, p. 2.

    1622 – The Tryall: Australia’s earliest shipwreck

    1629 – The Batavia Tragedy

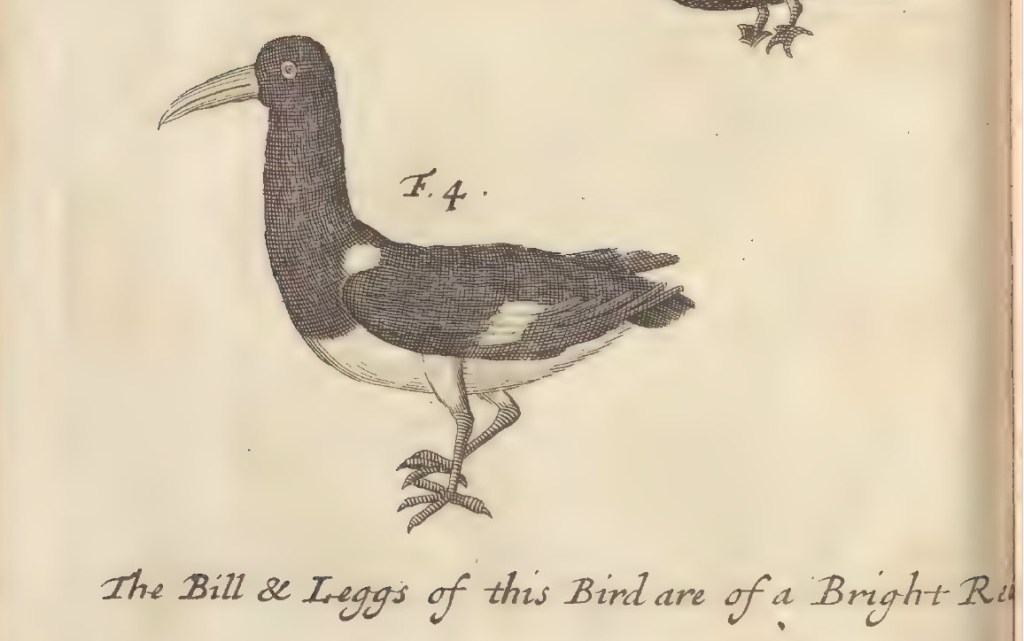
    1688 – William Dampier: Navigator, naturalist, writer, pirate

    1770  – The Endeavour’s Crappy Repair

    1788 – Loss of La Astrolabe and La Boussole, a 40-Year Mystery                        

    1789 – Bligh’s Epic Voyage to Timor

    1789 – HMS Guardian: All Hands to the Pumps

    1790 – The Loss of HMS Sirius

    1790 – Sydney’s First Desperate Escape

    1791 – HMS Pandora: Queensland’s earliest recorded Shipwreck

    1791 – William Bryant’s Great Escape

    1797 – The Loss of the Sydney Cove

    1803 – Loss of HMS Porpoise

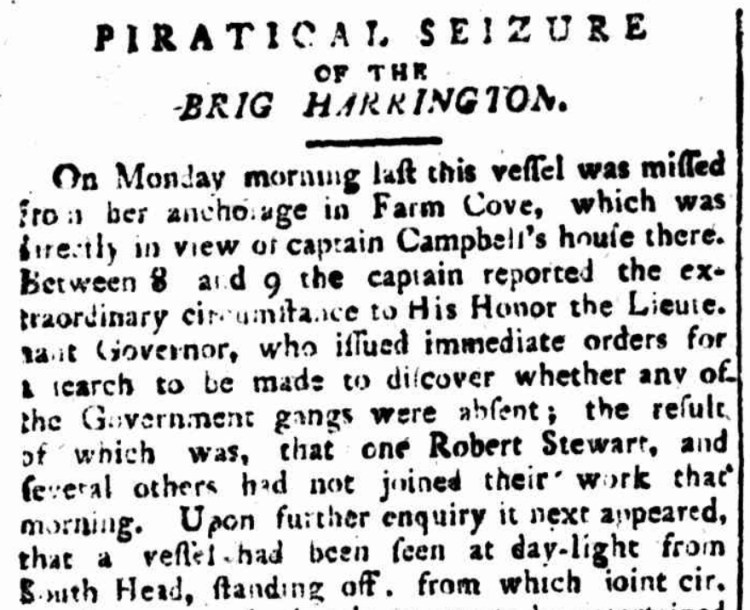
    1808 – Robert Stewart and the Seizure of the Harrington

    1814 – Wreck of the Morning Star

    1816 – The Life and Loss of HMSC Mermaid

    1824 – The Brig Amity’s Amazing Career

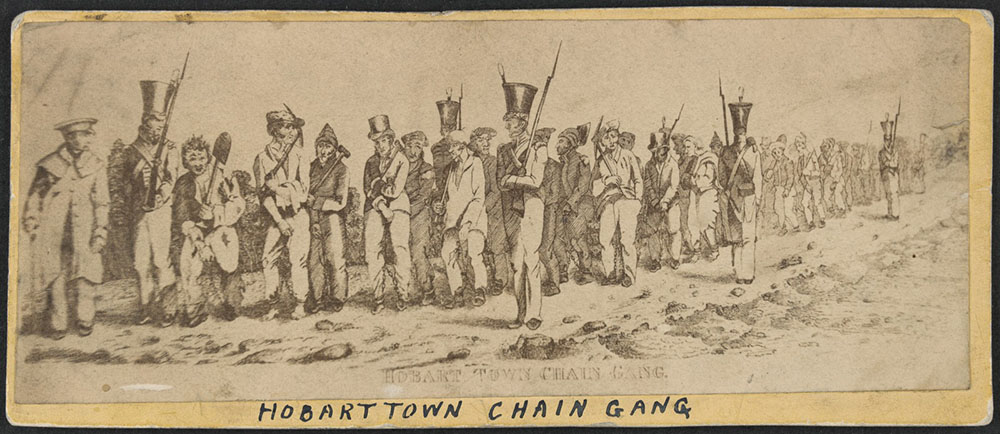
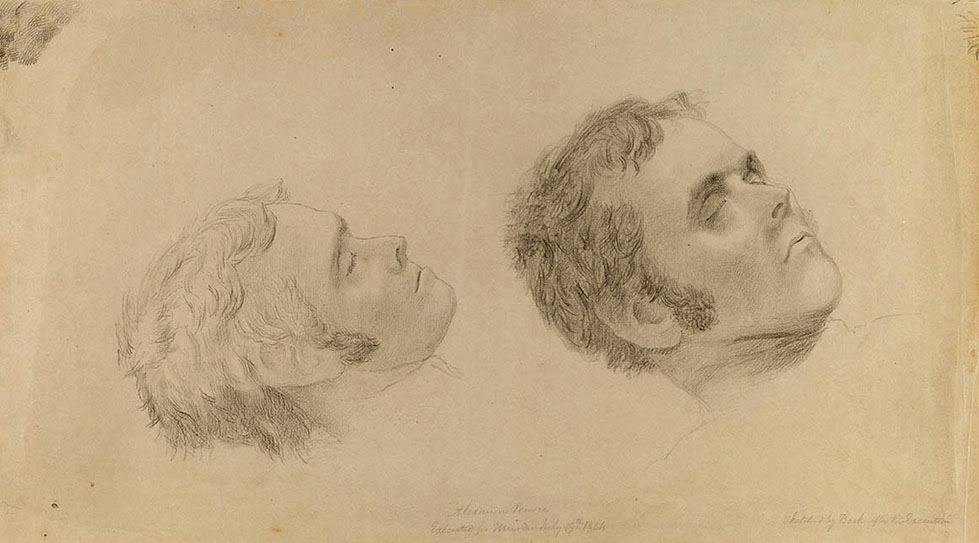
    1829 – The Cyprus mutiny 

    1831 – The Caledonia’s perilous last voyage

    1833 – The Badger’s Textbook Escape

    1835 – The Loss of the Convict Ship Neva

    1835 – The Post Office in the middle of nowhere

    1835 – The Tragic Loss of George III

    1845 – The Cataraqui: Australia’s worst shipwreck

    1846 – The Peruvian’s Lone Survivor

    1847 – The Foundering of the Sovereign

    1850 – The Loss of the Enchantress: A first-hand account

    1851 – The Countess of Minto’s brush with Disaster

    1852 – The Bourneuf’s Tragic Last Voyage

    1852 – The Nelson Gold Heist

    Woodbury, Walter B. (Walter Bentley), 1834-1885. Hamlet’s Ghost, Sourabaya [Surabaya], Java [Boat with Passengers and Crew], ca. 1865. Walter B. Woodbury Photograph Collection (PH 003). Special Collections and University Archives, University of Massachusetts Amherst Libraries

    1854 – Bato to the Rescue 

    1854 – HMS Torch and the rescue of the Ningpo

    1856 – The Loss of the Duroc and the Rise of La Deliverance

    1858 – The Loss of the Saint Paul and its Horrific Aftermath

    1858 – Narcisse Pelletier, An Extraordinary Tale of Survival

    1859 – The Indian Queen’s Icy Encounter

    1859 – The Sapphire and Marina

    1863 – The loss of the Grafton: Marooned for twenty months

    1864 – The Invercauld shipwreck

    1865 – The CSS Shenandoah: Victoria’s link to the American Civil War

    1866 – The Loss of the SS Cawarra: Bad luck or an avoidable tragedy?

    1868 – The Bogus Count and Hamlet’s Ghost

    1871 – The Mystery of the Peri

    1872 – The Loss of the Maria, A Cautionary Tale

    1875 – The Tragedy behind the Gothenburg Medals

    1876 – The Catalpa rescue

    1876 – The Banshee’s Terrible Loss

    1878 – The Loch Ard Tragedy

    1884 – The Macabre case of the Mignonette

    1885 – The Douro and its Piratical Captain

    1889 – The Windjammer Grace Harwar

    1891 – The Spanish Silver of Torres Strait

    1893 – The Foundering of the SS Alert

    1895 – The Norna and the Conman Commodore

    1899 – Cyclone Mahina

    1911 – The Loss of the Mandalay

    1918 – The Orete’s Robinson Crusoe-like Castaway

    1935 – The Life and Loss of  the SS Maheno

    1943 – Surviving the Centaur Sinking

    1943 – The Amazing Krait

  • The Catalpa rescue: a Most Audacious Prison Break

    The whaling barque Catalpa.

       In April 1875, the American whaling barque Catalpa quietly slipped out of New Bedford harbour without ceremony. To all appearances, she was just another whaler embarking on a routine hunt in the North Atlantic. However, Captain George Anthony had orders to sail halfway around the world and be stationed off Australia’s west coast, ready to rescue six convicts imprisoned by the British in Fremantle.

       The prisoners were all Irish nationalists who had been found guilty of treason and sent to Fremantle eight years earlier with scores of other revolutionaries. Over the years, most had been pardoned, but these six men had been serving soldiers in the British Army, and the government was disinclined to let them go. However, an Irish Independence organisation in the United States, the Clan-na-Gael, formulated a plan to set them free.

       They purchased the whaler, recruited a captain sympathetic to their cause and sent Irish agents, headed by John Breslin, to Fremantle to organise the escape on the ground. Breslin passed himself off as a wealthy American businessman looking for investment opportunities in the far-flung colony. He made contact with the convicts and warned them to be ready to leave at short notice. Breslin then assembled a small armoury of firearms and organised the hire of horses and carriages. He also reconnoitred the coastline south of Fremantle, looking for a suitable out-of-the-way place to take the escapees. There they would be taken off the beach in a whaleboat and delivered to the waiting ship.

    John J Breslin, AKA John Collins who orchestrated the Catalpa escape.

       By January 1876, all was in place except for the Catalpa. The ship was nowhere to be seen. As the weeks ticked by without any word from the whaler, Breslin grew increasingly concerned that some calamity had befallen her. However, his fears were unfounded. To Breslin’s great relief, the Catalpa finally dropped anchor in Bunbury on 28 March.

       Breslin met with Captain Anthony, and the two men thrashed out the final details of the escape. And, after a couple of unavoidable delays, the pair set on the escape, taking place on Monday, 17 April. On Sunday night, Captain Anthony took the Catalpa into international waters 30 kilometres west of Rockingham and then went ashore in the whaleboat to wait for Breslin and the Irish prisoners at a prearranged beach near Cape Peron.

       On Monday morning, the prisoners left their work gangs on various pretexts and made their way to Rockingham Road. There, they were met by Breslin and his men waiting with a change of clothes and horse-drawn carriages. They then raced south towards the waiting whaleboat. By 10.30, the prisoners, Breslin and all his men, were being loaded onto one of the Catalpa’s whaleboats as a plume of dark smoke from the government steamer smudged the morning sky. Captain Anthony wasted no time heading the boat out to sea to rendezvous with his ship.   

    However, it would not be smooth sailing getting back to the Catalpa. The seas had turned rough while he had been waiting on shore. To make matters worse, the whaleboat sat low in the water, weighed down by so many extra bodies. The boat crew battled the wind and waves all that day but made slow progress. But towards sunset, Captain Anthony spotted the Catalpa off in the distance. Then disaster struck. The mast snapped under the strain of the taut canvas and nearly flung everyone into the ocean. But for the quick actions of the man at the tiller, the brazen escape may well have failed there and then. Once night had descended and the ship was lost to sight, they had no choice but to spend an uncomfortable night in the cramped boat being buffeted about by the ocean swells. The next morning, the mast was repaired, and they were once again on their way. They soon sighted the Catalpa again and set a course to join her. Captain Anthony also spotted billowing black smoke, heralding the government steamer Georgette, on a course to intercept the whaler. Captain Anthony had the sail taken in and the mast lowered. The steamer passed within one kilometre of the whaleboat but failed to see it in the choppy sea conditions.

    “The Rescued Six.” By Charles Herbert Moore – https://archive.org/details/catalpaexpeditio01peas, Public Domain, https://commons.wikimedia.org/w/index.php?curid=33130178

       When the Georgette came alongside the Catalpa, the Superintendent of the Water Police enquired if there were any escaped prisoners on board. On being told there were none, the police officer asked if he could come aboard so he could see for himself. The first mate forbade him permission, reminding the Superintendent that the Catalpa was an American-flagged ship in international waters and was therefore not subject to British authority. Not wishing to spark an international incident, the Georgette broke off after 10 minutes and continued its fruitless search for the missing prisoners.

       As the Georgette steamed off, Captain Anthony had the mast and sail reset, and his oarsmen pulled for all they were worth. When the first mate sighted the whaleboat in the distance, he ordered the Catalpa’s helmsman to head towards them to close the gap. Hidden from sight by the bulk of the ship, Captain Anthony was unaware that a police cutter was also making for the ship.

       The whaleboat reached the Catalpa first and was hooked up to the davits, and within minutes, they were underway again and heading north. It was a close-run race. But, in the end, the police could do nothing but watch on as several of the Irish convicts jeered at them from the safety of the American ship’s deck. The police cutter’s commander gracefully accepted defeat with a snappy salute before returning to Fremantle empty-handed.    However, the Western Australian Governor was less sanguine about losing six prisoners so easily. He ordered the Georgette to go back out, find the ship and return the six prisoners to gaol. This time, she would carry a large complement of armed police and prison guards as well as a field artillery piece mounted on the foredeck. The next morning, the Georgette intercepted the Catalpa in international waters for the second time. This time, the Catalpa was heading south past Fremantle on her way towards the Southern Ocean to start her long voyage home.

    Mural commemorating the Catalpa rescue in Fremantle, WA. Photo CJ Ison.

       At 8 a.m., the Georgette pulled a little ahead of the Catalpa and fired a shot across her bows, signalling for the whaling ship to stop. Captain Anthony ignored the order and continued on his course until the Georgette’s gun crew had reloaded their piece. Only then did he put a speaking trumpet to his mouth and ask what they wanted.

       The Georgette’s Commanding Officer asked if there were any escaped prisoners onboard. This time, he warned Captain Anthony that the colonial secretary had been in contact with the American Government and had been authorised to use force to stop the ship. He also threatened to bring down the Catalpa’s masts with artillery fire should they not heave to. Breslin and Anthony agreed to call the bluff, thinking it unlikely that they had got permission to board, even with the magic of telegraphic communications. Anthony pointed to the Stars and Stripes fluttering in the wind and cautioned that an attack on his ship would be an attack on the United States.

       No one on the steamer wished to trigger a diplomatic row, so after shadowing the Catalpa for another half an hour or so, the Georgette veered off and returned to port empty-handed. Breslin would later write that the British left without even bidding them a hearty bon voyage.

       The Catalpa arrived in New York on 19 August after a four-month voyage via Cape Horn. The rescuers were feted as heroes, and the six Irish prisoners settled into their new lives as free men. This was arguably one of the best planned and executed escapes during Australia’s convict era. It was also the last.

    A more detailed account of the rescue can be found in Bolters: An Unruly Bunch of Malcontents.

    Sun sets over Flinders and Stanley Islands in Bathurst Bay with a fishing boat in the forground at Cape Melville on Cape York Peninsular, Far North Queensland. Photo Chris Ison / Wildshot Images.

    © Copyright C.J. Ison / Tales from the Quarterdeck, 2025.

    Please enter your email address below to be notified of future blogs.

  • BOLTERS: An Unruly Bunch of Malcontents

    Convict crewed boats crossing the bar to unload ships at Norfolk Island. Courtesy National Library of Australia.

    More than 160,000 of Britain’s most unwanted souls were banished to Australia between 1788 and 1868.   These convicts ranged from petty thieves to hardened criminals.   Fraudsters, burglars and pickpockets rubbed shoulders with highway robbers, rapists and murderers in the fetid prison cells of transport ships bound for Australia.    Political prisoners, social reformers and ordinary men and women struggling to feed their families also found themselves trapped in a brutal judicial system determined to rid Britain of its undesirables.  

    The vast majority of these men and women made the best of the hand fate had dealt them.   They earned their freedom and took up land and farmed it, started businesses, married, raised children, and helped found the country we know today.   But this book is not about them.   Library shelves are lined with volumes praising the accomplishments of those worthy and not-so-worthy folk.   Rather, Bolters tells the stories of those unruly malcontents who stepped ashore and thought, “This place is not for me,” and began plotting their escape.  

    Those who tried to abscond and failed, or flout any of the many other rules and regulations governing their lives were often sent to places of “secondary transportation.”   These isolated penal settlements established at Newcastle, Port Macquarie, Moreton Bay and Macquarie Harbour were intentionally harsh.   They were places where floggings were frequent, work was backbreaking, living conditions were wretched and life expectancy was short.     Norfolk Island would later surpass them all for its brutality.  

    Hobart Town convict chain gang. Photo courtesy State Library of Victoria.

    Australia’s penal settlements were gaols without bars.   There was often very little to prevent anyone from taking their leave and hiding out in the bush.    But what could they do then?   The countryside was wildly unfamiliar, and the already dispossessed Aboriginal peoples were often hostile towards anyone encroaching further onto their land.   Despite this, there were several bolters who lived for many years in Aboriginal communities.   Alternatively, runaways could hole up on the outskirts of settlements, preying on whoever presented themselves as easy targets.   These “bushrangers” were the scourge of early administrators in New South Wales and Van Diemen’s Land.   The authorities went to great lengths to hunt them down and bring them to justice, often at the end of a rope.   Eking out an existence on society’s fringes was not a viable long-term proposition.   Those truly serious about escaping had to look not towards the country’s interior, but out to sea.    Where townsfolk, farmhands, labourers and the like viewed the expansive ocean with justifiable trepidation, it was seen in a very different light by the many seamen and mariners in the convict ranks.

    A flogging as Illustrated in The Fell Tyrant published in 1836. Courtesy Mitchell Library, State Library of NSW

    Ships had brought them out to the colonies.   They could whisk them away.    Stowing away was the most frequent method of absconding, especially for those without seafaring skills.   A cat-and-mouse game soon developed, with stowaways finding ever more inventive places to hide while the authorities devised new ways of flushing them out.   Rarely did a ship leave Australia during the convict era without someone trying to stow away.

    For men of a more ruthless and violent temperament, seizing control of a ship and sailing to some far-flung port proved an irresistible temptation.    Ships transporting prisoners between settlements were always on alert for trouble, but that did not stop some desperate characters from trying their luck.  Captains of vessels, complacent of port regulations, risked their ships being taken by convicts ever vigilant for lapses in security.   A few enterprising convicts even built their own craft to make their escape.   Few of these endeavours ended well, for the distances to be traversed were vast and the ocean unforgiving to frail and unseaworthy watercraft.  

    Detail from an 1828 watercolour of Hobart by Augustus Earle showing the brig Cyprus (centre), which was seized by convicts en route to Macquarie Harbour. Courtesy State Library of NSW.

    Bolters tells the stories of many of those convicts who chanced their luck to regain their liberty.   The narratives draw heavily on the personal accounts left behind by those determined to escape and official reports written by the men whose job it was to stop them.    In 1791 William and Mary Bryant and a band of runaways made off with Governor Phillip’s cutter and sailed it to Timor in the Dutch East Indies (Indonesia).   To this day it is still recognised as an outstanding feat of seamanship and survival.    It was unfortunate for them that their luck ran out shortly after.   However, Mary and a handful of others reached England and were later pardoned. They proved escape was possible, inspiring many others to follow their lead.    In 1803, William Buckley fled from a short-lived settlement on the shores of Port Phillip Bay.   He was taken in by the local Aboriginal people and remained with them for the next 32 years.   Macquarie Harbour saw many inmates try to escape that god-forsaken place.   No story is more chilling than that of the infamous cannibal Alexander Pearce and the men who fled into the wilderness with him.  

    Sketches of Alexander Pearce made shortly after he was hanged. Artist: Thomas Bock. Courtesy State Library of NSW.

    When a group of determined prisoners captured the Cyprus in 1829, few could have imagined that they would sail the vessel to Japan before scuttling it off the coast of China.  Several men made it back to England before being arrested. Then, five years later, the prisoners entrusted with completing the Frederick at Macquarie Harbour took off for South America rather than deliver her to Port Arthur as supposed.    The book ends with the liberation of six Irish rebels from Fremantle Prison by the American whaler Catalpa in 1876.   This was arguably the most carefully planned and executed escape during the convict era.   Along the way, the book delves into many lesser-known but no less desperate and dramatic attempts to flee Australian shores.

    © Copyright C.J. Ison / Tales from the Quarterdeck, 2024.

    Please enter your email address below to be notified of future blogs.

  • William Dampier: Navigator, naturalist, writer, pirate.

    Life and adventures of William Dampier. Source: Tales of Shipwrecks and Adventures at Sea, 1856.

    William Dampier visited Australian shores twice in the 17th Century. The first time was when he served on the Cygnet in 1688, and the second, 11 years later, when he commanded HMS Roebuck. Dampier was the first Englishman to describe the land, its fauna, flora and people to a European audience. While his contribution to Australia’s history is relatively minor, his story is nonetheless a fascinating look into the golden age of exploration. Navigator, naturalist, writer, and pirate are all words that describe aspects of Dampier’s colourful life.

       Born in Somerset in 1651, William was the son of a tenant farmer. He does not appear to have had any interest in following in his father’s footsteps. Instead, when he turned 17, he went to sea and began his apprenticeship as a mariner. He joined the Royal Navy around 1673 and saw action during the Third Anglo-Dutch War. When hostilities ceased, he left the navy and travelled to the West Indies. Then, when war broke out between England and Spain, he became a privateer, which could best be described as a state-sanctioned pirate. In 1678, now aged 27, he returned to England and married his fiancée. However, he would spend just one year with her before he put to sea again.   

    This time, he would be gone 12 long years. After hunting down Spanish ships off Central America, he joined another privateer and crossed the Pacific Ocean in search of plunder. He visited ports in the Philippines, China and Southeast Asia. Then, in January 1688, he was on the Cygnet when it stopped on Australia’s northwest coast. The ship had pulled in for repairs at King Sound north of present-day Broome and would remain there for a couple of months. Dampier spent his time documenting the unusual fauna and flora. He also wrote at some length about his observations on how the indigenous people lived, but not in particularly flattering terms. To his Eurocentric eye, they existed in appalling conditions, and he thought them to be the most miserable people he had ever encountered.

    A map of the world showing the course of Mr Dampiers voyage round it: From 1679 to 1791. By Herman Moll.

       In 1691, Dampier joined a very exclusive club of men who had circled the globe when he returned to England via the Cape of Good Hope. His various exploits and adventures became the subject of his hugely successful book, “A New Voyage Round the World,” published in 1697. Through his book, Dampier came to the attention of both the Royal Society and the Admiralty. They commissioned him to chart the east coast of New Holland, some 70 years before James Cook would eventually do so. Had Dampier succeeded, he may well have changed the trajectory of modern Australian history. However, as will soon become evident, circumstances would conspire against him.  

    HMS Roebuck sailed from England on 14 January 1699 with a crew of 50 and provisions to last them 20 months. Dampier originally planned to sail around Cape Horn and then cross the Pacific Ocean until he reached Australia’s east coast. However, his ship was long past its glory days, and its refit for this hazardous voyage had taken far longer than anticipated. By the time he reached the southern tip of South America, it was winter, the worst time to try rounding Cape Horn. Instead, he decided to cross the South Atlantic and round the Cape of Good Hope. He would then cross the Indian Ocean to New Holland’s west coast and begin his survey there.

    HMS Roebuck.

    They made landfall near Dirk Hartog Island in early August 1699.   On 7 August, he sailed past Cape Peron and into Shark Bay, where he spent a week exploring.   Dampier named it for the abundance of sharks he found in those shallow, enclosed waters. He made a detailed chart of the bay and described many of the fish, birds and plants he saw there. Though fish, fowl, and turtles were easily procured and made a welcome addition to the men’s diet, they were unable to find a supply of fresh water. On 14 August, Dampier left Shark Bay by the same passage he entered after encountering shoals and dangerously shallow water between Dorre and Bernier Islands and the mainland.

    A Pied Oyster Catcher. Source: A Voyage to New Holland, in the year 1699.

    They continued north along the coast for another 750 kilometres until they arrived at a small group of islands, now known as the Dampier Archipelago. Freshwater remained elusive, so they continued sailing north until they were at latitude 18° 21’ south, about 60 to 70 km south of present-day Broome. Again, they went in search of water. And, again, they returned empty-handed. Only this time, an encounter with the local inhabitants ended in violence. One of Dampier’s men was speared through his cheek while a Karajarri man was wounded by musket fire. In early September, Dampier resigned himself to temporarily abandoning New Holland and made for Timor to resupply.   

    From Timor, Dampier continued sailing northeast and charted the northern coast of New Guinea. By now, the Roebuck was in such poor shape that he abandoned his plan to locate New Holland’s east coast and turned back towards England. He stopped briefly at Batavia, then crossed the Indian Ocean, rounded the southern tip of Africa, and sailed north through the Atlantic. In February 1701, they reached Ascension Island, but HMS Roebuck would go no further. Her planking was riddled with seaworms. And she was taking on a lot of water. Dampier had to run her ashore to stop her from foundering in deep water. He and his crew would remain stranded there for five weeks until a passing East Indiaman rescued them. Dampier and his men returned to England in August 1701.

    1966 Australian postage stamp commemorating William Dampier.

    William Dampier was court-martialled on his return to England on a charge of ill-treating his first mate on the voyage out. Found guilty, he was stripped of the money the Admiralty owed him, and he was ruled unfit to command any of His Majesty’s ships in the future. Undeterred by the setback, he published a book about his most recent exploits and would go on to circumnavigate the world twice more. When Dampier died in London around 1715, he was the only person to have circled the globe three times.

    Sun sets over Flinders and Stanley Islands in Bathurst Bay with a fishing boat in the forground at Cape Melville on Cape York Peninsular, Far North Queensland. Photo Chris Ison / Wildshot Images.

     © Copyright C.J. Ison / Tales from the Quarterdeck, 2024.

    Please enter your email address below to be notified of future blogs.

  • The Krait’s Remarkable Career

    MV Krait anchored at Darwin. Courtesy AWM.

       The small fishing vessel MV Krait holds a special place in Australian maritime and military history. Named after a small, deadly snake, it played an important part in Operation Jaywick, which saw commandoes sink several Japanese ships anchored in Singapore Harbour in September 1943.

       The MV Krait started life as a Japanese fishing vessel named the Kofuku Maru, which was launched in 1934. She was a motorised gaff-rigged ketch measuring 20 metres in length, with a two-metre draft and a displacement of 23 tonnes. At the outbreak of the Second World War, the Kofuku Maru was owned by a Japanese fishing company based in Singapore. They used the vessel to ferry water, food, and other supplies to fishermen working in the Riau Archipelago and to bring their catch back to the city’s seafood markets.   

    When Japan entered the war, the British authorities seized the Kofuku Maru. As Japanese troops advanced down the Malay Peninsula, an Australian merchant mariner, Bill Reynolds, used the fishing boat to evacuate over 1000 civilians to Sumatra in the Dutch East Indies (present-day Indonesia).

    Singapore shortly before the Japanese landed on the island. Photo Central Queensland Herald, 26 Mar 1942, p. 20.

        Then, in January 1942, when it was clear that Singapore was about to fall, Reynolds sailed the Kofuku Maru to Colombo in Ceylon (present-day Sri Lanka). There, some officers from the Allied Intelligence Bureau saw the potential of having a Japanese fishing vessel at their disposal. With any luck, they thought, the Kofuku Maru might be able to traverse enemy waters without raising suspicion. Reynolds had likely told them that Japanese aircraft had ignored the vessel while he had been operating around Singapore. The Kofuku Maru was then sent to Australia, where she was made ready to begin her clandestine career.

       The Krait, though still going by its Japanese name, Kofuku Maru, was chosen to take part in Operation Jaywick, an audacious mission to destroy enemy shipping moored in Singapore Harbour. It was a high-risk, high-reward mission, but with any luck, the Japanese would not suspect the Krait of being anything other than one of the numerous small Japanese fishing vessels plying the waters around Malaya and Indonesia.   

    A 14-man team was selected for the operation under the command of Major Ivan Lyons, a British Army officer attached to the Z Special Unit, better known simply as Z Force. The men chosen were a mix of British and Australian Army and Navy personnel. After completing specialised training and rehearsals at Refuge Bay north of Sydney, the Krait then made the long voyage up the east coast, through Torres Strait, past Darwin and down the Western Australia coast to Exmouth Gulf.

    A group on board MV Krait enroute to Singapore during Operation Jaywick. Courtesy AWM.

       The 7500 km long passage was not without problems. The engine quit while they were off Fraser Island, and the Krait had to be towed to Townsville, where she remained until a replacement could be found and installed. More repairs had to be made before they finally reached Exmouth Gulf, further delaying the operation.

       But on 2 September 1943, the Krait left Exmouth Gulf with the Z Special Unit men on board. The plan called for the eight-man naval contingent to sail the vessel to within striking distance of Singapore Harbour. Then six Army commandos would take to three folding kayaks, paddle into the harbour, and sink as much Japanese shipping as they could by attaching magnetic “limpet” mines to their hulls below the waterline.

       Four days after leaving Exmouth, the Krait motored through the narrow Lombok Strait with a Japanese ensign flying from her mast. Once clear of the strait, they bore west through the Java Sea towards their intended target. The men had stained their skin so they resembled local fishermen and were meticulous about what rubbish they threw overboard.   

    Towards the end of September, the Krait had made it to the small island of Pulau Panjang, just 30 km away from Singapore Harbour. The six commandos then set off in their two-man kayaks and island-hopped north to a small island where they could observe the entrance to the harbour. Meanwhile, the Krait made for safer waters near Borneo but not before agreeing on a rendezvous point with the commandos for the night of 2 October.

    MV Krait’s route from Exmouth Gulf to Singapore. Courtesy Google Maps.

       On 26 September, the six men paddled into the harbour and planted their mines on seven Japanese ships. Singapore’s early morning quiet was shattered by a series of loud explosions as the mines went off. One failed to detonate, but six ships were sunk or badly damaged. But by then, the commandos were long gone and were holed up on a small island to await the return of the Krait.

       The Japanese did not realise that the attack had come from the sea, thinking instead that it was the work of local saboteurs. Several local Chinese and Malays, along with some prisoners of war and European civilian internees, were suspected of the bombings. They were rounded up by the Japanese Military Police and interrogated. Most were tortured, and some were executed in the aftermath, an unfortunate and unforeseen consequence of the raid.

       Meanwhile, the commandos rendezvoused with the Krait as planned without incident. The Krait then set off for home. Two and a half weeks later, they were safely back in Exmouth Gulf. Major Lyons would lead a second similar raid on Singapore Harbour the following year, but Operation Rimau would end in disaster.

    MV Krait in Brisbane 1943. Courtesy AWM.

       Following the success of Operation Jaywick, the Krait was based in Darwin and used to support coast watchers and other intelligence operations, which reported on Japanese activities to Australia’s north. Commissioned into the Royal Australian Navy (RAN) in 1944, she was officially renamed HMAS Krait and, in September 1945, was present for the local Japanese surrender at Ambon.

       After the war, the Krait was employed by the British administration in Borneo until it was sold to a British-owned timber sawmill and renamed Pedang, meaning sword in Malay. In the late 1950s, a pair of Australian businessmen recognised the vessel’s historical significance and began fundraising to purchase her and have her returned to Australia.

       In 1964, the Krait came back to Australia, where it was operated and maintained by the Royal Volunteer Coastal Patrol. Then, in 1984, the Krait was handed over to the Australian War Memorial and berthed at the Sydney Maritime Museum. It is now on display at the Australian National Maritime Museum in Sydney.

    MV Krait at the Australian National Maritime Museum, Sydney. Photo CJ Ison.

    Sources: 

    Australian National Maritime Museum: Articles on the Krait and Operation Jaywick.

    Royal Australian Navy: Article on the Krait and Operation Jaywick.

    Australian War Memorial: Article on Operation Jaywick.

    © Copyright C.J. Ison / Tales from the Quarterdeck, 2023.

    To be notified of future blogs, please enter your email address below.