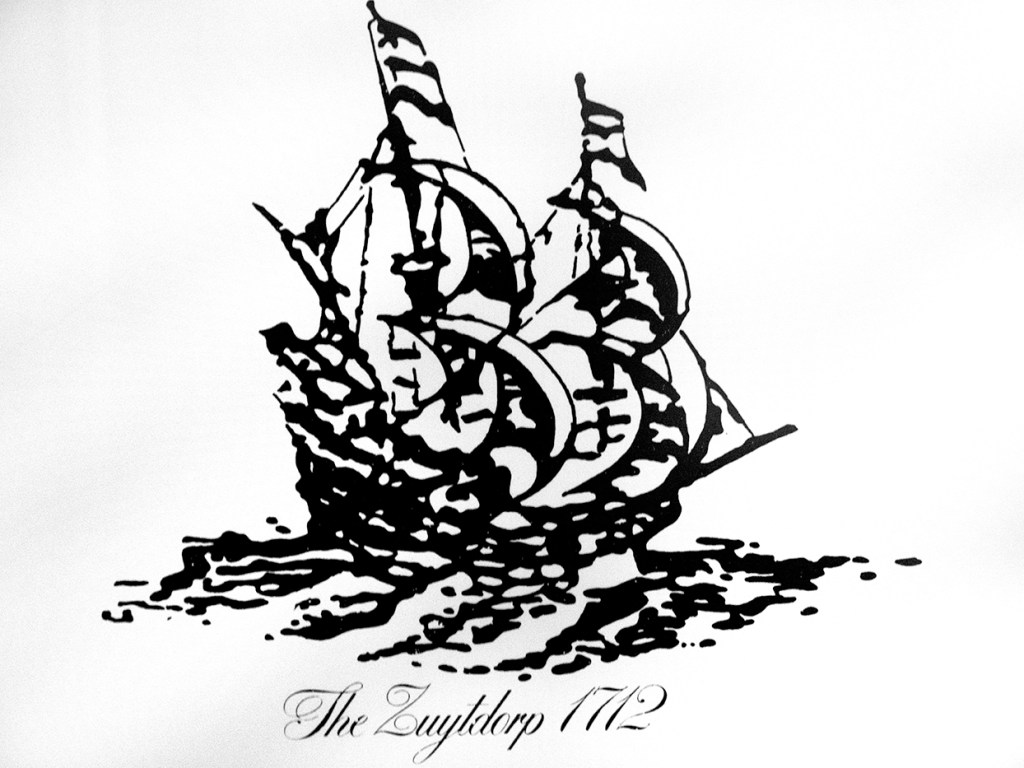
Illustration of the Dutch ship Zuytdorp, 1712. Western Australian Shipwreck Museum.
In August 1711 the Zuydorp sailed from the Netherlands bound for Batavia (Jakarta) in the Dutch East Indies (Indonesia). However, after rounding the Cape of Good Hope, the ship vanished without a trace. For more than 200 years the fate of the ship and all those on board her remained a mystery.
The Zuydorp was a large merchant ship around 30 to 50 metres long carrying 200 or more people and cargo including a large quantity of freshly minted silver coins. Unlike other ships to come to grief on New Holland’s dangerous coast, no survivors made it to Batavia to tell what happened.
It was not until 1927 when the head stockman at Tamala Station, Tom Pepper and his family discovered relics from the long-lost ship about 60kms north of Kalbarri on the Murchison River. Some of the artefacts were silver coins minted in 1711 which helped identify the wreck. By 1954 the site where the survivors had landed was examined in more detail, and a decade later divers finally found the wreck site and its trove of silver coins.
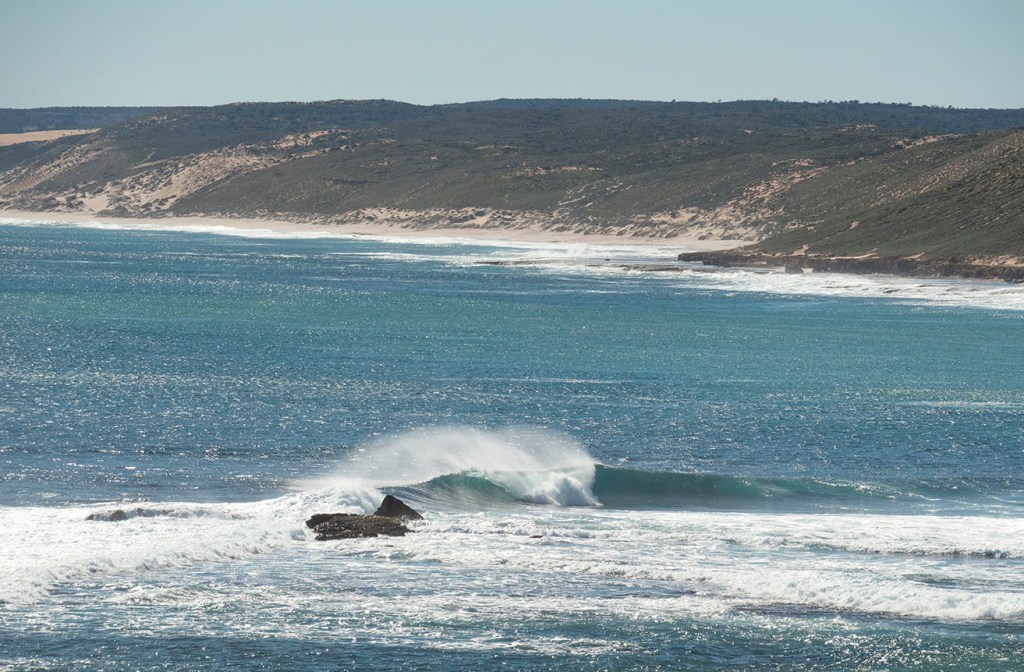
Looking north from the mouth of the Murchison River towards the rugged coast where the Zuydorp was wrecked. Photo CJ Ison.
At the time the Zuydorp was on her way to Batavia, ships were using the “Roaring Forties” to push them across the southern Indian Ocean before bearing north following the coast of New Holland to reach the East Indies. It seems the captain misjudged his position and the Zuydorp struck the reef at the base of cliffs that now bear the ship’s name.
The accident probably happened at night, the captain unaware of how close he was to land. The archaeological evidence suggests that an unknown number of people survived the wreck and managed to get ashore. The remains of what may have been signaling fires have been found on top of the cliffs but apart from a scattering of other artefact nothing remains to hint at what befell the survivors. The place is devoid of fresh water for much of the year and no one could have lived long without the help of the local Nhanta people who inhabit that stretch of coast.
Interestingly in 1834, an Aboriginal man told settlers in Perth that there had been a ship wrecked far to the north of Perth. From his description, it was thought to be somewhere in the vicinity of Shark Bay, a bit further north than where the Zuydorp was ultimately discovered, but they also thought the wreck he was referring to was recent. A search party was dispatched to investigate but no wreck or survivors were found. It is quite likely he was drawing on oral history passed down the generations which had recorded the loss of the Dutch ship.
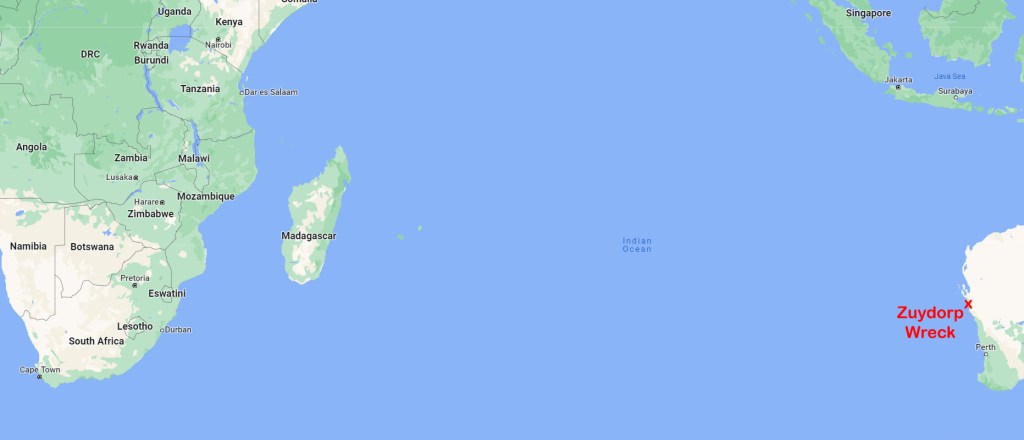
Courtesy Google Maps.
It has also been speculated that a drawing of a ship at Walga Rock, inland from the wreck site, was possibly made by a Zuydorp survivor or an Aborigine who had seen the wreck. But that has largely been dismissed and the drawing is probably that of the 19th Century steamer Xanthos.
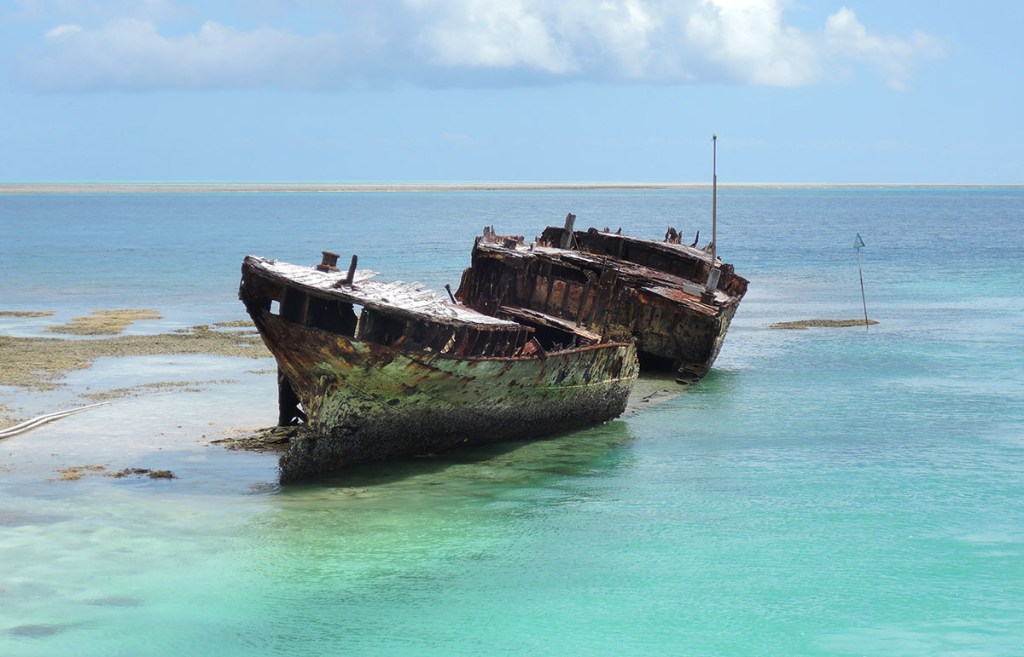
HMCS Protector at Heron Island during low tide. Photo: C.J. Ison.
There lie the remains of an old ship on the Southern Great Barrier Reef which holds a fascinating story spanning almost 140 years. The rusting hull now serves as a breakwater protecting the entrance to the boating channel accessing Heron Island, but its history goes back to 1884.
Her Majesties Colonial Ship (HMCS)Protector was launched at Newcastle on Tyne in 1884 to see service in South Australian waters. The colonial government had sought the ship at a time when there were heightened fears of a Russian invasion. The 55metre long F1 flat-iron gunboat displaced 920 tons and had a top speed of 14 knots (26km/h). Originally she was crewed by about 90 men.
South Australian gunboat Protector circa 1885. Photo Courtesy SLV.
Her armaments included one 8-in breech-loading gun on the bow, as well as five 6-in guns, four 3-pounder quick-firing (QF) guns and five Gatling machine guns. From 1914 that was changed to three QF 4in MkIII guns, two QF 12-pounder guns and four QF 3-pounders.
HMCS Protector regularly patrolled the South Australian coast for the next fifteen years and not surprisingly made an uneventful time of it. Then, on the eve of Federation, she was called upon to join the international force assembled to suppress the “Boxer Rebellion” in China.
HMCS Protector. Courtesy State Library of South Australia, B18116.
In August 1900 she farewelled Adelaide and was commissioned as HMS Protector for the duration of her overseas service. She arrived in Shanghai in late September but was not needed for combat operations. She spent a few weeks carrying out surveys and running despatches between Shanghai and forces in Pechili Gulf further north. Then, in November she was released to return home to Australia.
In January 1901 HMCS Protector was transferred to the Commonwealth Government and stationed in Sydney where she mainly functioned as a training ship for Naval Militia Forces. Then, with the formation of the Royal Australian Navy in 1913, she was renamed HMAS Protector and for a period served as a tender to HMAS Cerberus stationed at Williamstown in Port Phillip Bay.
With the outbreak of the First World War, HMAS Protector was sent to Sydney and served as a depot ship to Australia’s two submarines, AE1 and AE2. In August 1914 she and her submarines were sent to help capture the German colonies in New Guinea. HMAS Protector remained based at Rabaul until October when she was ordered to return to Sydney.
HMAS Protector after being rearmed in 1914. Photo Courtesy SLV.
Then, in October 1915 she was dispatched to report on the wreck of the German cruiser Emden which had been destroyed by HMAS Sydney at the Cocos Islands almost a year earlier. See my blog Australia’s first “ship on ship” naval action.
On 1 April 1921, the Protector was briefly renamed HMAS Cerberus, before being decommissioned three years later. Her guns and engines were removed and she was sold off. In November 1929 she was converted to a lighter and renamed Sidney. But her military service was not quite over yet. In July 1943 the Protector was brought back into service as a lighter for the U.S. Army in New Guinea. However, as she was being towed north she collided with a tug off Gladstone, Queensland. The wreck was abandoned on a beach until a local businessman bought it reputedly for £10. He floated it off and towed it to Heron Island where it was used as a breakwater. HMAS Protector’s rusting hull is still there today.
Example of a fully rigged ship of the early 17th Century, similar to the Tryall. Source: Sailing Ships by Chatterton, 1909.
Some people might be surprised to learn that the oldest recorded shipwreck off the Australian coast dates back to 1622. That predates Cook’s voyage up the east coast by 148 years. It occurred 20 years before Abel Tasman partially circumnavigated the island of Tasmania. Or just six years after the Dutch navigator Dirk Hartog nailed a pewter plate to a post near Shark Bay, recording his discovery of a big lump of land that had until then been unknown to anyone but its inhabitants.
The Tryall* was a 500-ton East India Company merchant ship launched in 1621. Her maiden voyage was meant to take her from England to the East Indies to deliver cargo before returning home with her hold filled with spices. The East India Company chose a master mariner named John Brooke to command the vessel on this most important voyage.
The Tryall departed from Plymouth on 4 September 1621 with a crew of about 140 men. Captain Brooke sailed down the west coast of Africa and pulled into Table Bay for water and fresh supplies. While there, he learned that a new route across the Indian Ocean had been established, cutting the sailing time to Batavia by several months. The traditional route to the East Indies had ships follow the coast around Africa’s southern tip, then pass through the Mozambique Channel. Once north of Madagascar, they would venture out into the Indian Ocean. The new “Brouwer Route,” as it was called, took full advantage of the roaring forties, which swirled around the bottom of the world unimpeded by any significant land mass. Captain Brooke received orders to take the Tryall below 35 degrees South and use the Brouwer Route. Brooke tried to hire a sailing master for this leg of the voyage, for neither he nor anyone else on the ship had sailed the southern route before. He was unable to recruit anyone, so on 19 March 1622, Captain Brooke sailed the Tryall out of Table Bay and into the unknown. Six weeks later, they were off the coast of Western Australia.
Map of Western Australia coast. Courtesy Google Maps.
Brooke likely sighted land in the vicinity of Point Cloates around 22.7 S 113.6 E, mistaking it for Barrow Island about 200 km further north. It would appear that he had underestimated the strength of the roaring forties and had been blown too far east before he turned his ship north, something easily done with the rudimentary navigation instruments of the day. But it was an error he would never admit to having made.
For the next couple of weeks, the Tryall struggled to make progress against fresh northerly winds, but when the wind swung around to the south again, they got underway. Then, on the night of 25 May 1622, disaster struck.
The Tryall slammed into submerged rocks near the Montebello Islands. Stuck fast on the reef and being smashed by powerful swells, the Tryall began to break apart. Brooke and a handful of men, including his son, managed to get a small skiff over the side and escaped the doomed ship, apparently leaving everyone else to their fate. Soon after, some of the crew were able to launch the ship’s longboat, and 35 sailors clambered aboard and got clear of the Tryall. They landed on one of the Montebello Islands, where they remained for about a week, preparing the boat for the 2,000 km-long voyage to Batavia. Ninety-three men lost their lives. Captain Brooke reached Batavia on 5 July, where he penned a letter to the ship’s owners reporting the ship’s loss. In it, he claimed that he had followed the proscribed route precisely, but had struck a reef not laid down on his chart. Brooke probably thought that they were the only survivors, and his version of events would go unchallenged. His letter, he hoped, would absolve him of any blame for the loss of the ship, its valuable cargo, and so many lives.
Translates to read “Here the English ship Trial was wrecked in June 1622” from copy of Hessel Gerritsz’ 1627 map of the north west coast of Australia. Source: National Library of Australia.
When the longboat finally made it to Batavia, those survivors had a very different story to tell. One of them, a trader named Thomas Bright, wrote his own scathing letter to London condemning Captain Brooke. Bright blamed the wreck on Brooke’s poor navigation that had brought them so close to New Holland and the fact that he had not posted a lookout despite knowing he was in those dangerous waters. He also claimed that Brooke had abandoned the wreck as quickly as he could in the partially filled skiff, leaving the rest of the men to their fate.
In his report to the ship’s owners, Brooke had also recorded that the wreck site was much further west than where it had occurred to mask his error in navigation. For the next three centuries, the non-existent rocks caused some confusion and uncertainty among navigators sailing those waters. It was not until 1936 that the historian Ida Lee established that the wreck site was likely to be off the northwest of the Montebello Islands. Then, in 1969, amateur scuba divers found the wreck site where Lee had said it would be.
Wreck of the Brig Maria with the New Guinea Expedition. Source: Australian Town and Country, 9 Mar 1872, p. 17.
If ever there was a cautionary tale warning of the perils of going to sea ill-prepared, it is that of the tragic loss of the Maria in 1872.
A Marine Board inquiry would blame the captain’s poor navigation and equally poor character for the loss of the ship and so many lives. However, the underlying causes of the disaster dated back to the ship’s purchase and a litany of poorly thought-through decisions made by a committee of young and ambitious men. They had become fixated on seeking adventure and fortune in the wilds of New Guinea and were willing to cut whatever corners necessary to see their plan come to fruition.
In late 1871, the more adventurous sons of some of Sydney’s leading families banded together to travel to New Guinea, where it was said that gold could be found in abundance. Brought up on stories of Australia’s earlier gold rushes, they wanted to leave their mark on the new frontier. They formed a committee and founded the New Guinea Gold Prospecting Association, charging newcomers £10 to go towards the expedition’s costs. Eventually, they signed up 70 men eager to try their luck.
The committee’s first task was to find a ship that would take them to New Guinea so they could prospect for gold in that largely unexplored part of the world. When no one would lease them a ship for the amount of money they could afford, they purchased an aging brig called Maria.
Expedition members onboard the Maria before sailing from Sydney. Photo Courtesy SLQ.
The Maria was over 25 years old, and her glory days were long behind her. She had been seeing out her final days hauling Newcastle coal down the coast to Sydney. Her only redeeming quality was her price. In fact, after a month of searching, she was the only ship they could afford. William Forster, one of the expedition’s survivors, later summed up the state of the vessel thus. “It would, perhaps, have been difficult to find a more unseaworthy old tub anywhere in the southern waters.”
When they were eventually ready to sail the Maria out of Sydney, the port authorities refused them clearance to sail under the Passenger Act because she was overcrowded, unseaworthy, and the passengers, all paid-up members of the prospecting association, were not adequately provided with safety equipment or provisions. Things might have turned out differently had the young men heeded the warning and remedied the shortcomings. But rather than do that, the committee signed on most of the passengers as members of the crew, so the Passenger Act no longer applied.
Alarm bells should have rung out loud and clear when, at the last moment, the captain they had hired refused to take the ship to sea. Feigning illness, it seems he had begun to doubt the wisdom of taking the overcrowded, unseaworthy old tub on a 3700 km passage through the Coral Sea during the North Australian cyclone season.
Then, rather than waste any more time recruiting another qualified master mariner, the committee accepted the first mate’s offer to captain the ship. It was put to a vote, and he was immediately elected to the post with barely a moment’s thought given to whether he was actually up to the task. Though he was officially the Maria’s captain he was more of a sailing master, unable to make decisions without first getting approval from the committee.
The Maria finally sailed out through Sydney Heads on 25 January 1872 with 75 people crammed on board. The first few days passed uneventfully, except for some emerging friction between the prospecting association’s members. They broadly fell into one of two groups: well-heeled, well-educated adventurous young gentlemen from some of the colonies’ leading families, and working-class miners and labourers hoping to make money on the new goldfields. It was probably the first time either group of men had spent time with the other, more or less as equals, and the mix proved volatile at times.
Wreck of the Maria. Image Courtesy SLQ.
Then, when they were only a few days away from reaching New Guinea, the Maria was caught in a ferocious storm. She was tossed around for five days and sustained serious damage. Water poured through gaps in the deck down into the accommodation, soaking everyone and everything. Her old sails were torn to shreds, rotted rigging snapped under the strain, and a rogue wave tore away a length of the bulwark. They lost all control of the ship for a time after a second rogue wave unshipped the tiller and destroyed the associated steering gear. After one-third of the expedition members signed a petition pleading to be put ashore, the majority voted to turn around and head for Moreton Bay to disembark those who had had enough and make repairs.
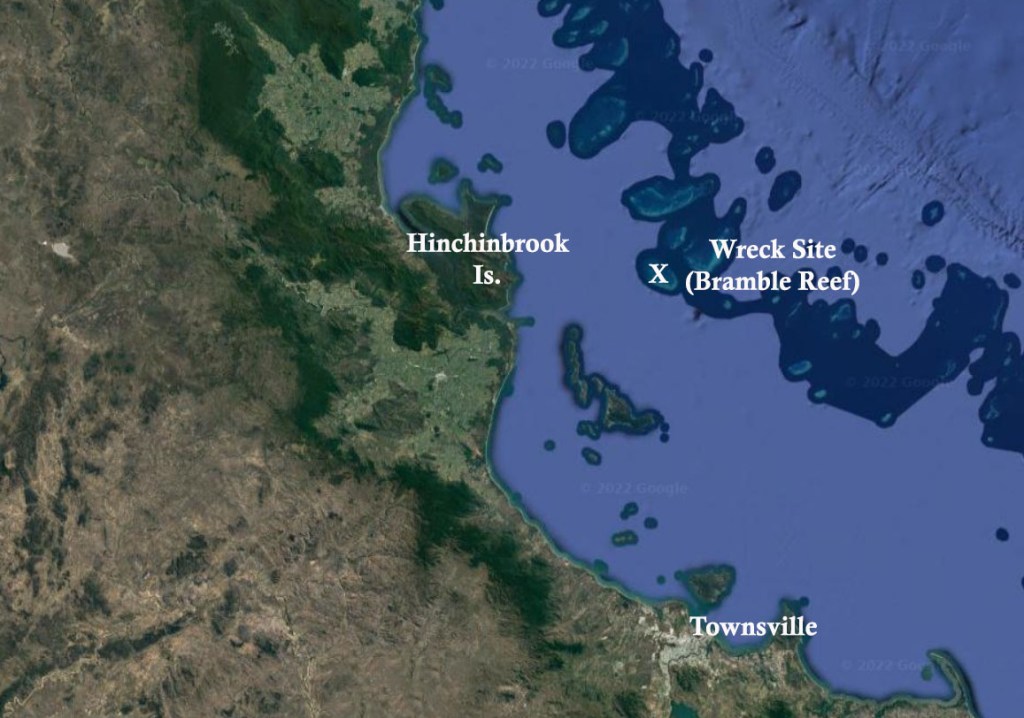
But, the badly damaged Maria struggled to make headway against the prevailing southerly trade winds. Captain Stratman decided to make for Cleveland Bay (present-day Townsville) instead. However, he would need to find his way through the Great Barrier Reef guided only by a general coastal chart with a scale of one inch to 50 nautical miles (approx. 1 cm to 40 km). Such a small scale would have provided him with little detail and no doubt less comfort that they would reach Townsville unscathed.
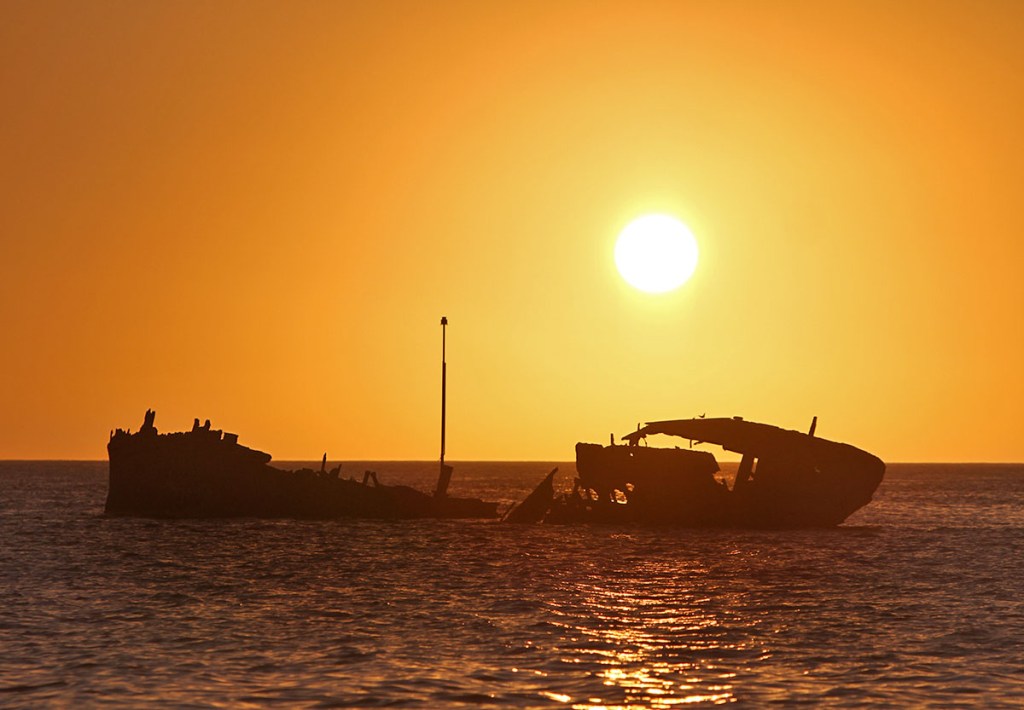
With a lookout stationed high on a mast above, watching for submerged hazards, the Maria gingerly made her way west and soon became entangled in the giant maze of coral reefs and shoals. Thinking they were approaching Magnetic Island and the safety of Cleveland Bay, the captain was unknowingly approaching the coast some 90 km further north. Then, in the early hours of 26 February, their luck finally ran out. The Maria ran onto Bramble Reef off Hinchinbrook Island and began taking on water. A few hours later, she sank to the bottom until just her masts showed above the surface of the water.
Before that happened, Captain Stratman, with a handful of others, had already abandoned the ship in one of their three boats, leaving everyone else to their fate. The class divide separating the expedition members made it almost impossible for anyone to coordinate their efforts. No one would take orders from anyone else. Some eventually made it to Cardwell in the two remaining lifeboats. About a dozen men were last seen clinging to the rigging but they had vanished before rescuers finally found the wreck.
Others had taken to two makeshift rafts, but many of them drowned, and of those who reached land, half were massacred by local Aborigines. Of the 75 people who sailed out of Sydney on the Maria, almost half, 35, lost their lives.
The full story is told in A Treacherous Coast: Ten Tales of Shipwreck and Survival from Queensland Waters available through Amazon.
In January 1918, Donald Mackenzie found himself marooned on a tiny uninhabited island after his vessel sank during one of the most powerful cyclones to cross the Central Queensland coast.
The tough 56-year-old Scott was a seaman on the coastal auxiliary schooner Orete, which had sailed from Maryborough bound for Mackay with a cargo of sawn timber. She was heavily laden. Once the hold had been filled, more timber had been stacked on deck, pushing her deeper in the water. The captain thought the tough little vessel could handle it and set off down the Mary River, where its mouth opened into Hervey Bay. Even as they crossed the usually calm waters protected by Fraser Island (K’Gari), they could see that the weather was deteriorating. As they bore north, the sea conditions got progressively worse. These were the days before ships carried radios, and little did they know a massive cyclone was forming ahead of them. By the time they reached the Percy Islands, and were only 200 km from their destination, the barometer plummeted. Huge seas pummelled the overloaded vessel. Rather than continue to sail into the encroaching storm, the captain decided to anchor in the lee of Pine Islet to ride it out.
However, as the cyclone approached the coast, the wind shifted, and the anchors began to drag. The Orete was blown from her anchorage under bare poles. They tried cutting away the deck cargo to lighten the load, but in the process, the captain broke his leg when the timbers moved. Then the mate tried to launch their lifeboat, but it was washed away before they could board it. In the end, the captain, the mate and two crewmen huddled below deck to see out the storm. Unfortunately, the schooner soon foundered, trapping all four men in the cabin to go down with the ship. Mackenzie and another sailor were only spared because they had been on deck when the schooner capsized. Both men were plunged into the heaving sea, but Mackenzie wore a life belt tied around his waist. He swam to a floating cabin door and held on as the storm raged around him. His mate was not so lucky and was never seen again. After four or five hours, Mackenzie washed up on a beach surrounded by flotsam from the wrecked ship.
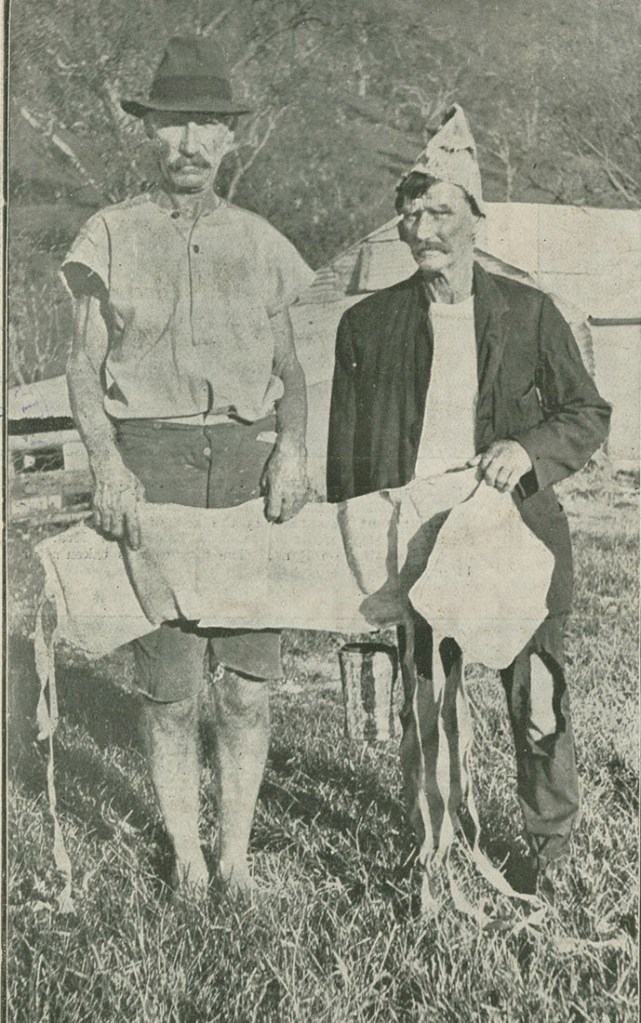
Orete survivor, Donald Mackenzie (right) holding his life preserver. Source: The Queenslander Pictorial Supplement, 9 March 1918.
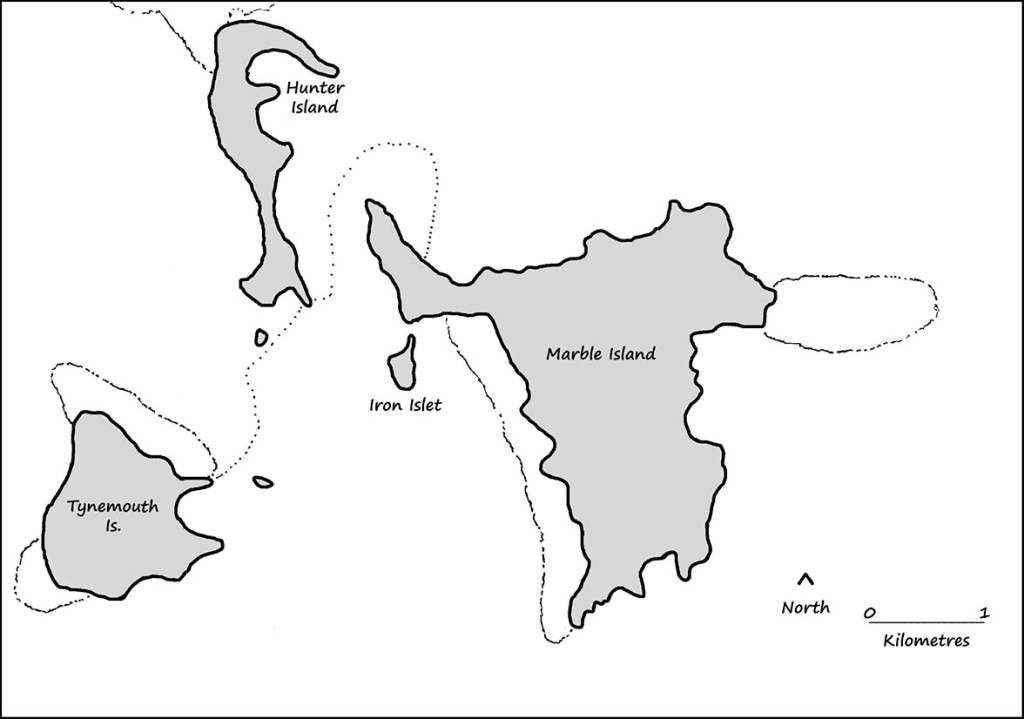
When the weather subsided, Mackenzie took stock of his situation. He had no idea where he had landed; he would later learn it was Tynemouth Island. The foreshore was littered with timber and other debris, but among the mess of litter, he found a few onions and pumpkins. They would be his sole source of food for the coming days. Perhaps key to his ultimate survival, he also found a crate of kerosene cans.
A quick search of the small uninhabited island had revealed no permanent supply of water. So he emptied the kerosene cans of their contents and filled them with fresh water before the puddles dried up. Looking out from the east coast, Mackenzie could see another island, and he thought he could see several buildings. That would later prove to be Iron Islet.
Without the means to make a fire or attract attention, Mackenzie resolved to build a raft to cross the expanse of water. He broke apart the kerosene crate and salvaged the nails. He then used them to fix long planks together to form a raft. After ten days, Mackenzie was ready to make the crossing to Iron Islet.
That time had not come soon enough. Hunger and the blazing hot conditions were taking their toll on him. Several days had passed since he had eaten the last of the raw vegetables, and he had been subsisting on shellfish smashed from the rocks ever since. During the day, there was no respite from the searing tropical sun. And, at night, he was tormented ceaselessly by mosquitoes and ants, making sleep all but impossible.
Donald Mackenzie’s raft. Source: The Queenslander Pictorial Supplement, 9 March 1918.
Mackenzie dragged his raft into the water and started towards Iron Islet using a broad timber plank for a paddle. But he was soon caught in a strong current ripping through the passage separating the two islands. He was swept along by the current, which threatened to take him out into the vastness of the Coral Sea. Mackenzie made the difficult decision to abandon his raft and swim back to Tynemouth Island while he still had a chance of reaching land.
Disheartened as Mackenzie was, he knew he was growing weaker by the day. If he was ever going to survive, he had to build another raft. This one took him eight days to complete. Then, on Sunday, 10 February, he dragged his cumbersome craft into the water, straddled it, and started paddling away from shore.
He was caught in the strong current for a second time. He used every ounce of strength his fatigued muscles could give him and inched the raft across the passage. After an almost super-human effort, Mackenzie reached the southern end of Hunter Island, north of Iron islet. There, he rested before setting off again to cross the one-kilometre channel that now separated him from his destination. Again, he was caught in a powerful current. This one was even stronger than the last. He paddled furiously, but it was hopeless. He had no control over the craft, and as he looked back he could see the buildings of Iron Islet disappearing from sight.
Mackenzie’s approximate course,
At one time or another, most people experience that sinking feeling when success—so close at hand—slips away and all seems lost. This was Mackenzie’s darkest moment. He had survived the wreck that had claimed the lives of his shipmates. He had been cast away, Robinson Crusoe-like, on a deserted island for 19 days, suffering from hunger and exposure. He had built two rafts with his bare hands and escaped. But it had all been for nothing. Mackenzie was rocketing out into the vast Pacific Ocean, and there was nothing he could do to stop it. He was mentally exhausted, and the most recent frenzied paddling had left him physically spent. But as the channel widened, the current slackened and the raft’s headlong progress slowed.
Mackenzie looked towards an island to his right and could not believe his eyes. There he saw sheep grazing in a field. With renewed spirit, he drew on his last reserves of energy and paddled towards shore. As he got closer, he saw the distinctive outline of a cottage roof partly obscured by trees. He kept paddling until the prow of the raft ran up onto a sandy beach, where he waded ashore on unsteady legs. He would soon learn he had landed on Marble Island. Most importantly, he had survived; his ordeal was over.
The full story is told in A Treacherous Coast: Ten Tales of Shipwreck and Survival from Queensland Waters available through Amazon.