Category: RN / RAN Ships

  • Matthew Flinders and the loss of HMS Porpoise – 1803

    Loss of the Porpoise & Cato. Courtesy Wikipedia.


         Shortly after Matthew Flinders completed his historic circumnavigation of Australia, he was farewelled from Sydney to return to England as a passenger on board HMS Porpoise. To everyone’s astonishment, he returned to Sydney a month later to report that the Porpoise and another ship had run aground on a reef far out in the Coral Sea.

       HMS Porpoise, under the command of Lt Fowler, along with the merchant ships Cato and Bridgewater, departed Port Jackson on 10 August 1803, intending to remain together as they sailed north through the remote waters of north Australia. Ships regularly travelled in company, so one might come to the other’s aid should they get into difficulty. After all, the next European outpost after leaving Sydney was Kupang on Timor Island, 2,000 km west of Torres Strait and over 5,000 km from Sydney.

       On the afternoon of 17 August, the three ships passed a small island marked on the chart, which confirmed their position about 160nm (300 km) NE of Sandy Cape at the northern end of Fraser Island (K’gari). The chart showed no other obstacles in their path until they were ready to pass through the Great Barrier Reef, much further to the north.    As night took hold, they continued bearing NNE under reduced sail, pushed along by a southerly breeze. The Porpoise was out in front with the Cato and Bridgewater off her port and starboard quarters, respectively. Then, around 9.30 pm, the Porpoise’s lookout called “breakers ahead.” The Porpoise tried to veer off but without success, and she struck the uncharted reef. Likewise, the Cato attempted to steer away from the line of white water that indicated danger. However, she had insufficient room to manoeuvre and ran aground about 400m from where the Porpoise struck.
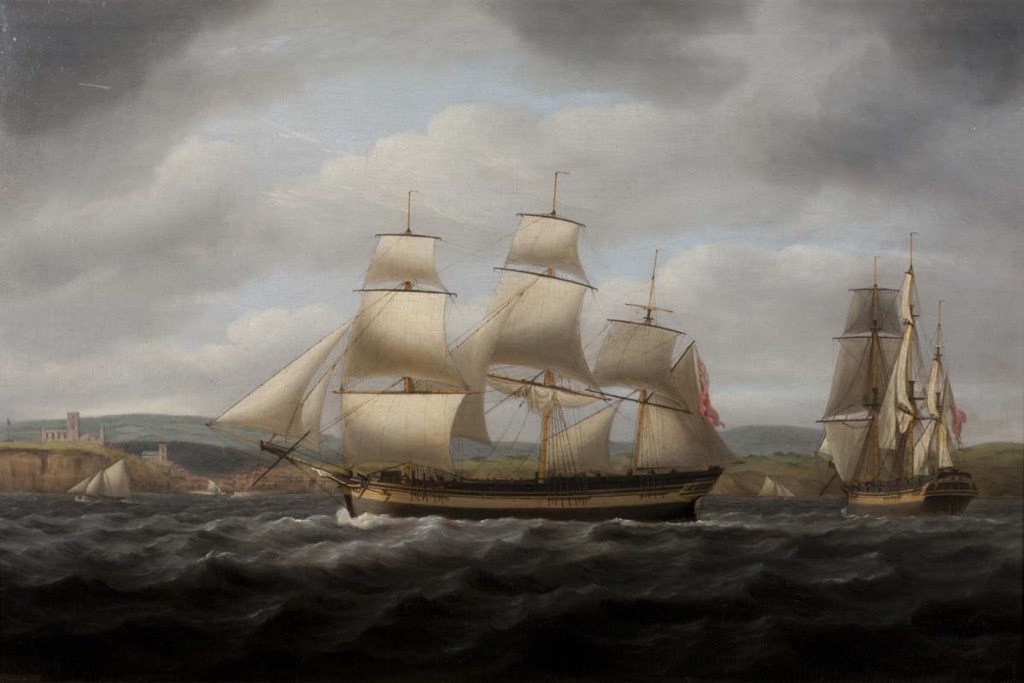
    The 430-ton Cato by Thomas Luny cira 1800.

         Fortunately, the Bridgewater missed the reef that claimed the other two ships. Her captain spent the rest of the night and the following morning trying to return so they might help any survivors. However, contrary winds and large seas hampered him, and he could not get close to the reef without risking his own vessel. He reluctantly continued on his way, leaving the survivors from the Porpoise and Cato to their fate.

       Meanwhile, the men on the stranded ships waited out the night. HMS Porpoise had gone aground broadside to the reef and heeled over so her strong hull took the brunt of the crashing waves. The Cato was not so lucky. She had also run aground broadside to the reef, only her deck lay exposed to the full force of the powerful waves, and she soon started breaking up. Her crew spent an anxious night clinging for dear life to the inner forechains.

       The next morning, the Porpoise’s small gig and a six-oar cutter were used to ferry the crews of both ships to a small sandy islet a short distance away. Over the next several days, they salvaged as much as they could from the two stranded wrecks. Casks of water, flour, salt meat, rice and spirits, along with live sheep and pigs were all brought ashore. They found they had sufficient provisions to feed the 94 castaways for the next three months. Most shipwreck survivors fared far worse.

    Captain Matthew Flinders, RN, by Toussaint Antoine DE CHAZAL DE Chamerel. Courtesy Wikipedia.

       On the morning of the 19th of August, Captain Matthew Flinders took command as the most senior naval officer present. Flinders, in consultation with Lt Fowler and the Cato’s captain, John Park, decided he should take the largest cutter and return to Sydney to get help. The three also agreed on a contingency plan should Flinders and his party fail to reach Sydney and alert the authorities. The ship’s carpenters would begin building two new boats from materials salvaged from the wrecks. If, after two months, the remaining survivors had not been rescued, Lt Fowler and the rest of the men should try to make for Sydney themselves in the new boats.   

    Flinders’ cutter was fitted out with a deck to make it better handle the rough seas on the long voyage ahead. She was christened “Hope” and, on 26 August, nine days after striking the reef, Flinders, Park and twelve sailors set off to three loud cheers from their shipmates lining the shore.    They took sufficient provisions to last them three weeks, and Flinders set a course west so they would strike the Australian coast. On the evening of 28 August, they made land near Indian Head on K’gari Island and headed south, hugging the coast until they reached Sydney ten days later.
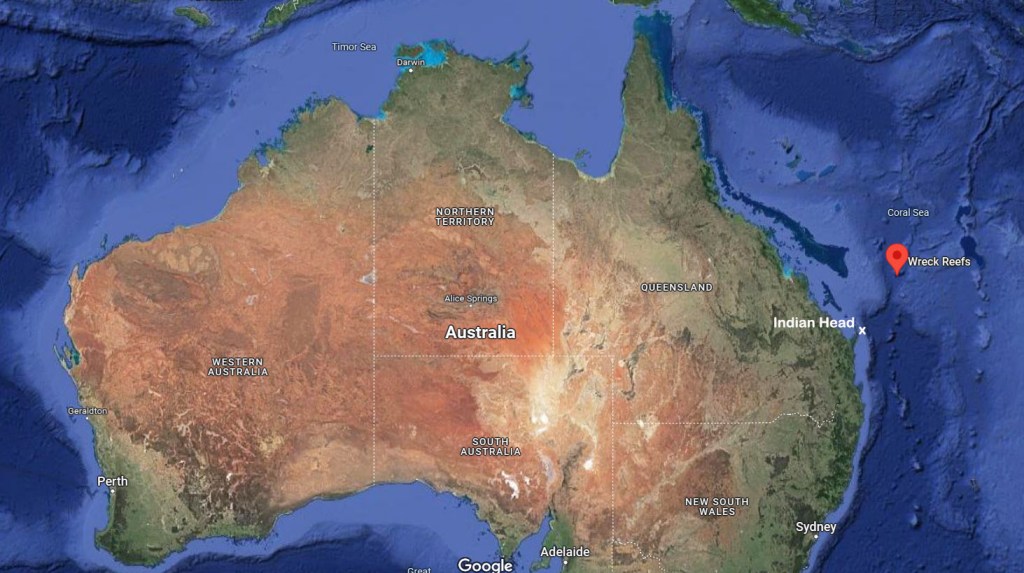
    Map showing Wreck Reefs where the Cato and Porpoise were wrecked in 1803. Courtesy Google Maps.

       Meanwhile, the carpenters got to work building the first of the two new boats. They named it Resource and had her afloat in about two weeks.  However, as they were working on the second boat, their supply of coal for the armourer’s forge ran out, halting construction. Lt. Fowler ordered that the Resource be sent with a work party to an island to the south to produce sufficient charcoal to complete the second boat.

    But, before they set off, the welcome sight of three rescue ships sailed into view. Flinders had made it to Sydney and returned with the fully-rigged ship Rolla, and the colonial schooners Cumberland and Francis, to rescue the survivors. Flinders might have got there a little earlier, but he had spent a couple of anxious days trying to find the uncharted reef. Most of the men were put on to the Rolla, which was on its way to China, while Flinders returned to Sydney on the Cumberland. Much of the stores and salvage from the wrecked ships were taken back to Sydney on the Francis and the newly built Resource. Remarkably, only three men were lost during the ordeal. The site of the disaster is now known as Wreck Reefs.

       Captain Flinders’ adventures did not end there. By the time he next left for England, Britain was at war with France. When his ship stopped at Mauritius, he was placed in detention until the end of hostilities. Flinders did not return to England until 1810. His book “A Voyage to Terra Australis”, detailing his voyages, was published in 1814.

    © Copyright C.J. Ison / Tales from the Quarterdeck, 2022.

    To be notified of future blogs, please enter your email address below.
  • Von Mucke’s Great Escape

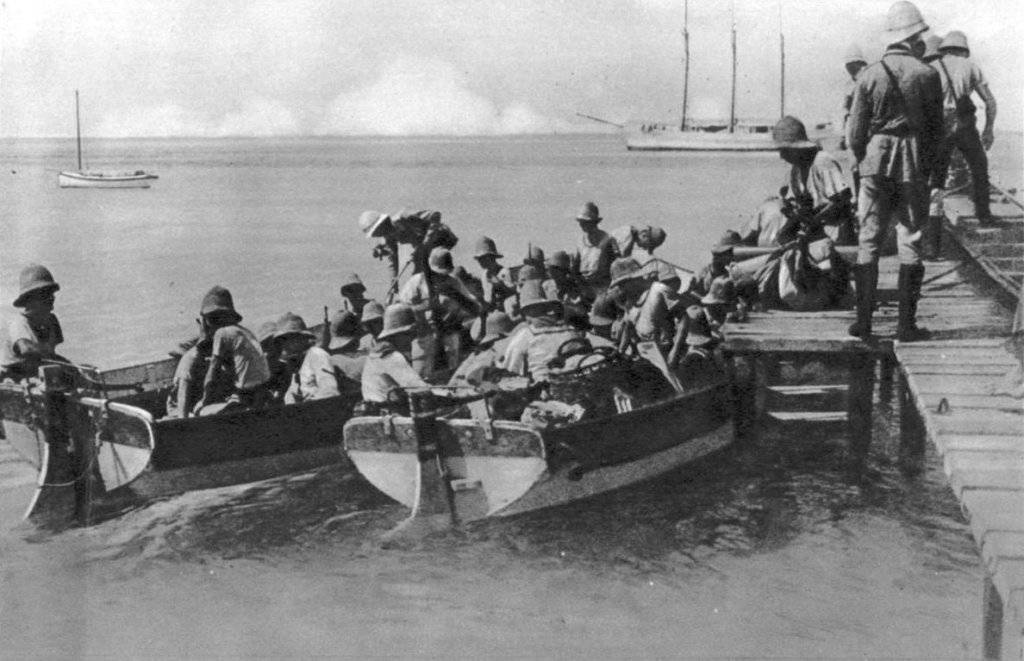
    The Emden shore party at Cocos Island with the Ayesha moored in the distance. Photo courtesy Australian War Memorial.

    Before the German Cruiser Emden was engaged by HMAS Sydney, a fifty-strong party was sent ashore at Cocos Island to destroy the telegraph station linking Australia to South Africa.   As the two ships exchanged shells in a battle that lasted ten hours, the shore party could do little but watch on and hope for the best.  

    On 9 November 1914 Lt von Mucke had been ordered to lead a party ashore to disable the cable station on Cocos Island.   But shortly after the Germans had disabled the station and rounded up the telegraph operators, the Emden signalled for them to return to the ship.   Then von Mucke saw the Emden raise its battle flag and fire a salvo at a target then hidden from his sight.  

    The Emden then steamed off leaving the shore party stranded on the island.   They had no chance of catching up to the fast-moving cruiser then fighting for its life.    As the Emden continued to engage HMAS Sydney, von Mucke immediately declared Martial Law over the island and deployed his four machine guns and 30 or so sailors to defend against any landing.

    Lt. Hellmuth von Mucke. Photo by Oscar Brockhus, Novitas Verlag Berlin.

    At one time German sailors and Australian telegraph operators stood together watching the naval battle play out in front of them.   But eventually, the two ships disappeared over the horizon, the Emden clearly the worse for the ongoing encounter.  

    Von Mucke held out little hope that his ship would return for them victorious.   The mortally damaged Emden was deliberately run aground the next day and the survivors surrendered to HMAS Sydney.   Von Mucke also realised that he and his men would eventually have no choice but to surrender should they remain on the island.   He decided to leave while they still could, seizing the schooner Ayesha.

    The three-masted schooner was the property of John Clunies-Ross, who also happened to own the Cocos Islands themselves.   His Great Grandfather had claimed the uninhabited islands in the 1820s and began a coconut plantation using workers brought from Malaya.

    Von Mucke requisitioned provisions to last his men 8 weeks at sea and had them loaded onboard.    The departure had an oddly festive quality to it.   Residents asked for autographs from the Germans, and also had them pose for photographs.   Then, as the sun set in the west, von Mucke bid the residents “auf wiedersehen” and sailed out of the harbour to three resounding cheers.

    Schooner Ayesha.

    Before leaving he hinted they were bound for East Africa to throw any pursuers off his scent.   However, his real intention was to head north to the Dutch port of Padang on the island of Sumatra.    Von Mucke and his men arrived at Padang on 26 November after 17 days sailing.   There, he hoped to get help from any German ships in port while he planned the next leg of his return to Germany.    While the Dutch were neutral during the First World War, that meant they would neither hinder nor aid any of the combatants.   “The master of the port declined to let us have, not only charts, but also clothing and toothbrushes,” as he rigorously enforced the port’s neutrality, von Mucke later lamented.    The Dutch authorities asked von Mucke and his men to surrender themselves to internment but the German officer declined and 24 hours later they left the harbour.   

    For two weeks they remained close to the Sumatran coast hoping to cross paths with a German ship while avoiding Allied naval vessels patrolling those waters.       Their luck held out and on 16 December the German merchant ship Choising, which had been undergoing repairs at Padang, came into sight.   

    Map showing von Mucke’s escape route. Source: The Story of the Great War, Vol 3.

    Von Mucke and his men transferred onto the ship and with heavy hearts, they scuttled the schooner which had been their home for the past six weeks.     The Choising to the port of Al Hudaydah in the Red Sea.   From there the men made their way to Damascus and then on to Constantinople in Turkey.   Von Mucke finally reported to the German Embassy there on 9 May 1915.    For his efforts, he was awarded an Iron Cross.

    Source: The Story of the Great War, Vol III, Chapter 31, “Story of the Emden.”

    © Copyright C.J. Ison / Tales from the Quarterdeck, 2022.

    To be notified of future blogs, please enter your email address below.

  • HMCS Protector 1884 – 1924

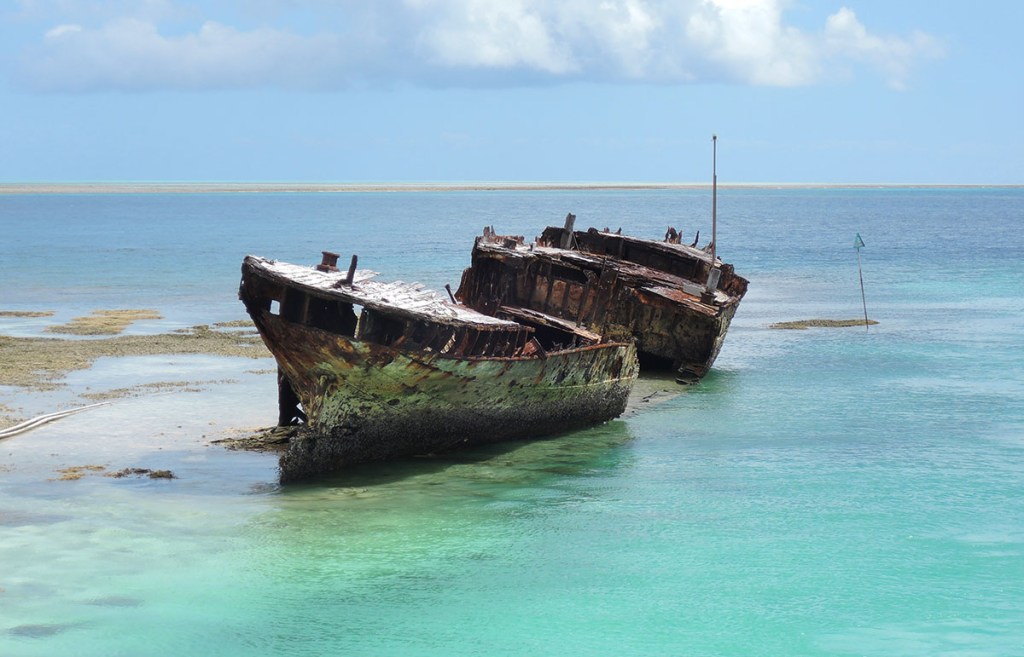
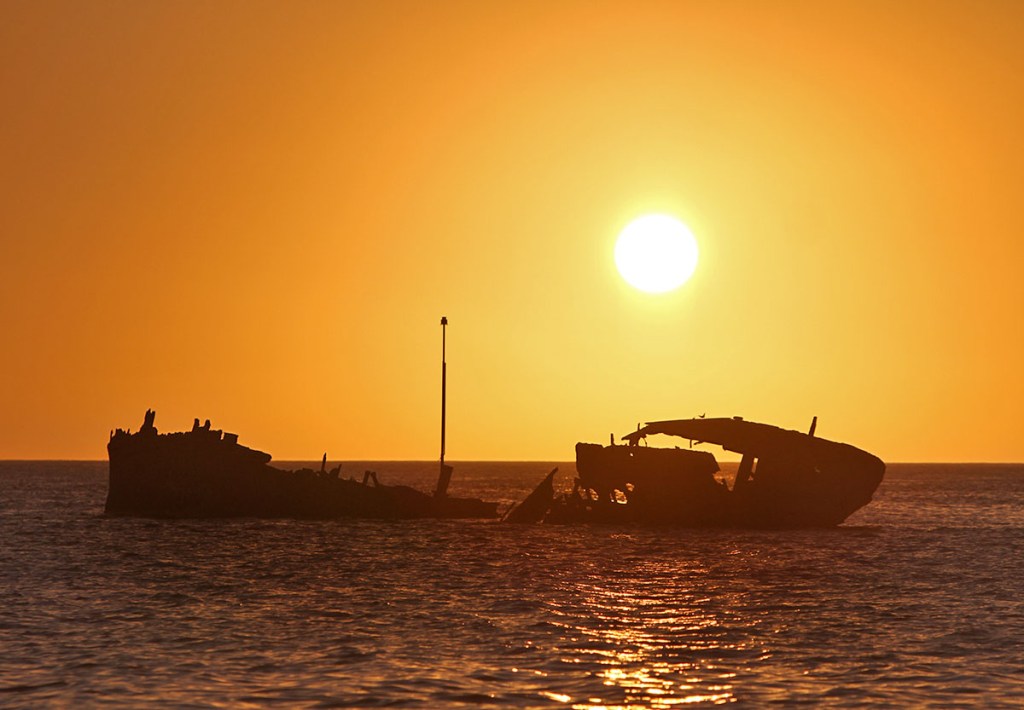
    HMCS Protector at Heron Island during low tide. Photo: C.J. Ison.

    There lie the remains of an old ship on the Southern Great Barrier Reef which holds a fascinating story spanning almost 140 years.    The rusting hull now serves as a breakwater protecting the entrance to the boating channel accessing Heron Island, but its history goes back to 1884.

    Her Majesties Colonial Ship (HMCS) Protector was launched at Newcastle on Tyne in 1884 to see service in South Australian waters.    The colonial government had sought the ship at a time when there were heightened fears of a Russian invasion.    The 55metre long F1 flat-iron gunboat displaced 920 tons and had a top speed of 14 knots (26km/h).   Originally she was crewed by about 90 men.   

    South Australian gunboat Protector circa 1885. Photo Courtesy SLV.

    Her armaments included one 8-in breech-loading gun on the bow, as well as five 6-in guns, four 3-pounder quick-firing (QF) guns and five Gatling machine guns.   From 1914 that was changed to three QF 4in MkIII guns, two QF 12-pounder guns and four QF 3-pounders.  

    HMCS Protector regularly patrolled the South Australian coast for the next fifteen years and not surprisingly made an uneventful time of it.   Then, on the eve of Federation, she was called upon to join the international force assembled to suppress the “Boxer Rebellion” in China.  

    HMCS Protector. Courtesy State Library of South Australia, B18116.

    In August 1900 she farewelled Adelaide and was commissioned as HMS Protector for the duration of her overseas service.   She arrived in Shanghai in late September but was not needed for combat operations.   She spent a few weeks carrying out surveys and running despatches between Shanghai and forces in Pechili Gulf further north.  Then, in November she was released to return home to Australia.   

    In January 1901 HMCS Protector was transferred to the Commonwealth Government and stationed in Sydney where she mainly functioned as a training ship for Naval Militia Forces.    Then, with the formation of the Royal Australian Navy in 1913, she was renamed HMAS Protector and for a period served as a tender to HMAS Cerberus stationed at Williamstown in Port Phillip Bay.

    With the outbreak of the First World War, HMAS Protector was sent to Sydney and served as a depot ship to Australia’s two submarines, AE1 and AE2.   In August 1914 she and her submarines were sent to help capture the German colonies in New Guinea.   HMAS Protector remained based at Rabaul until October when she was ordered to return to Sydney. 

    HMAS Protector after being rearmed in 1914. Photo Courtesy SLV.

    Then, in October 1915 she was dispatched to report on the wreck of the German cruiser Emden which had been destroyed by HMAS Sydney at the Cocos Islands almost a year earlier.   See my blog Australia’s first “ship on ship” naval action.

    On 1 April 1921, the Protector was briefly renamed HMAS Cerberus, before being decommissioned three years later.    Her guns and engines were removed and she was sold off.   In November 1929 she was converted to a lighter and renamed Sidney.    But her military service was not quite over yet. In July 1943 the Protector was brought back into service as a lighter for the U.S. Army in New Guinea.   However, as she was being towed north she collided with a tug off Gladstone, Queensland.  The wreck was abandoned on a beach until a local businessman bought it reputedly for £10.   He floated it off and towed it to Heron Island where it was used as a breakwater.   HMAS Protector’s rusting hull is still there today.

    HMCS Protector at Heron Island. Photo: C.J. Ison.

    © Copyright C.J. Ison / Tales from the Quarterdeck, 2022.

    To be notified of future blogs, please enter your email address below.

  • HMAS Sydney and the sinking of the Emden

    HMAS Sydney (I). Photo Courtesy Australian War Memorial.

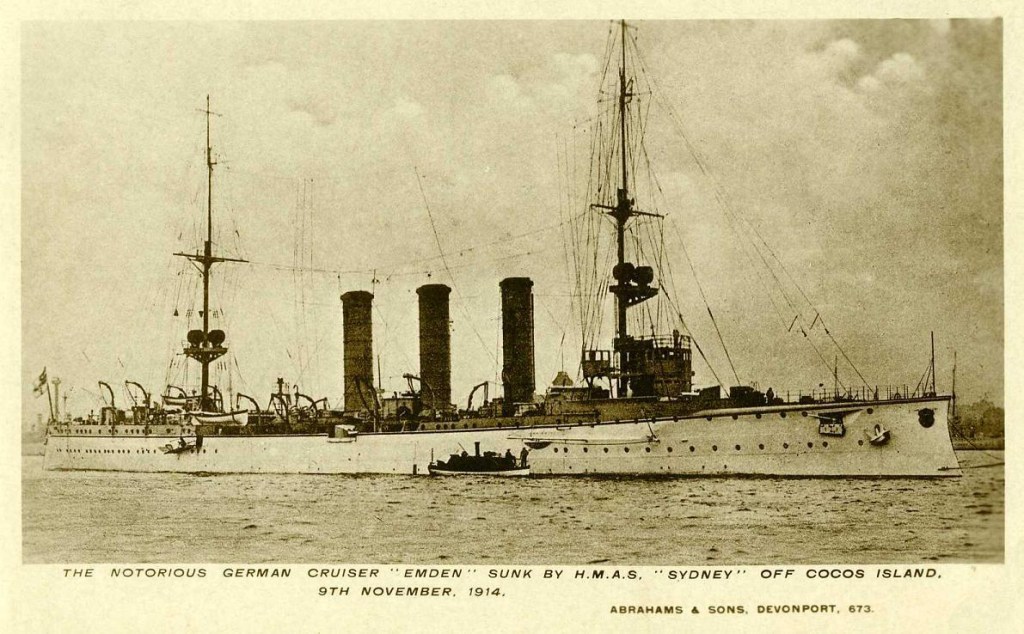
    In late 1914 HMAS Sydney was accompanying the first convoy of AIF troops leaving Australia to fight in the First World War. However, a few days after the convoy left Albany WA, the Sydney was ordered to investigate the presence of a suspicious vessel near the Cocos Islands.  The ship turned out to be the German Cruiser Emden which had been terrorising Allied shipping across the Indian Ocean since the beginning of the war.

    On 9 November 1914 the Sydney found the Emden and immediately went into action.     A few days later Stoker Henry Nielsen wrote a letter to his mother living in Rockhampton, Queensland, telling her of their great victory.   The account below has been taken from his letter which appeared in the Morning Bulletin newspaper on 6 January the following year.

    Emden before she was destroyed by HMAS Sydney at Cocos Keeling Islands in Nov 1914.

    “Just a line to let you know I am still alive and kicking in spite of the Emden.   I have nothing to write about except our scrap with the Emden.   We got a wireless message from Cocos Islands about seven o’clock on the 9th instant saying that there was a German warship lying there with a collier.   We were about fifty or sixty miles away from there, and we altered course and made for Cocos at full speed.”

    “We came up with the Emden about 9.30 am and she let go a shot at us at 11,000 yards.   We let go a ranging shot immediately after, and then both ships went at it hammer and tongs. …  Our shots told far more than theirs as we were only slightly damaged and our shots carried away her bridge, foremast, and three funnels in quick succession. Early in the fight the Emden caught fire and continued to burn throughout.”

    “One of their shots wrecked our range-finder and killed the men who were working it.”

    Emden at Cocos Keeling Islands viewed from a HMAS Sydney boat dated 9 Nov 1914. Courtesy State Library of NSW, FL541160.

    “The action lasted an hour and thirty-six minutes.   The Emden got an awful doing and the captain beached her on South Keeling Island.   She continued to fire for a short time after she was aground, but we soon silenced her. …”

    “She was still flying the German flag, and when signalled would not reply so we put another broadside into her and she fired another couple of shots.   However, they did not want any more as they pulled the flag down. …  It was late in the afternoon when the Emden hauled down her flag and we went out to sea and cruised about outside until morning.  … We then went back to the Emden to see what we could do for the wounded.   We were there all the remainder of that day fetching off German wounded, and prisoners. …”

    “From mainmast to stern she is just a shell, there being only the deck and hull left, all the rest being burnt out.   Her three funnels are lying over the top of one another.   Her foremast is down and her bridge is blown away.   The starboard side of her deck is full of great holes, and she is torn up everywhere.   There are holes in the side that you could walk through. …”

    Postcard commemorating the Sydney’s victory..

    “During the action we made the best speed the Sydney ever did.   We got just on thirty knots out of her.   Pretty good going!.   …  When we had finished with the Emden’s wounded we came on to [Colombo, Sri Lanka], arriving here last Sunday.”

    Stoker Nielsen survived the war and was discharged from the Navy in 1919.

    © Copyright C.J. Ison / Tales from the Quarterdeck, 2022.

    To be notified of future blog posts, please enter your email address below.

  • HMS Boomerang 1891-1904

    HMS Boomerang 1891-1904

    HMS Boomerang anchored in the Fitzroy River at Rockhampton. Photo courtesy the State Library of Queensland.

    HMS Boomerang was a Sharpshooter-class torpedo gunboat which served at the Australia Station between 5 September 1891 and 22 August 1904.

    She was originally named HMS Whiting when construction began but renamed Boomerang shortly before sailing for Australia.   The Boomerang was 74 metres long, 8.2 metres beam, 2.59 metres draft and displaced 735 tons.  

    Crew on the deck of the HMS Boomerang firing a torpedo. Photo Courtesy State Library of Queensland.

    She was armed with five torpedo tubes and carried 15 torpedos, two quick firing 4.7 inch guns and four three-pounders. The Boomerang had a tops speed of 35 km/h (19 knots) and had a crew of 91.

    The Boomerang was part of the Royal Navy’s Australian Auxiliary Squadron which comprised 5 cruisers and two torpedo gunboats.   While there was no immediate or specified threat to Australia there was an underlying fear in this country of invasion from Russia dating back to the Crimean War.

    Sailors during training exercise on HMS Boomerang in 1892. Photo Courtesy State Library of Queensland.

    The Boomerang returned to England in August 1904 and was sold off in Plymouth the following year.

    © Copyright C.J. Ison, Tales from the Quarterdeck, 2022.

    To receive notification of future blog posts enter your email address below.